Sunbeam rebuild.
Started 1982 Stopped around 1988; Started again Feb 28 2017…
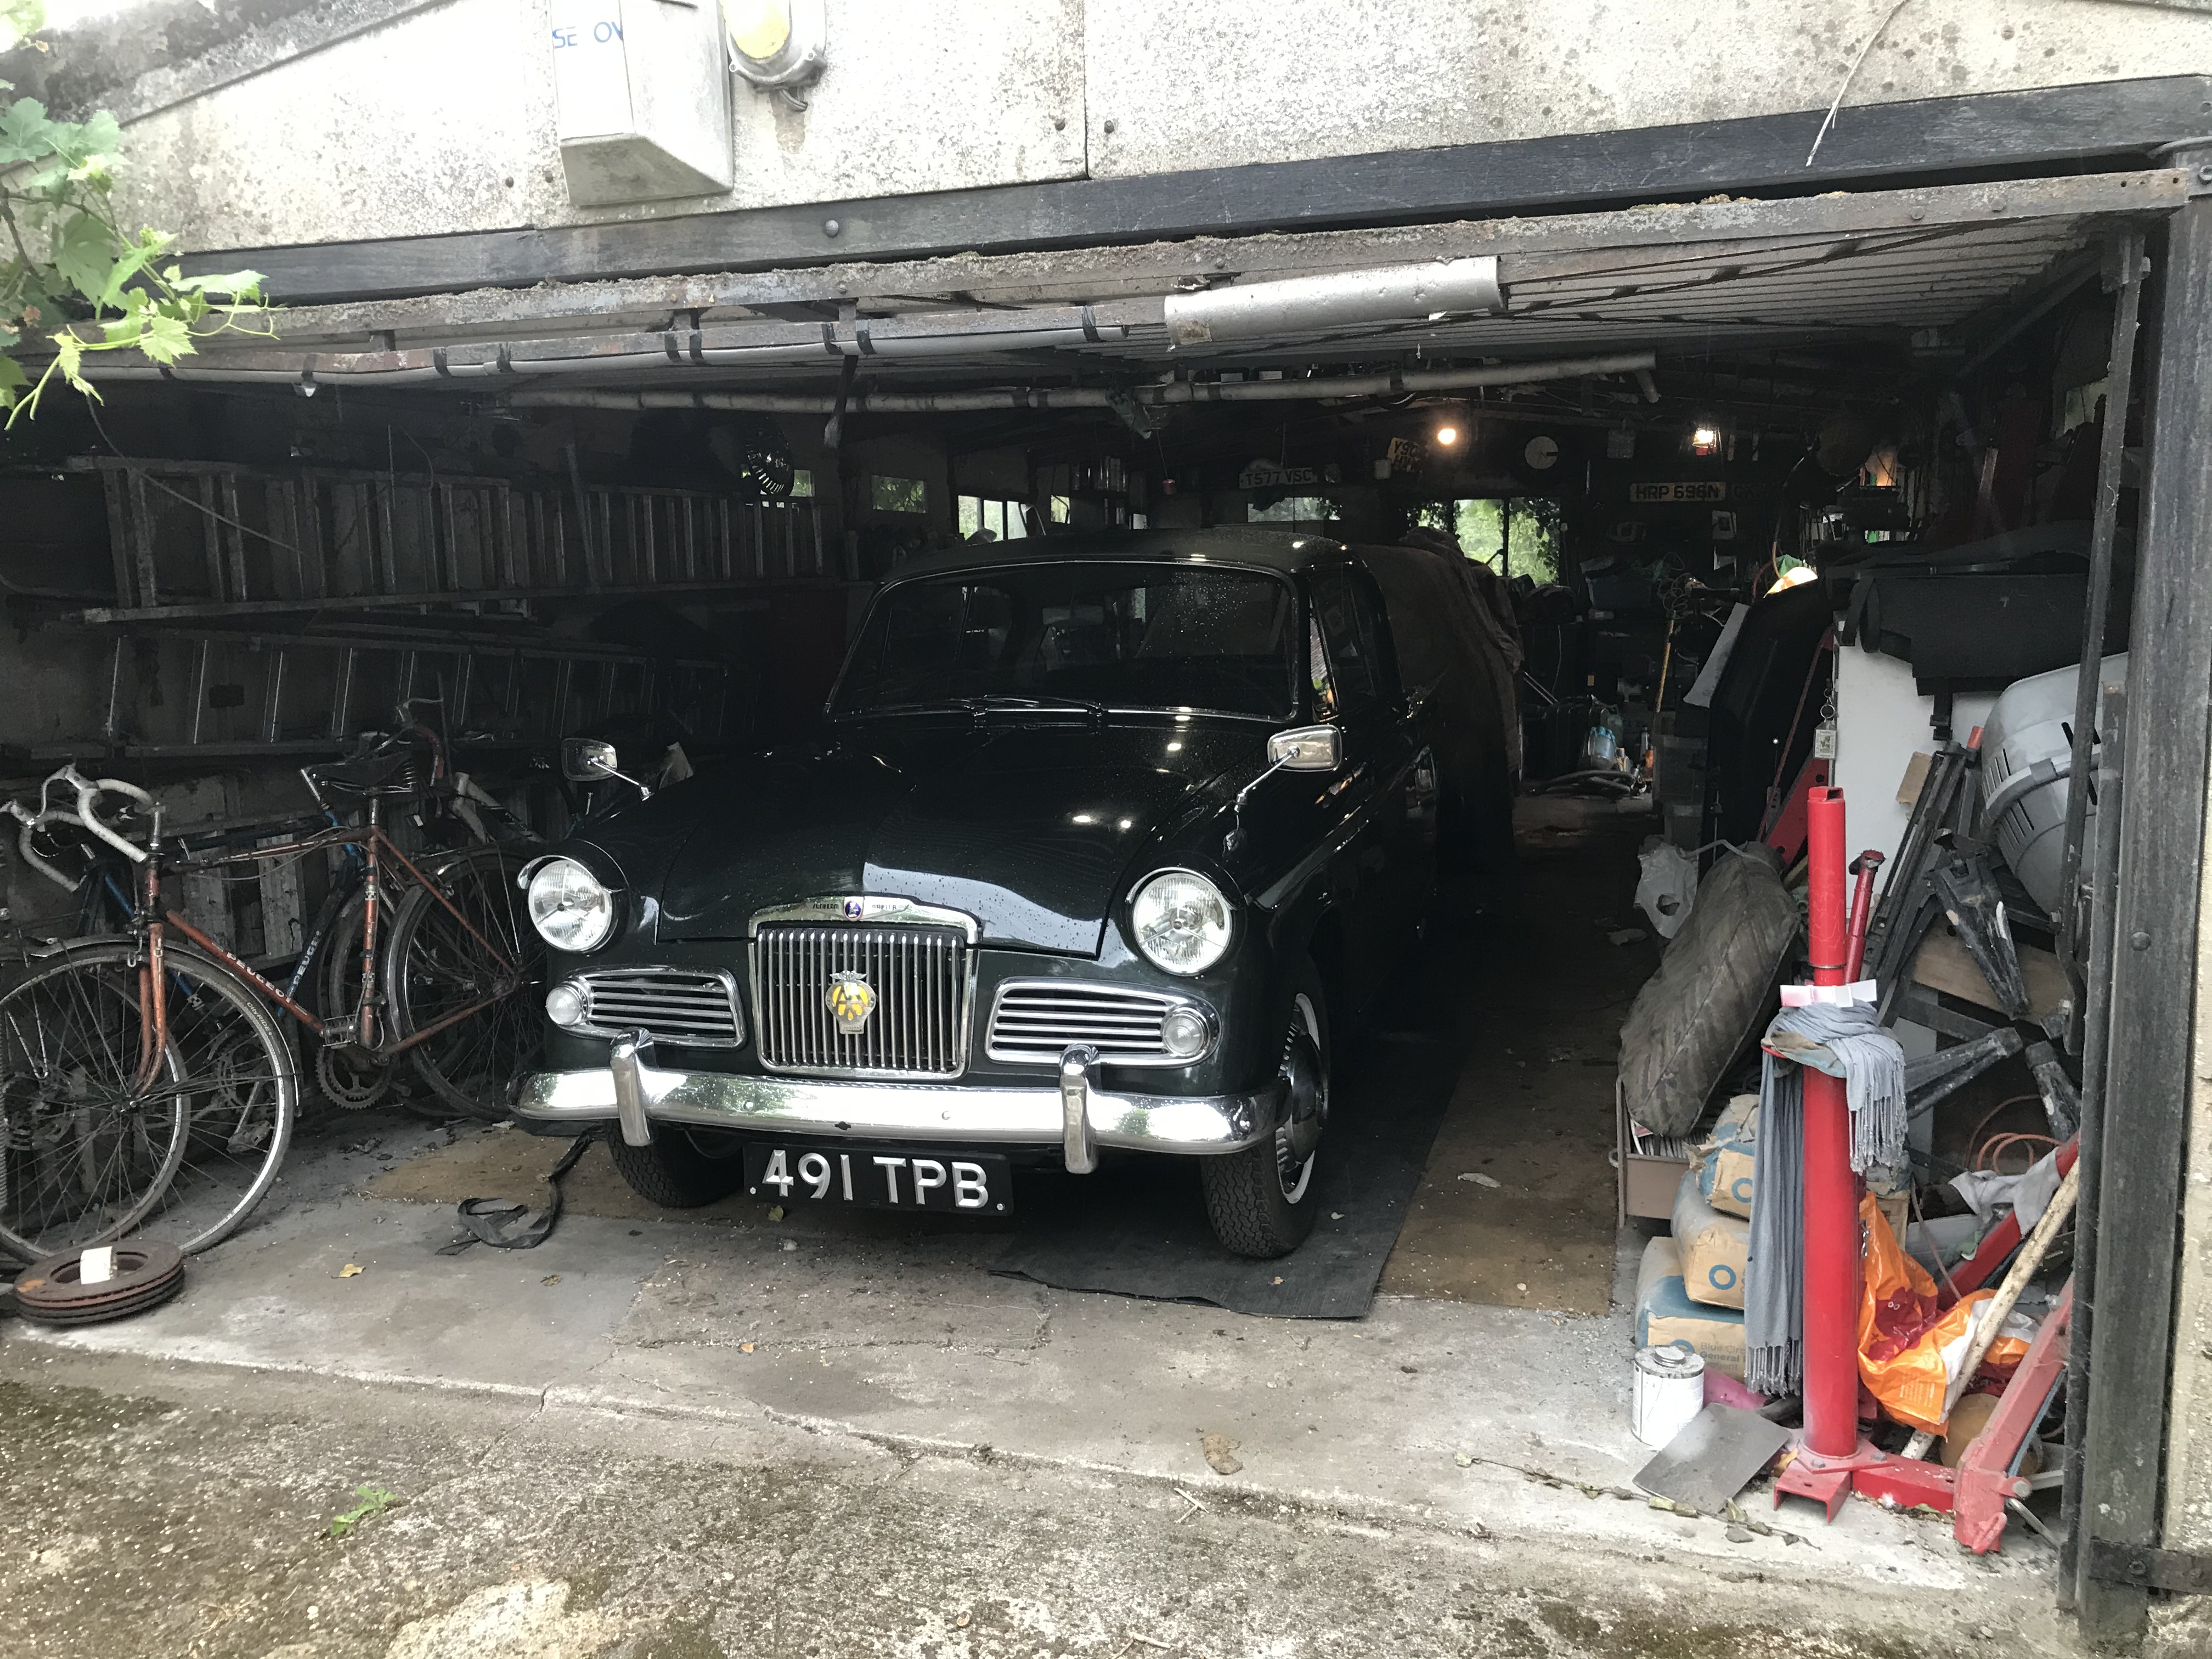
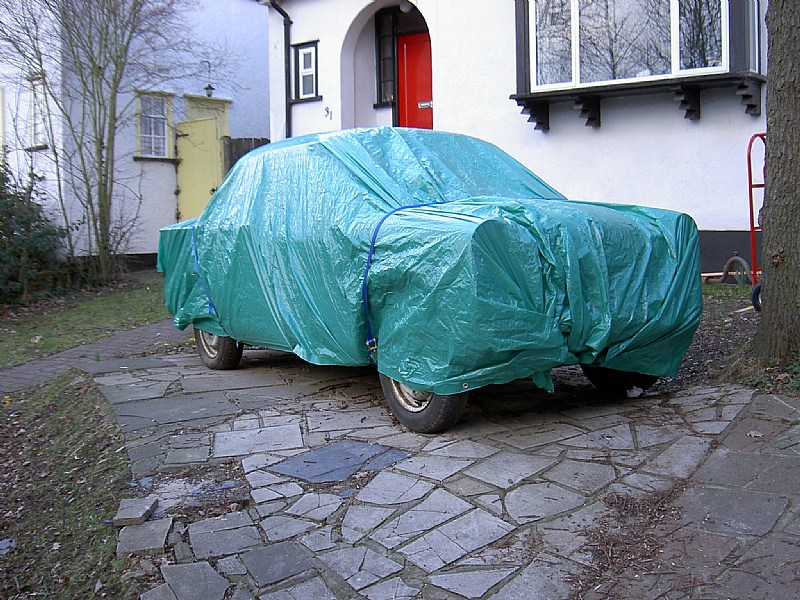
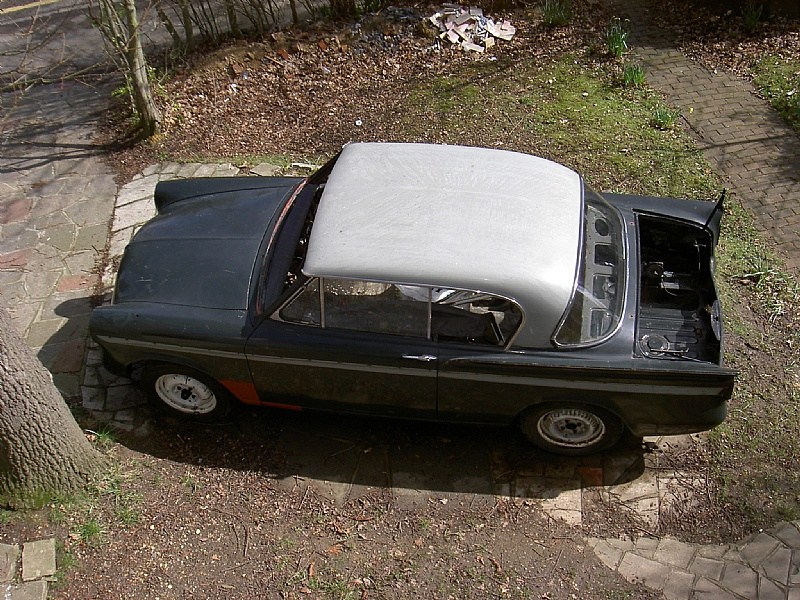
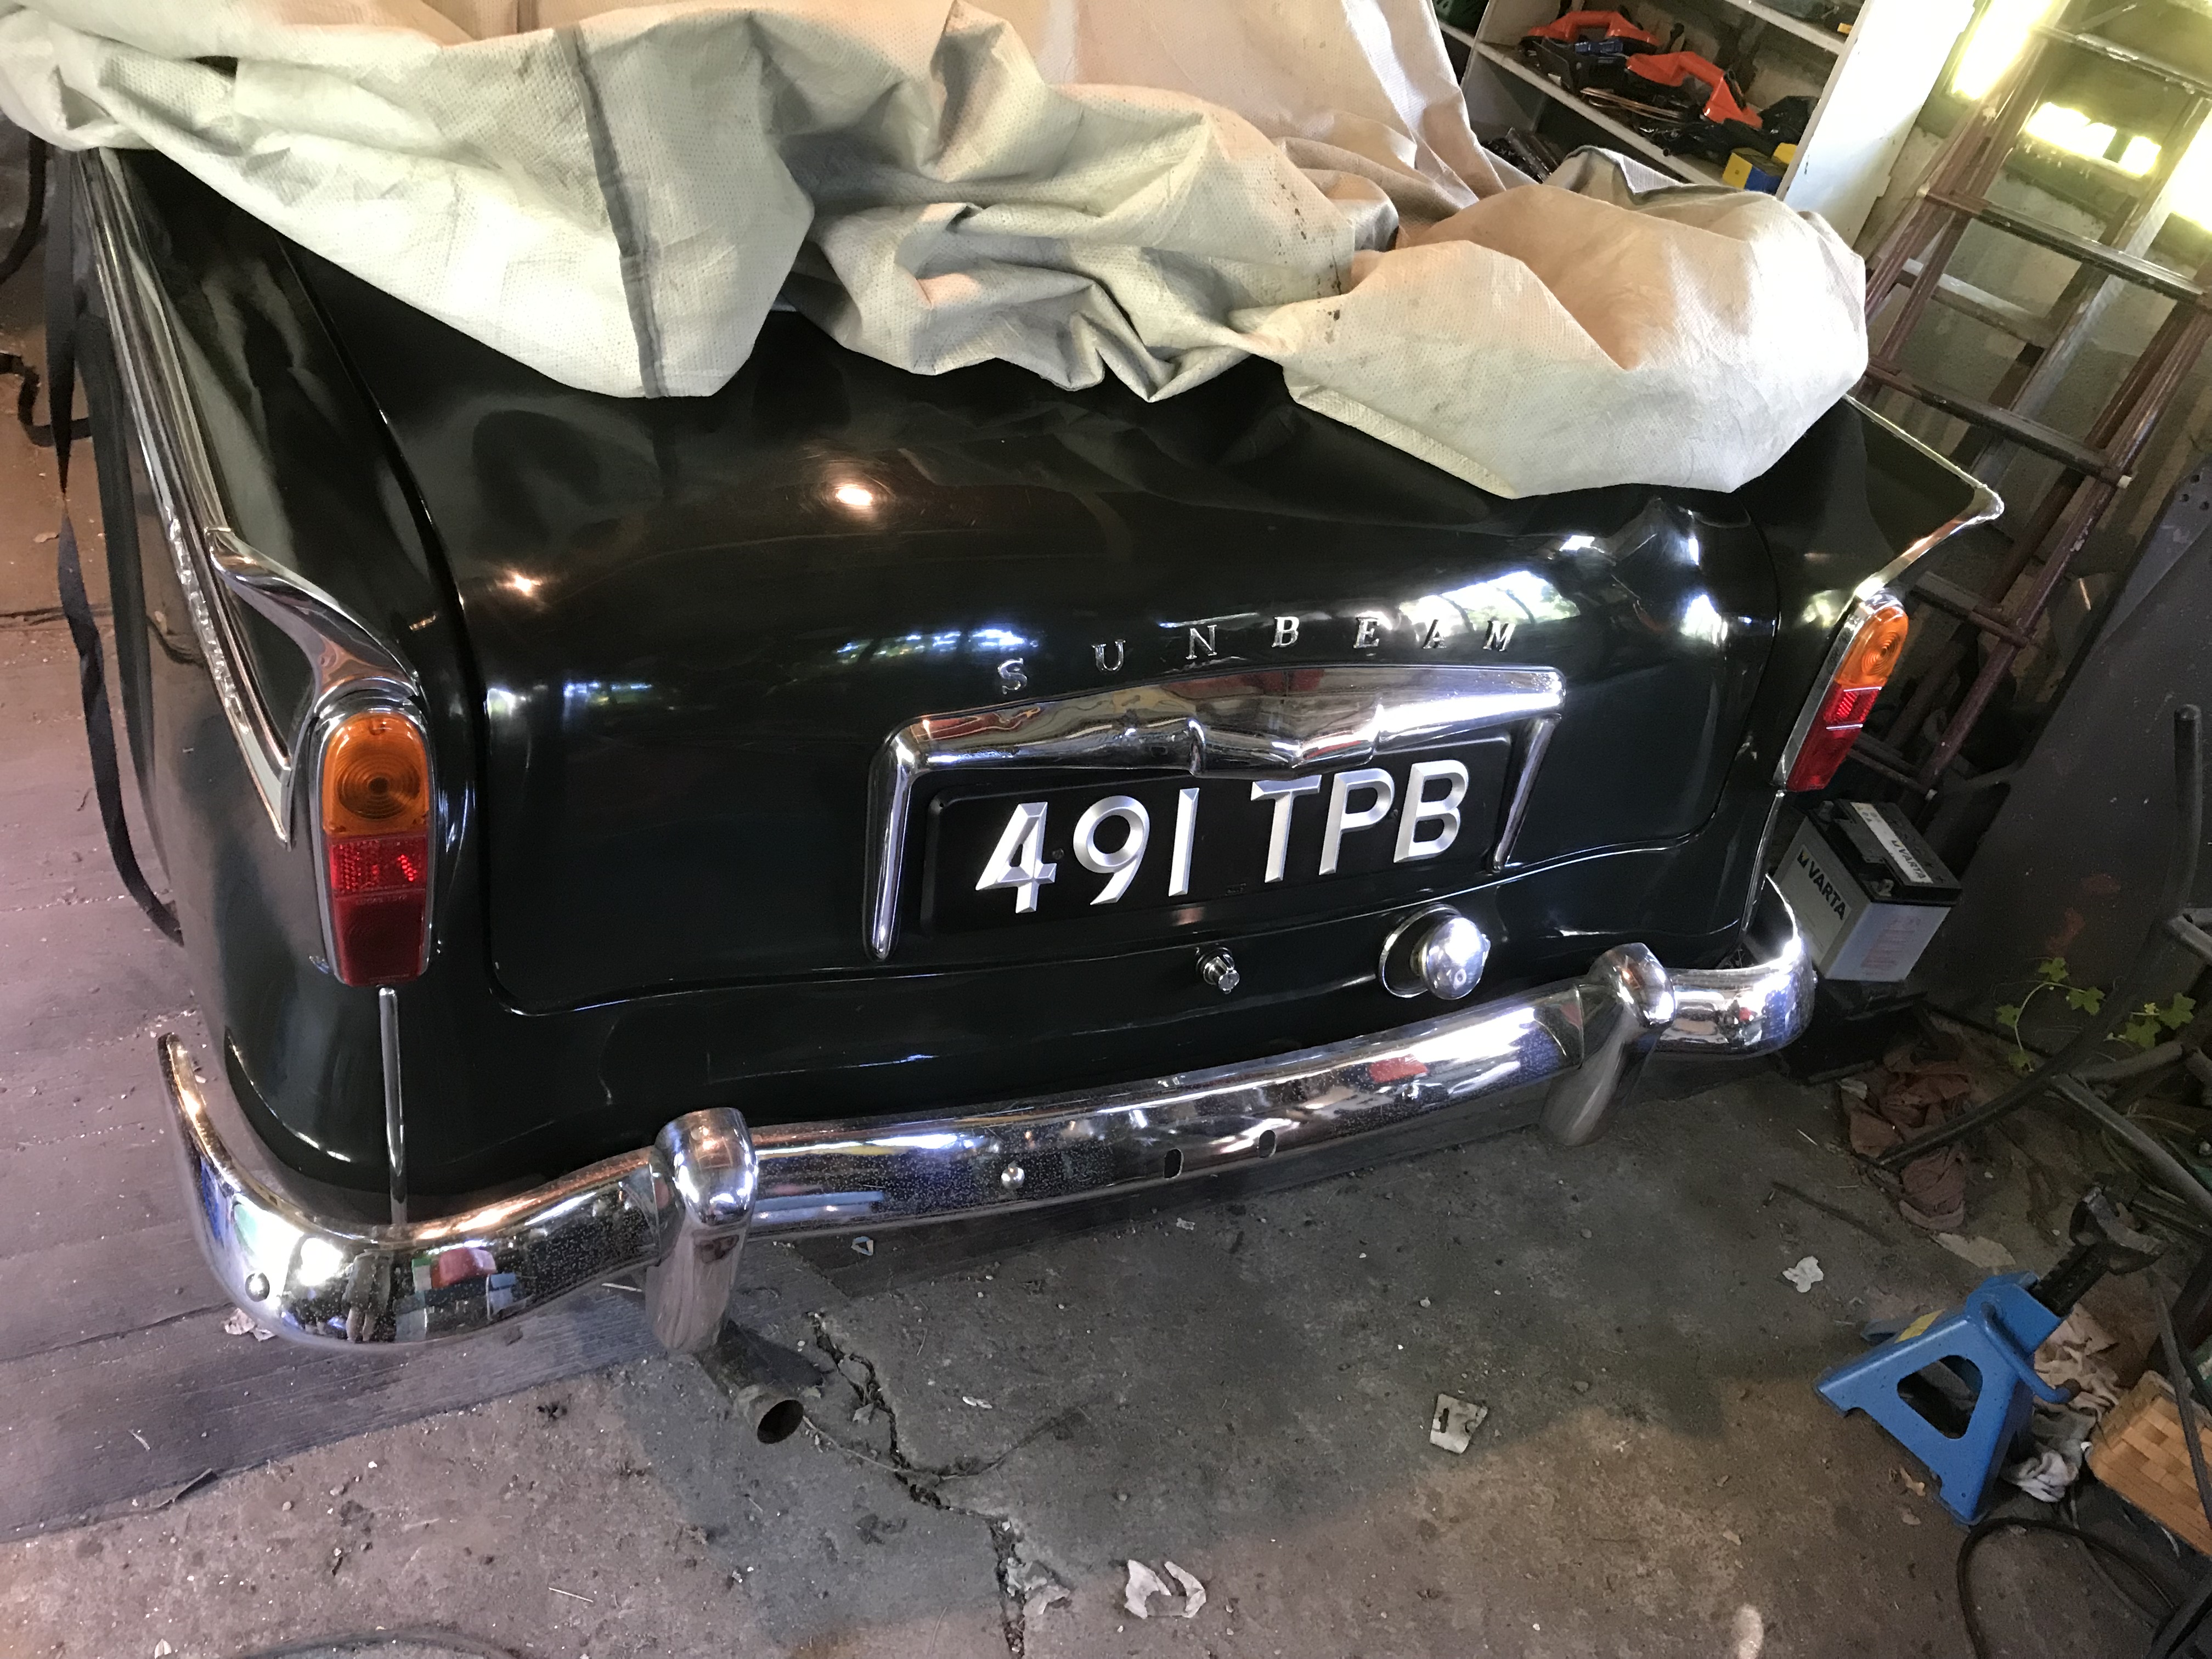
It’s a 1961 Series 3 Hardtop with OD Velvet/Sage Green. Genuine 42000. Originally owned by my mum who taught me to drive in it. Even in the early 1980’s I could see it was too good to just drive around, racking up the miles and the rust. So I stripped it down in the early summer of 1983, intending to restore it to showroom condition…then some other stuff happened…
Now in 2017, at the ripe old age of 53 (that’s me; the car is 56!) I just want it back on the road. My Mum died in January 2014 and this reminded me to seize the day. My work situation changed a little at the start of 2017 so I would have a little bit more time. Seven or eight years ago I re joined a motor club and got involved in rallying again. Seeing these cars of my youth actually being driven, seemed so much better than static shows. Decision made.
Times have changed and to a point, so has my attitude. I’d rather drive this car than keep it wrapped in cotton wool and genuine original condition is for some people, more desirable than a fantastic respray. So while it will need some patching up here and there, I want to try to do the best job I can without replacing every single part or making it so showroom it can’t be used. I’d like it to look good. But most of all I want it running and driving. If it needs painting, I’ll do it. We shall see. I don’t want it to become a project that I never got round to; so…
DAY 1 28 February 2017 – Cleaned. Dug out of rubbish and moved to a better place to work.
DAY 2 – Thought about buying some red oxide primer and black paint (but didn’t do it) Wrote a ‘To do’ list
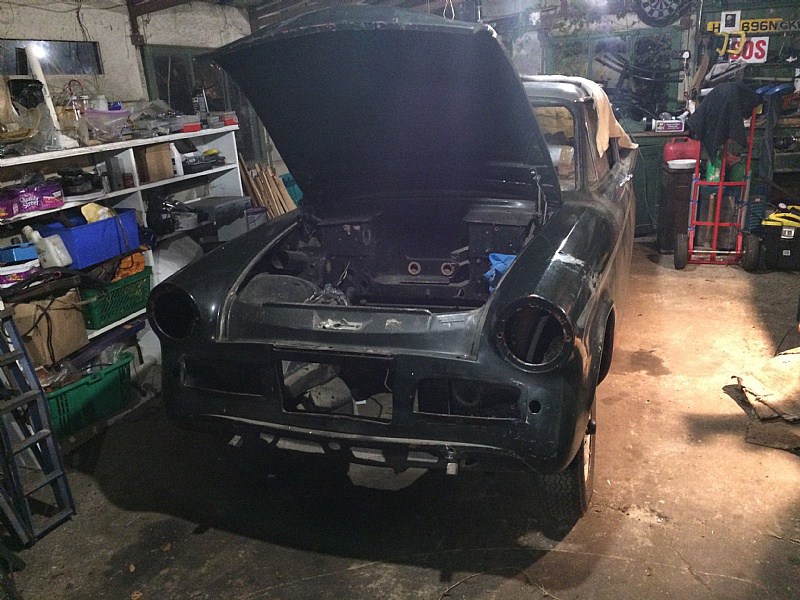
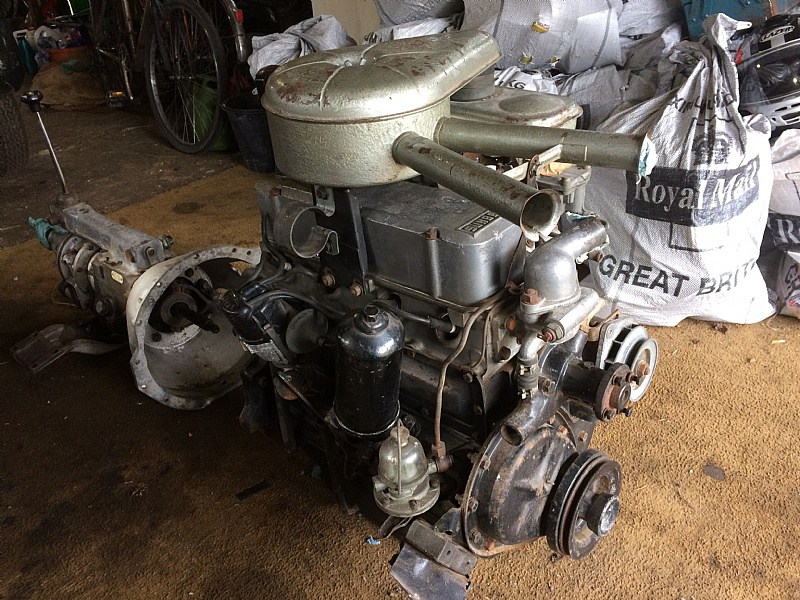
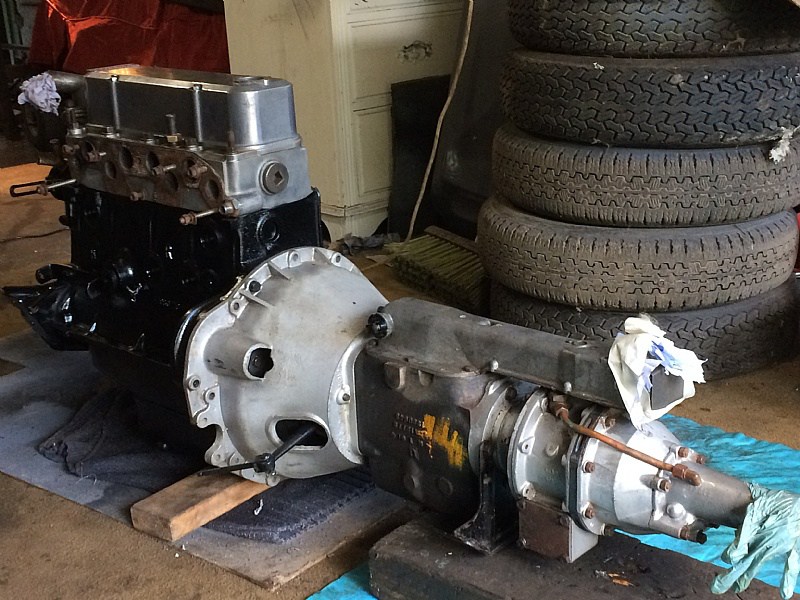
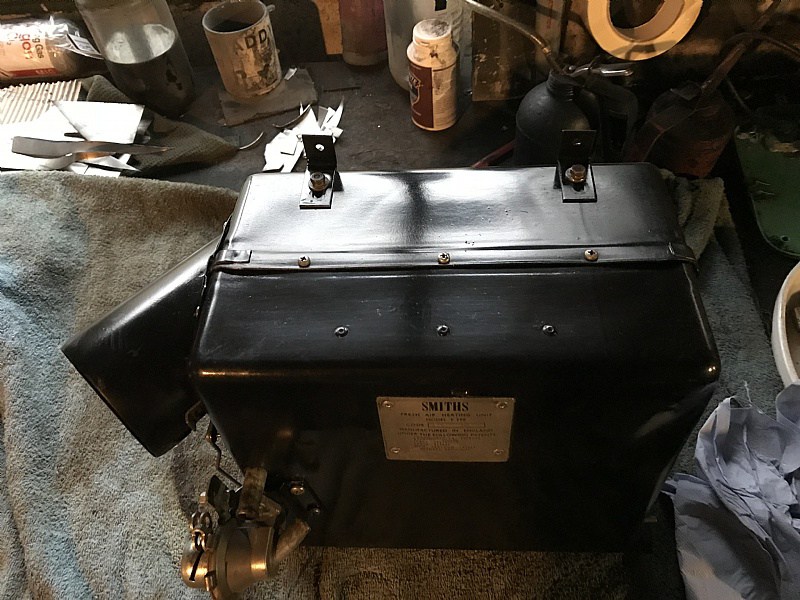
DAY 5 – Dug engine out from the pile of rubbish it was buried under. Cleaned engine bay ready for rubbing down. I would leave the ‘patina’ but at some point a battery must have leaked and eaten the paint away (this was before 1980 though – see photo).

The engine needs a bit of attention but was rebuilt in the mid 1980’s and has never run since.
DAY 12 – Let down by the weather! I did a deal with my wife; if it rained (as forecast) I’d do the car. If it didn’t I’d do the garden. It didn’t.
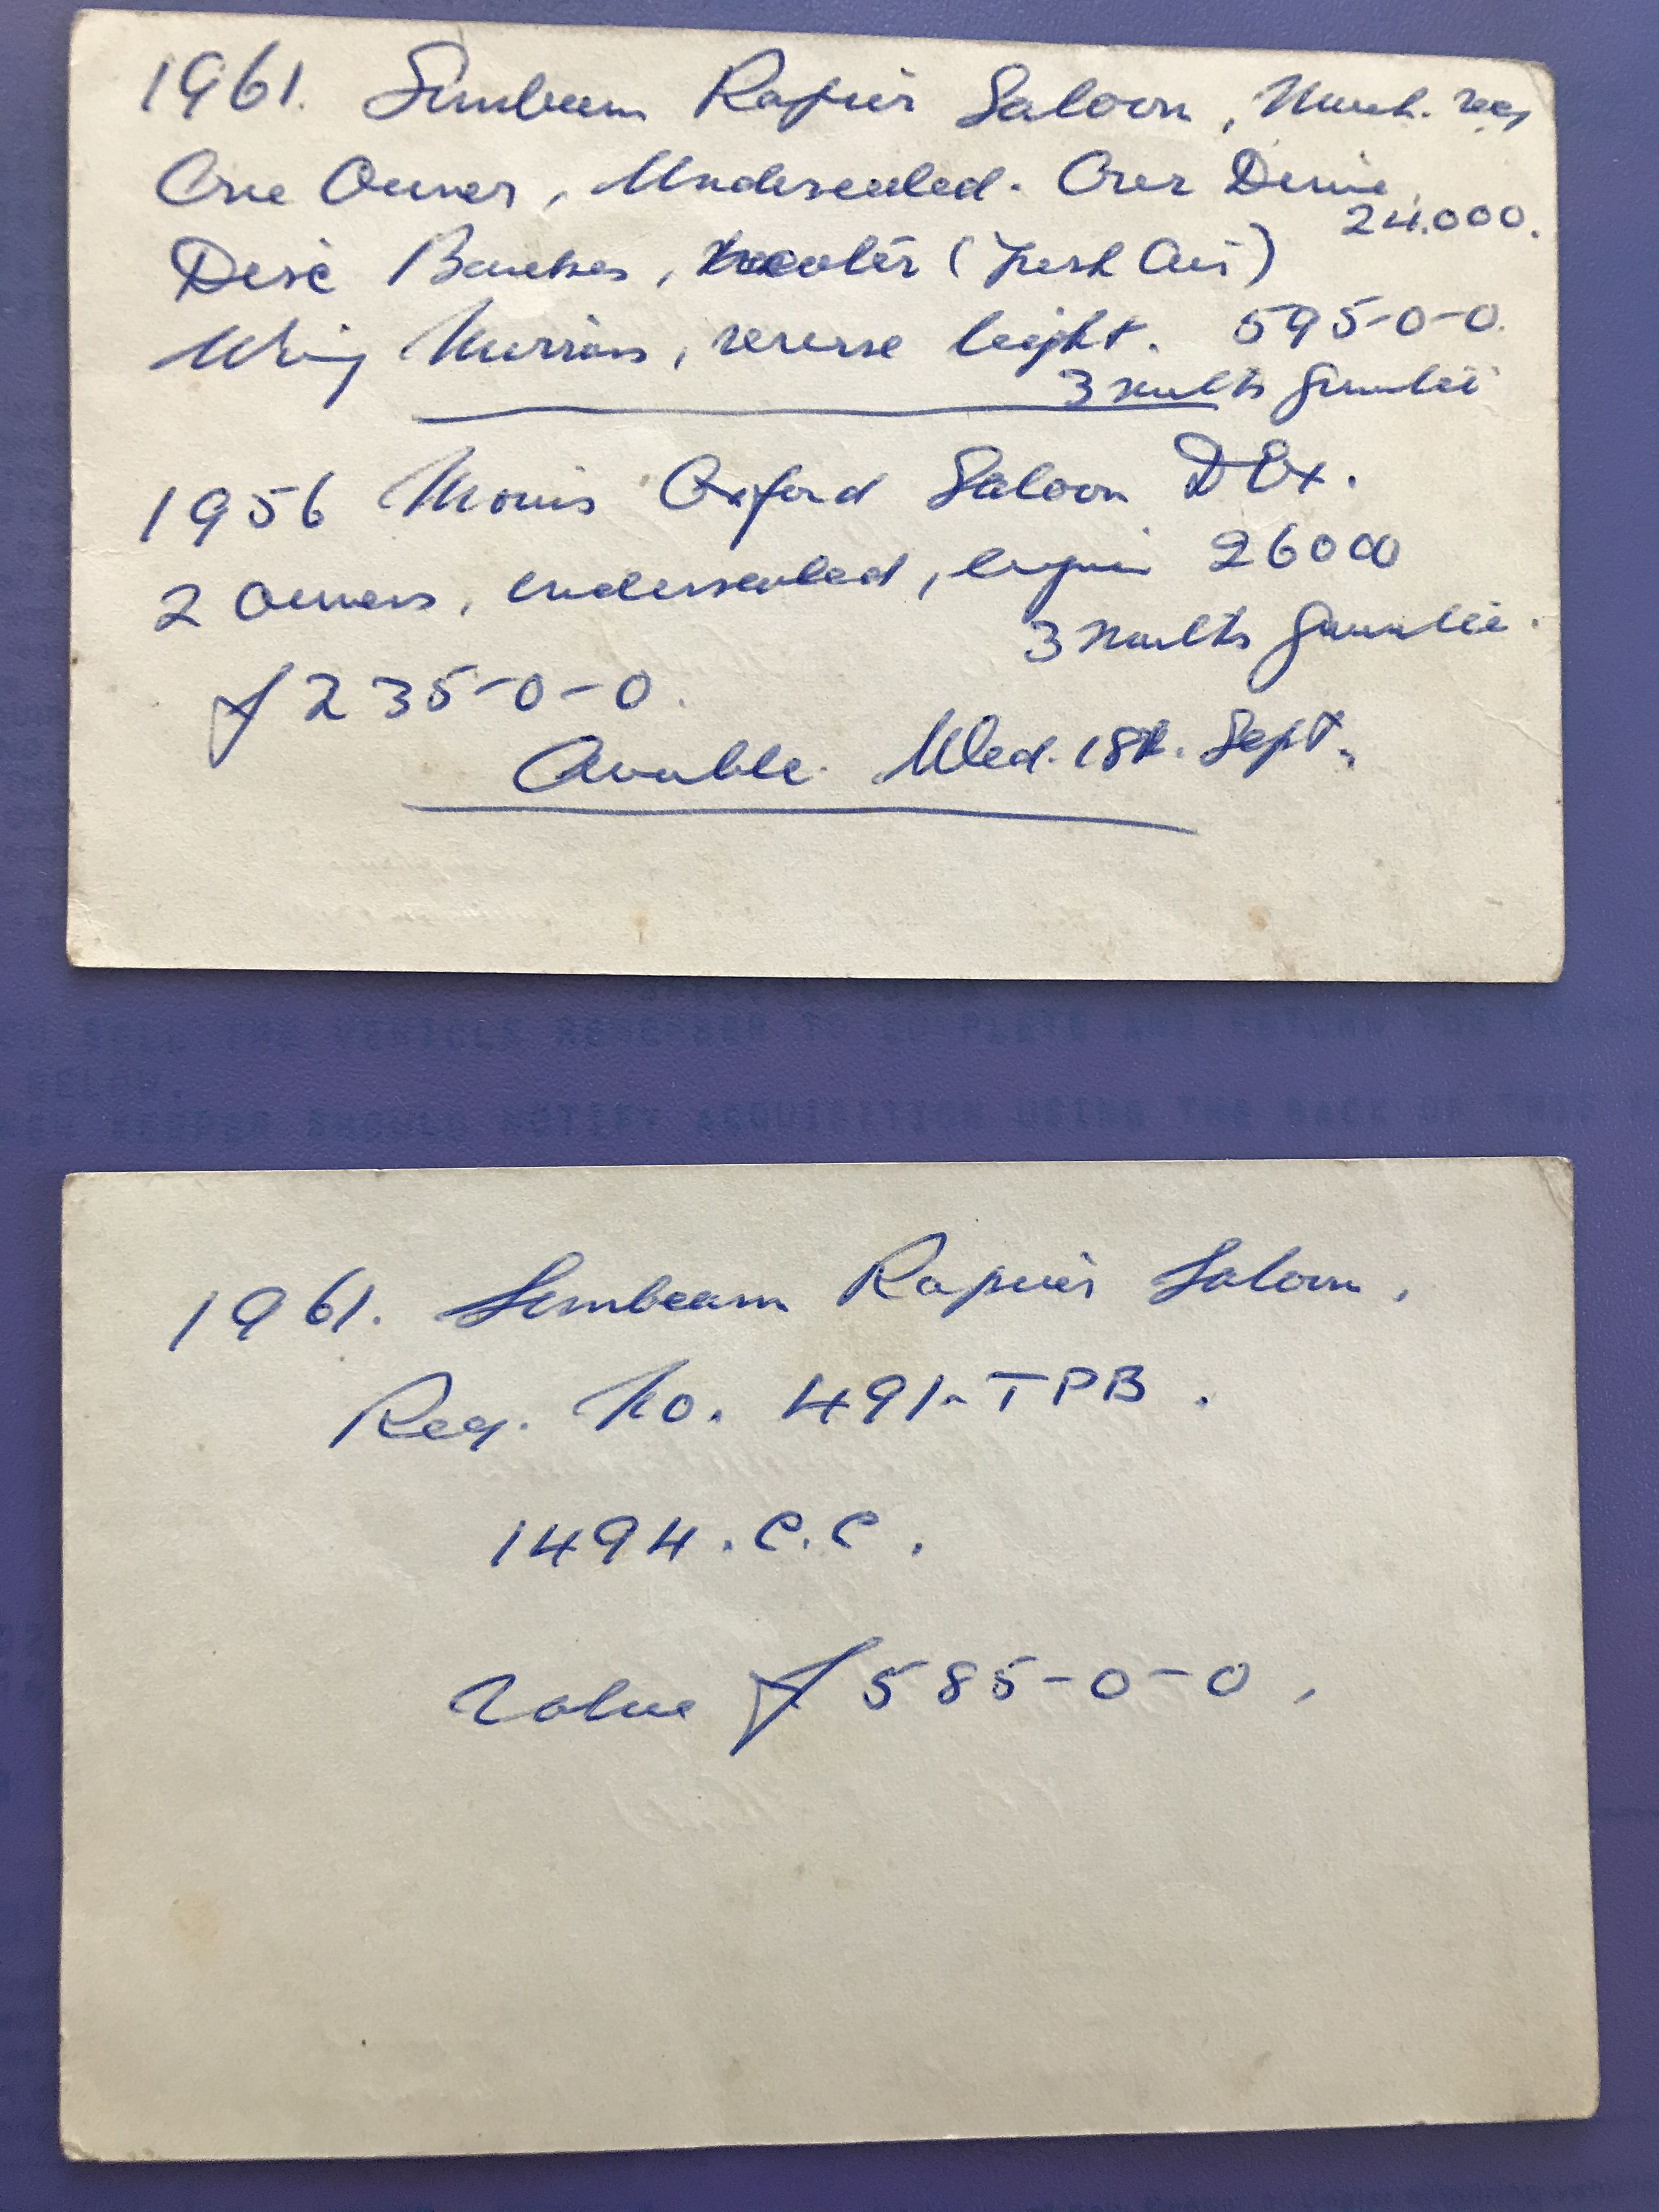
I did dig out some old photo’s and old documents though .

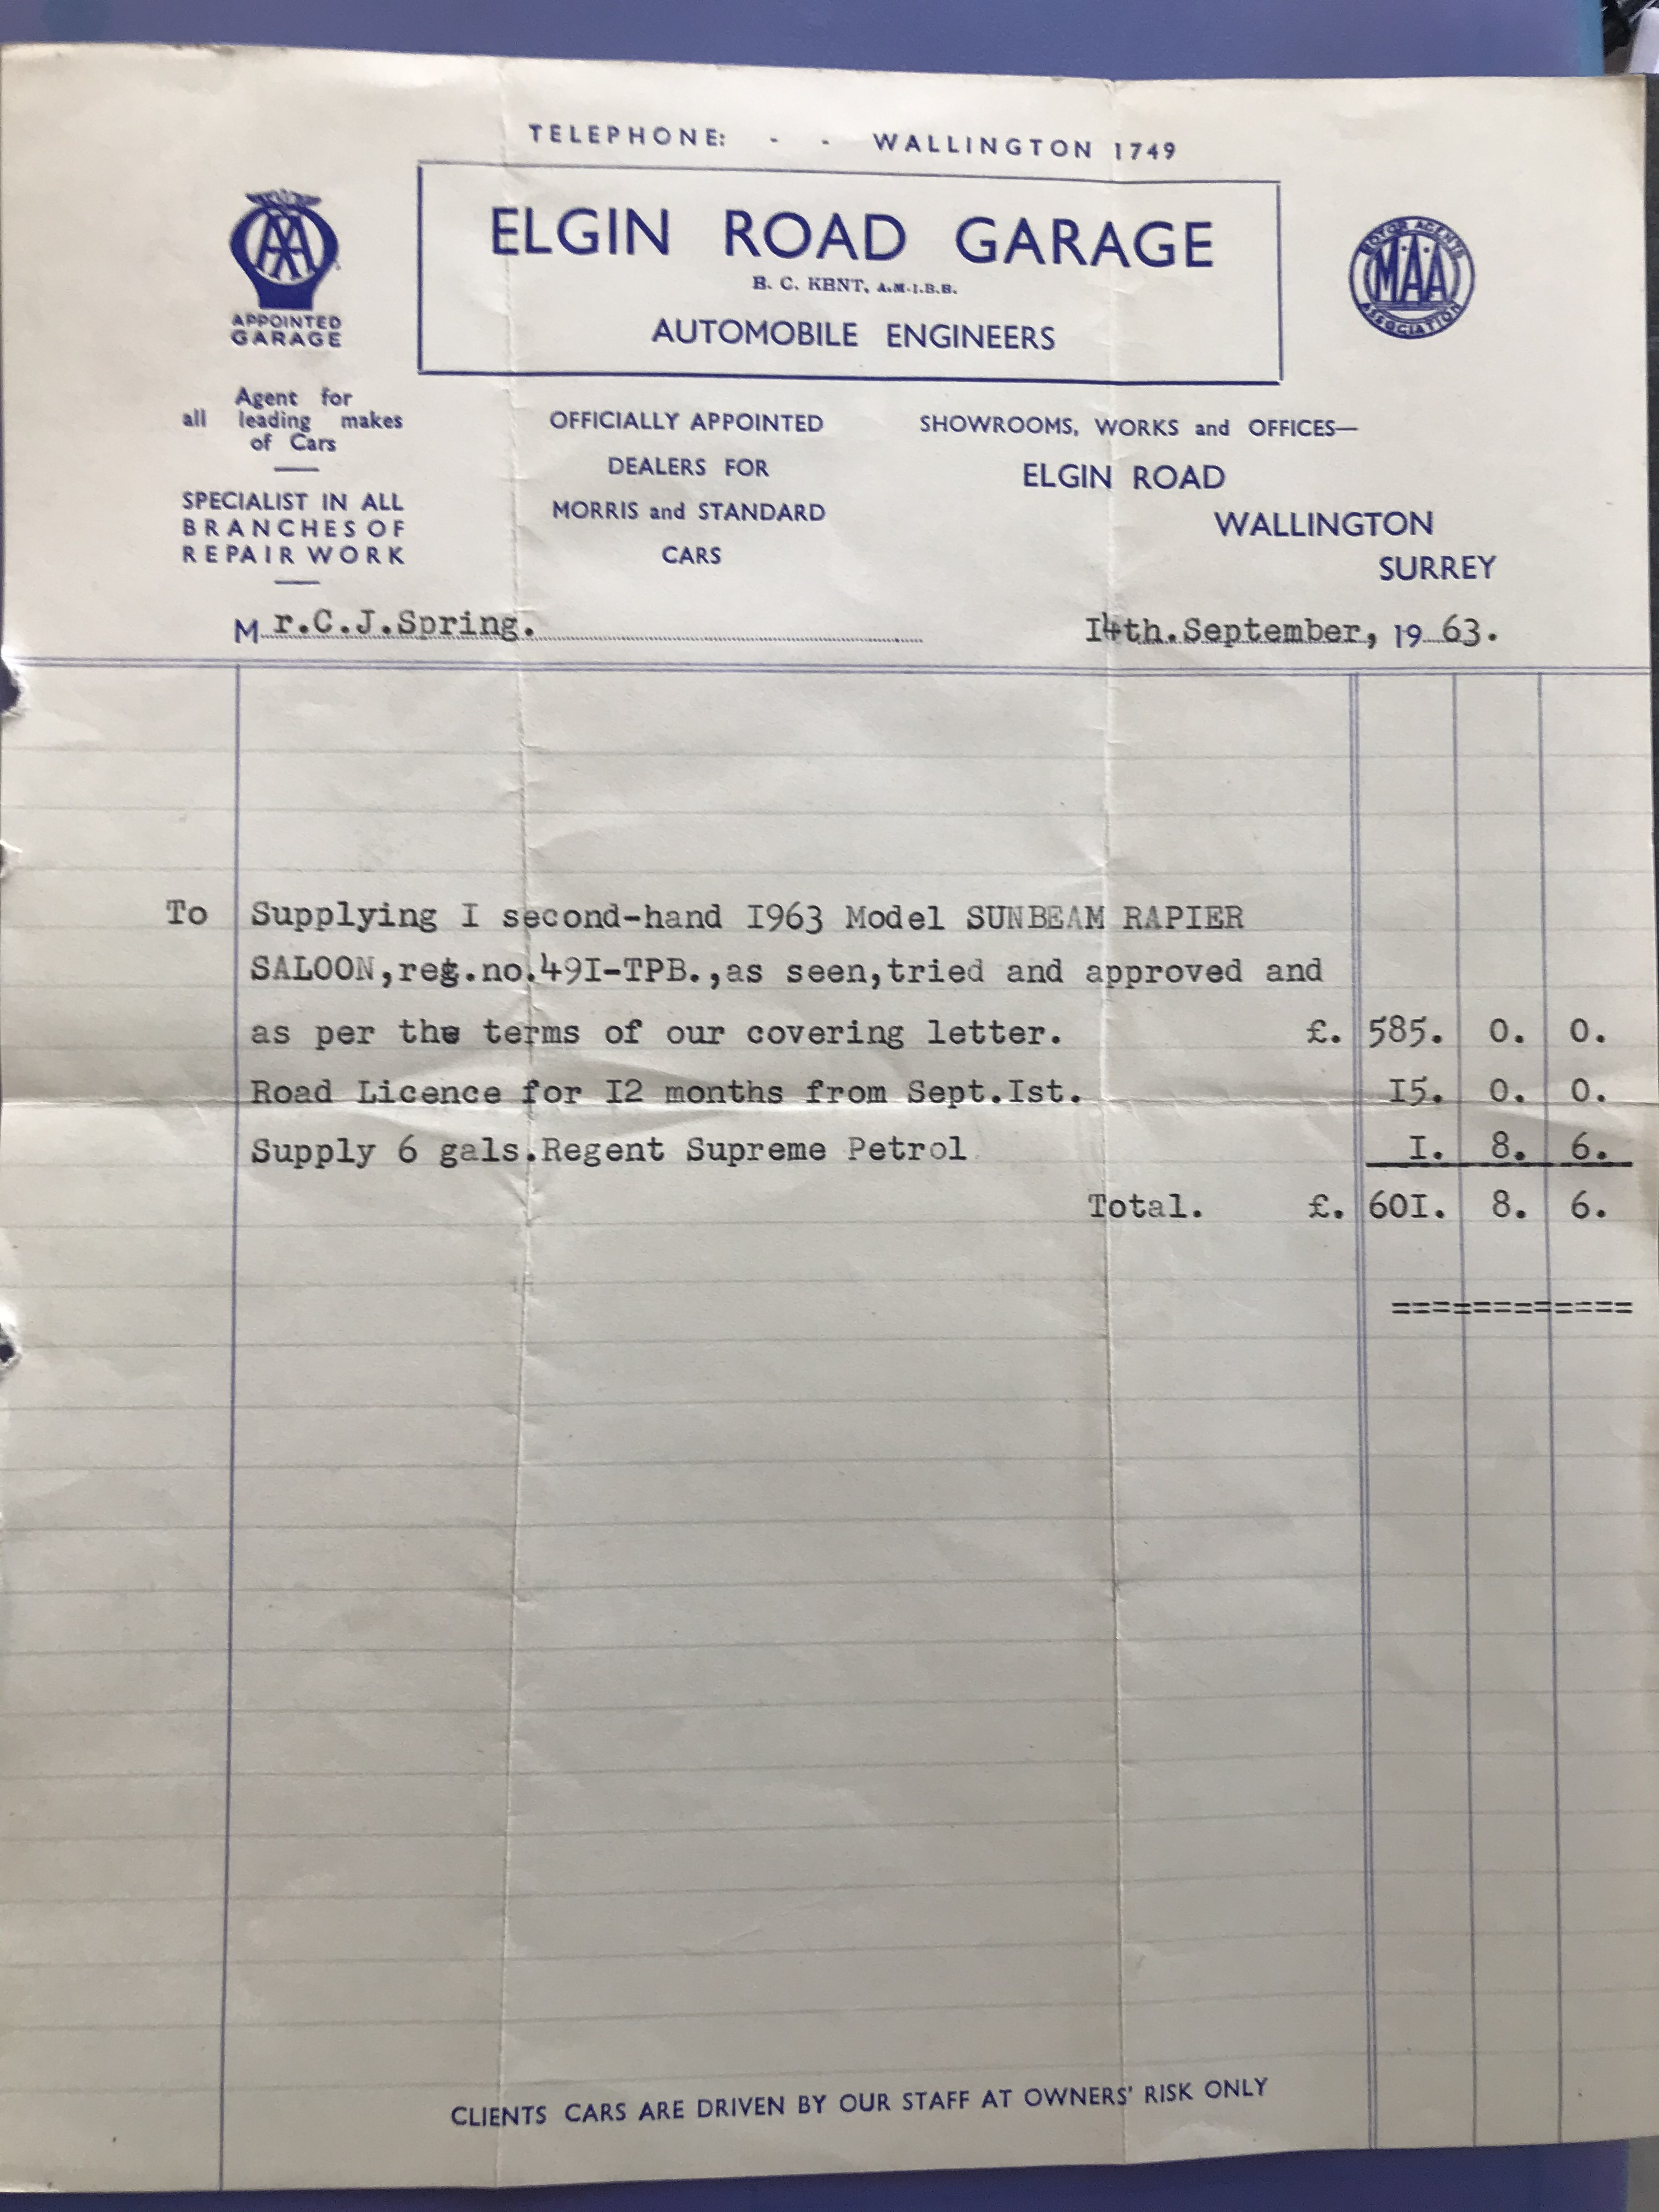
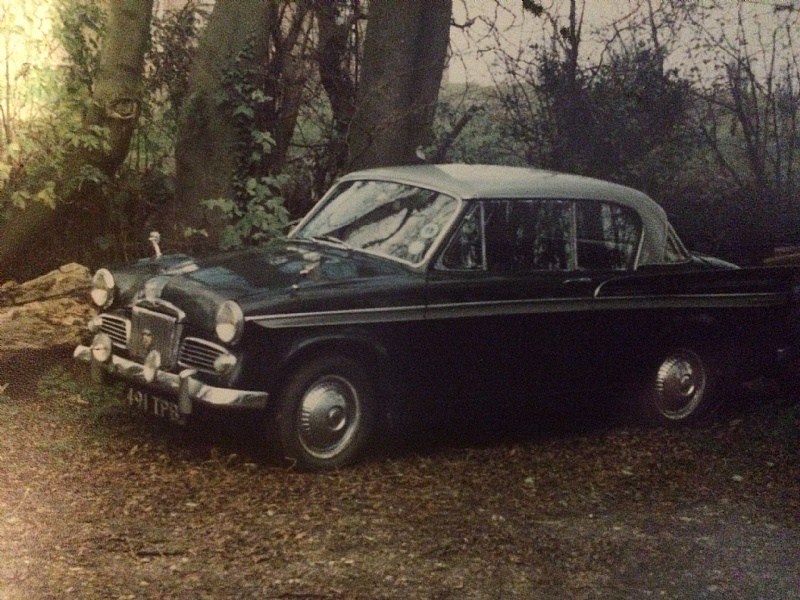
As first acquired by my mum in 1980. She inherited it from a relative (Mr Cecil James Spring). He bought it in 1963 at 2 years old for £585.00. He died in 1978, so it hadn’t been used for some time. When we found it in his garage the clutch was stuck on, but we (My Dad and I) managed to free it by running it in gear off the ground.
We know it was a one owner car in 1963 from the documents. Sadly, no idea who that first owner was.
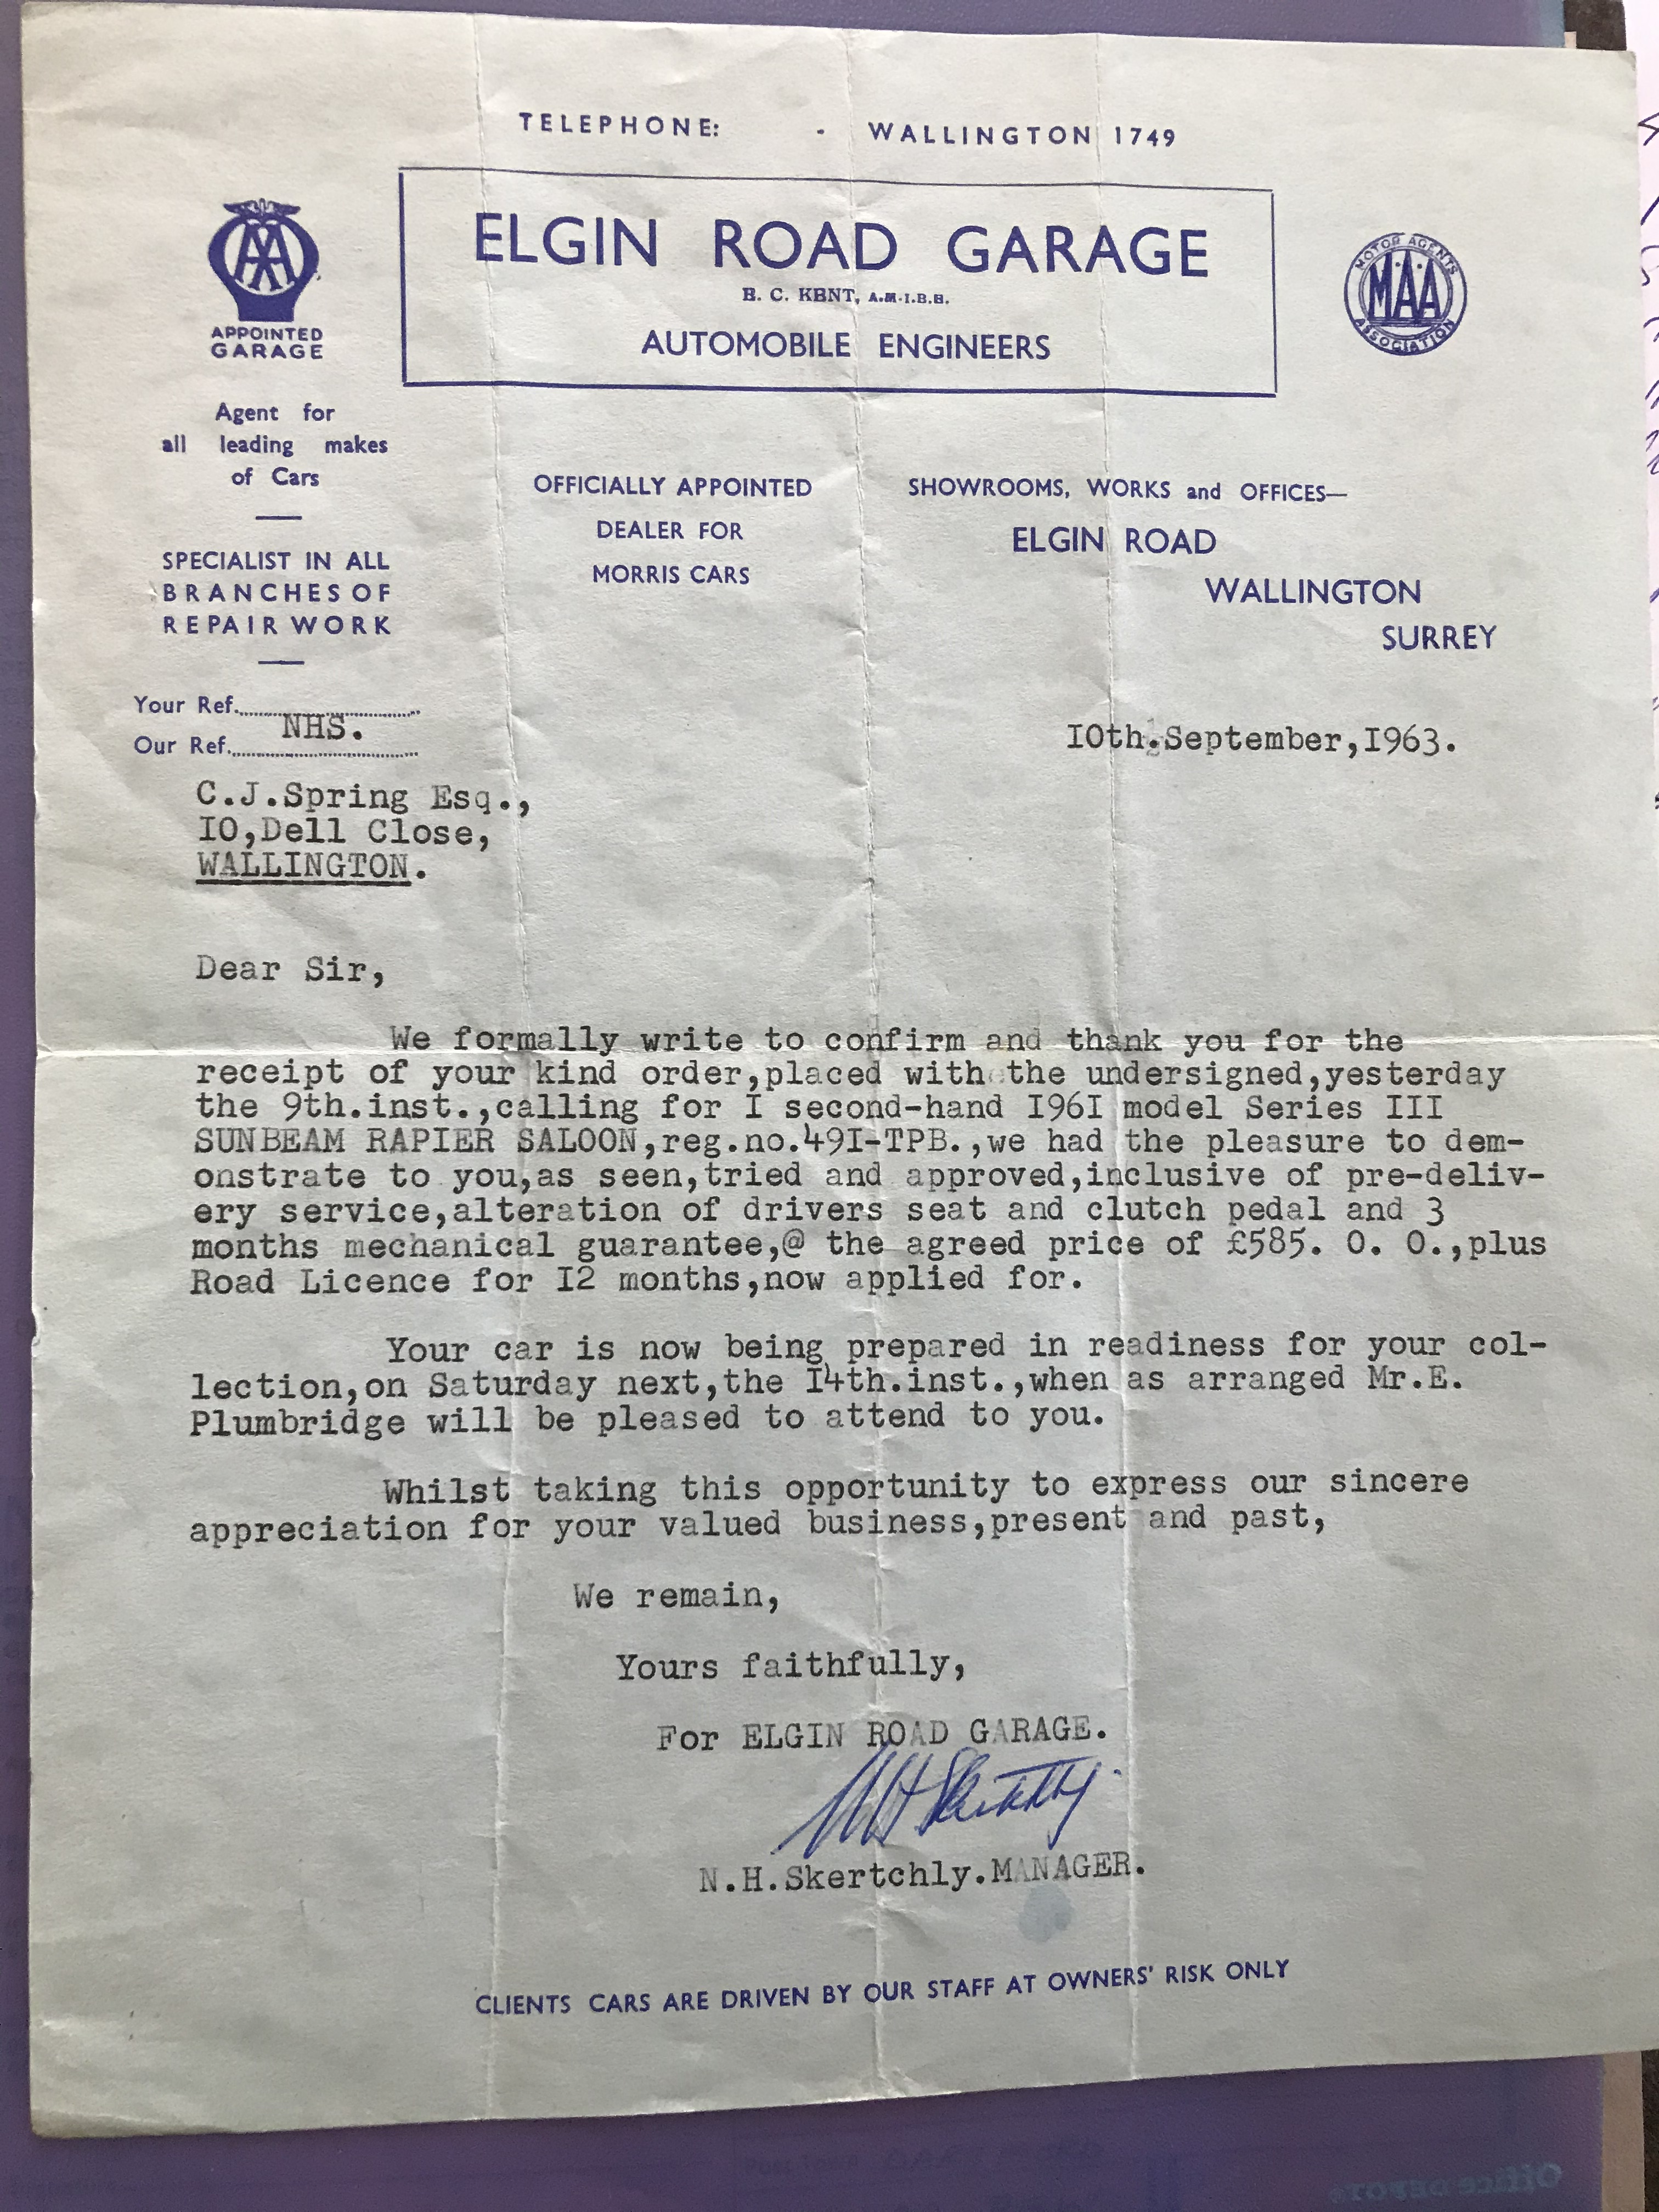
Elgin Road Garage doesn’t seem to exist any more, although there is a garage on what is probably the same site that has been there since 1971.
The car was valued for probate at £25.00 in 1979 so my mum kept it and used it and I learnt to drive in it passing my test in October 1980. For a while it was ‘my car’ until I bought a rusty Avenger in the December of 1980.
This is a year later (1981). I have passed my driving test and interested in road rallying. Hence the headlight rims.
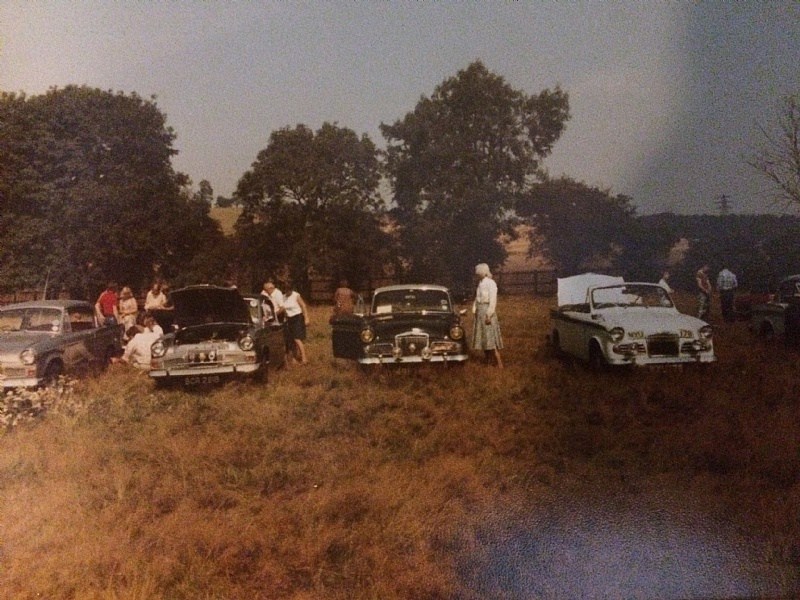
This is August 1982 (I think). My nineteenth birthday. Party time! My parents kindly obliged by going away for a weekend to SROC show – I think it must be at Knebworth. My Mum is standing next to the Rapier and I think My Dad is looking down just behind the Series 4 with the bonnet up. I remember them coming back and complaining of a really bad vibration – all four prop shaft bolts were very loose!!

The summer of 1982. My Dad has just bought a one year old Ital estate (for £4000). He and my sister seem to like it!. My car interests are obvious (far right). The Avenger was my first love. Sadly rusted away and scrapped in 1988. My brother has inherited our Dad’s old car (the Clubman estate) and on the left is my Mum with the Rapier. I swapped it with her for a 1979 Ford Capri in 1987, having already dismantled it for her!
I can’t help noticing the spotlights are missing by this point and remain so to this day.

This is 1988 or 89. My parents moved house and the car became an orphan for while. This is one of two rented garages. It was more of a barn and the car got covered in bird droppings. A couple of years later we moved to house with a garage and there the car stayed for the next 22 years more or less untouched. I don’t look like that anymore!
Here is a rare visit outside while we had a new garage built in 2006.

In all her glory (the red Defender was yet another car love). We used this to move the Rapier about, with a buffer made of settee cushions strapped to the front of the Landrover. Possibly explaining some of the dents I would need to tackle later on!

The wing bottoms were repaired with the correct panels in the 1980’s. The only rust there was.
This is still 2006 although it looks much the same! Time to get back to the present…
DAY 17 (17th March 2017)
Cleaned up the flywheel. I was expecting to have to skim it but it seems OK. Given the forces involved, I think the clutch will polish it off nicely. Teeth are good too.

DAY’s 31 to 44 (13th April 2017)
Sorted and checked all the parts. Missing a few bits (number plates/starter motor/dipstick???). Got the studs removed and replaced on exhaust manifold – that wasn’t right when I was driving it in 1980/81. It needed to be tightened every 100 miles or so as the thread had stripped on one stud. Drained sump (having had to a make a tool to extract the sump plug), removed all the ancillaries for checking then painting. I will need to make some minor repairs to both the engine block water drain and the manifold ball valve. I flipped the engine and removed the sump and found the inside of the engine as left by the re-builders 30 years ago. Excellent.

Note those brand new shiny pistons.
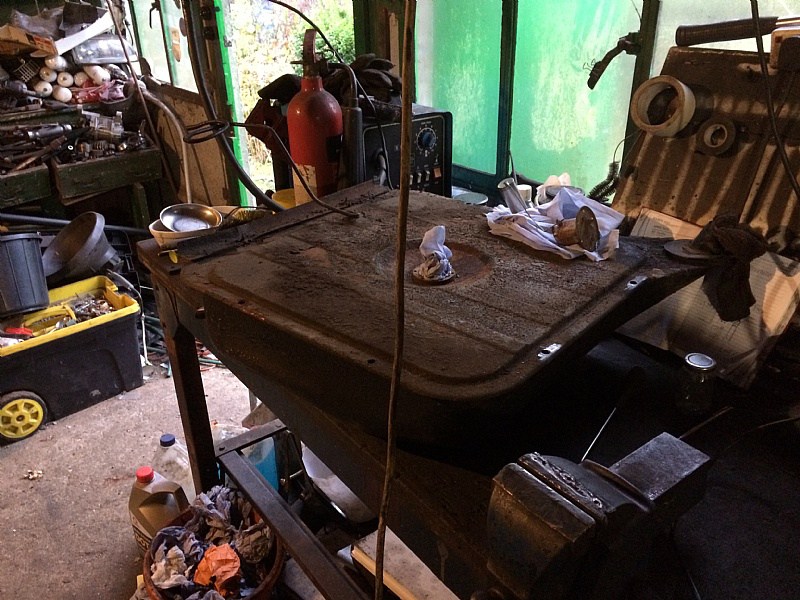
The next job was to clean the inside of the sump, give the outside a quick wire brush and then a coat of black engine paint before putting it back. However, it turns out the bottom of the sump has rust holes! Arrhh.
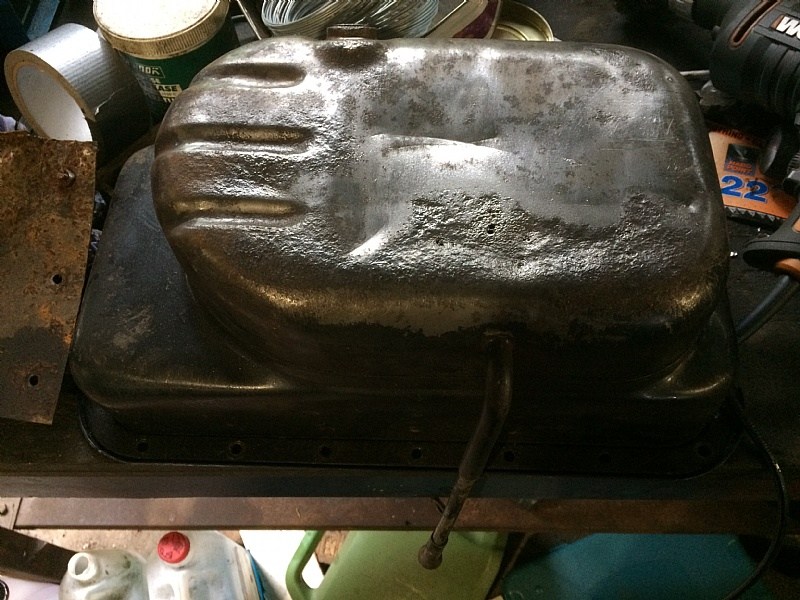
These can be seen due north of the dip stick tube. Even though the engine was inside the whole time and was resting on a bit of plywood; time has taken its toll and it has rotted from the outside in. I can’t find one for sale, so I will try and weld a patch on. Should be fun.
Day 49 (18th April 2017)
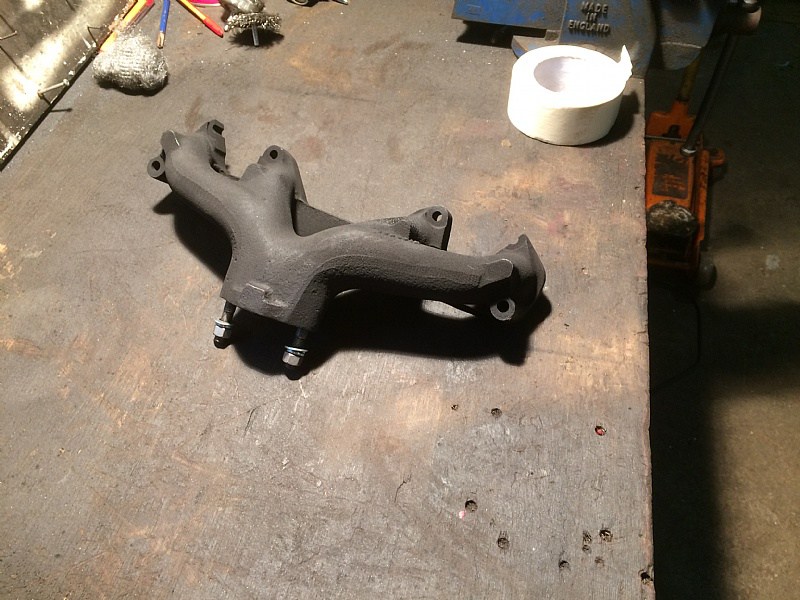
Sump being a problem child as rot is everywhere. In the meantime exhaust manifold with new studs and coat of high temperature paint. distributor finally gets it’s rev-counter drive gear fitted. I bought that in the 1980’s and got the rev counter itself from a crushed convertible at our local breakers when the car was still on the road. It originally had a blanking plate where the rev counter goes.
Day 74 (13th May 2017)
Gradually cleaning and checking engine parts and assembling missing parts. Lots of small niggly things and some parts are very rare/unavailable.
Day 92 (31st May 2017)
Plodding on with cleaning and checking parts (distributor, clutch, oil relief/bypass valve, carbs, clutch slave, overdrive solenoid and cut out switch etc) and replacing as required. I’m re using and fixing the originals as much as I can. Then the sump arrived back! I had a good go at welding it, but the whole bottom was rotten. My welding is OK but I was struggling to get it oil tight. So I gave it to an engineering shop near Brands Hatch (ten minutes away) and they brazed on a large plate. Not cheap but a solid job.

Painted and replaced the sump, which then meant the rest of the engine could get a quick clean up and coat of black engine paint. Replaced the broken clutch retainer springs (with greenhouse glass clips!) bolted on the clutch and just had to try the gearbox ..which dropped in. The first time these have been together since 1983. Feels like progress.
Is that not a thing of beauty?? Maybe I should abandon the re-build and have that as a coffee table? I will go and ask my wife.
…….So it’s decided. The engine is staying with the car.
The books says it will go in together (engine and box). I can’t decide whether to try this or split them again. There is nothing unconventional about this set up and the clutch is aligned so it should drop back in. I used to pride myself in being able to swap the box on the old Avengers in 45 minutes. Hmm must think.
First I need to finish prepping the engine bay.
DAY 95 and 96 (3rd & 4th June 2017)
I decided to complete the engine – I’m glad I did. Several head scratching moments and sticky threads. It would have been much harder with it in place. I can always strip it back again if it’s a problem getting it in.
.

So here it is! Now wrapped in bubble wrap until the big day. This is looking better than I had hoped. Do I want to drive this car through muddy puddles??
DAY 103 (11th June 2017)
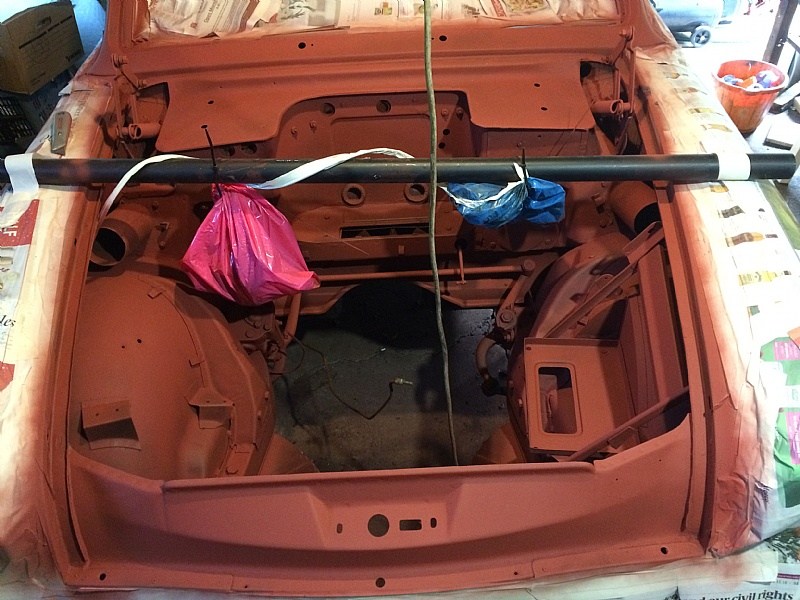
Cracking on with the engine bay. Now all wire brushed, treated with citric acid, washed, dried (with a hairdryer) then painted in Kurust and finally given two coats of Red oxide primer. I probably should have removed the steering gear, and cross-member, but all of this is well out of sight once the engine is back in, so instead will be painted in gloss black then masked before top coating in Velvet Green.
DAY 115 (23rd June 2017)
I have spent the last couple of weeks flatting the primer down with 1200 wet and dry and then went over the bare metal and the scuttle and pillars with high build primer. Then today I put on a coat of Velvet Green. I’m quite pleased with it and it certainly seems like I have pushed past the point where it got left back in the 1980’s. I will have ago with rubbing compound once this has hardened, then..wow… the engine can go back in, the brake pipes, master cylinders, heater and all sorts of other stuff – very exciting!!

Compare this with the picture from Day 5!
Day 119 (27th June 2017)
And now after a flattening and polish. I’m not 100% happy. I didn’t put enough layers on and the original surface was not perfect in places. But most of it is out of sight. I will re do the front panel. At least I know how to get a perfect finish now. More paint, 2000 grid W&D then rubbing compound.

DAYS 126 to 128 (4th & 5th July 2017)
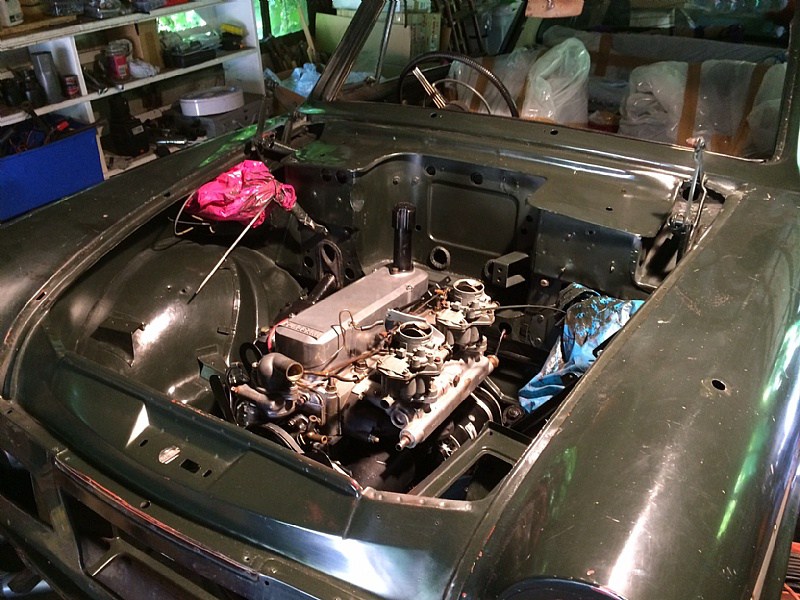
Engine now installed! Went in fairly easily.

A little tight on head room, but do-able with the box on.
Now working on the rad!
DAYS 129 to 141 (7th to 19th July 2017)
Finished and installed radiator and started working on the wiring. Going OK, have replaced one small missing piece, and will buy some wire to re do headlight looms which I damaged taking them apart (I was a careless youth back then).
Just need to figure the overdrive, attach a couple of earths, and insulate various ends where I haven’t added the ancillaries yet (horn, heater etc) then do the dash, fit prop and exhaust and then FIRE HER UP!!!

Days 142 to 162 (20th July to 9th August 2017)
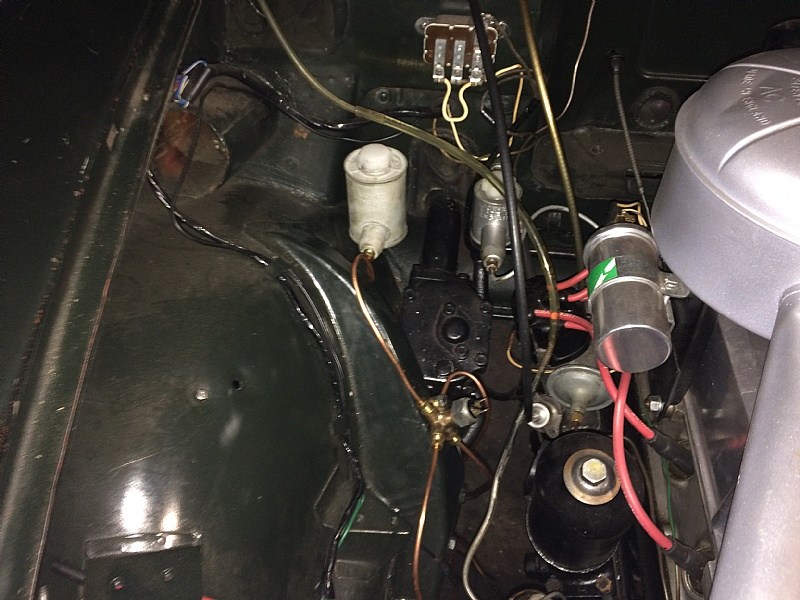
Tackled the remainder of the wiring, specifically the dashboard. This did entail replacing the water gauge which was the wrong one, as is the ammeter, although the differences are minimal*. I had to undo the loom to remove a damaged wire and then re-instate it. The replacement cable is on the dash top (top left of picture below). That is now done and in place. Cleaned the prop-shaft. There are now a few minor jobs to do on the dash/wiring and it should be possible to switch it live very soon.
*having studied many others since, it seems that the ammeter is right – a Lucas not a British Jaeger???

This is the loom in pieces (above). Below is it re-wrapped and in position.

Connected the battery and… Not much! No fire (good) no interior light, no starter, no lights! But ignition light came on. After working methodically through circuit by circuit with the multi-meter it became clear most of it was live. The interior light was a bulb and a door switch earth. The starter was the ignition switch wire to the solenoid terminal needed cleaning. I found a short in the fuel gauge that was causing the panel lights to come on with the ignition. This wasnt helped by a dry earth which when cured immediately blew the fuse and caused a puff of smoke from the fuel gauge. This now doesn’t work (it did back in the day – I don’t know if it did before this!). The light switch broke. But its all fixed now and in place ready for the engine to be started.
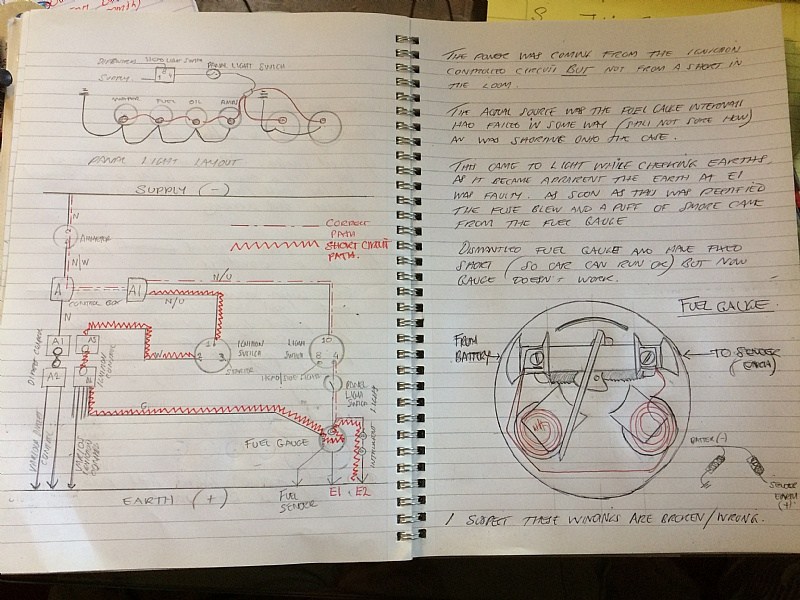
Notes on the very confusing short.
DAYS 162 to 190 (9th August to 6th September 2017)
Checked valves etc and found that the superb engine builder had installed the oil pump/distributor drive 180 degrees out. No option but to remove the sump and fix this. I took the opportunity to check the oil pump for wear and all is well. Set valves and did a compression test. After a little reluctance (stuck rings?) it all came up to a very healthy 180 to 185 psi across all four cylinders. Further checks indicated no spark but a little fiddling (not sure what I did) cured this. Something to do with the points!
Filled the cooling system and encountered an odd problem with the thermostat housing which is not flat on the head and appears to be cracked. I suspect I will need to revisit this problem later as it holds water cold but I doubt it will when it gets hot.
A test indicated it will fire, but both carbs had a petrol leak (from the main jet seals). Oil pressure came up under sustained cranking.
Painted the prop shaft. Cleaned, welded and painted the exhaust. This had suffered storage corrosion at the lowest point along six feet or so of its length. The front box is full of loose rust – not sure how long this exhaust will last!!
Altered the dynamo loom to take heat shielding and put this in place. Fitted the prop and gear stick. Then replaced and/or cleaned and painted all the exhaust mountings. All that needed doing now prior to starting the engine was putting the exhaust on. This had been in one piece since it was removed in 1982 or 1983.
See photo.
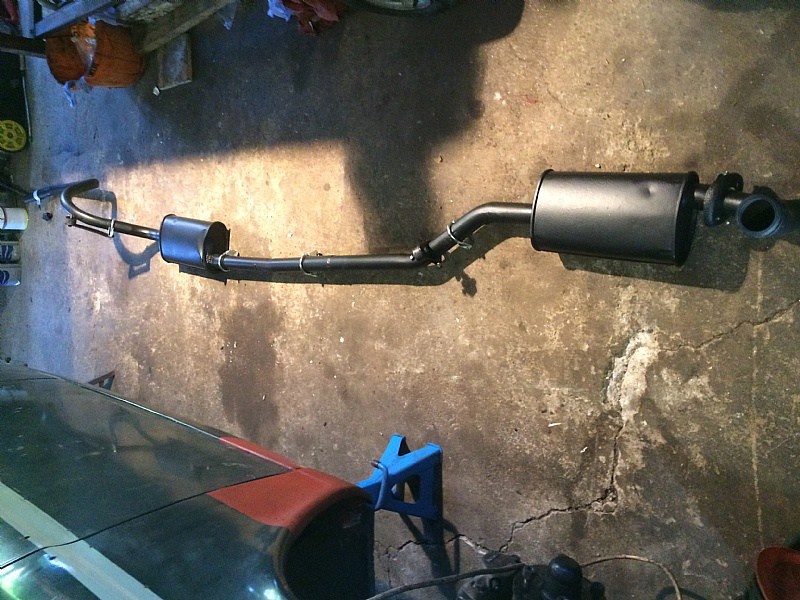
When this was removed I had access to a pit. It is many years since I put a whole system on a RWD car and had completely forgotten that is wasn’t a case of just attaching it to the engine and connecting up – it has to go over the axle SO there has to be lots of vertical clearance to do it whole. Most annoyingly one of the things in the way is the prop shaft! It has been off the car for 34 years and back on for 24 hours!!!
An attempt to separate the exhaust (when I moved house five years ago) ended in failure and some significant damage…so I need to think about the solution. Options are remove a shock and the prop OR try a more considered attempt to separate the rear section.
Watch this space.
DAY 191 (7th September 2017)
In the end not too hard. I didn’t think it would go on whole so I tried to separate the rear section. No dice. The rusted joint was stronger than the metal the pipes are made off. So I had another crack at putting it on whole and by coming in sideways and just moving the axle stands I managed to get it on. All bolted up and a new rear bracket fabricated (there was some old bodge on there before). Once on ..well why not try it???
https://youtu.be/HS17Cmpo54Y
Well it runs! And not too badly either. It always did have quite a distinctive tone. It needs oil in the gearbox and it looks like a carb refurb and fuel pump refurb too (all three are leaking). The water issue (thermo housing) is also going to be an issue. But all solvable. Clutch and brakes next. The fuel tank and pipework needs checking and repairing too.
DAY 193 (9th September 2017)
Fitted new Clutch Master Cylinder which was carefully wrapped in wax paper in the 1980’s. The whole thing was coated in wax including the inside. I fitted it (single-handed with some difficulty, as the nuts aren’t captive).
Day 194 (10th September 2017)
Filled it with fluid and left it to percolate. Unfortunately it appeared to be blocked (with wax?). However, after I left it disconnected for an afternoon it all leaked out (i.e. blockage cleared). I then managed to bleed it single-handedly to the point that I can now engage gears and it ‘pulls away’ (not literally – it’s on axle stands). Filled the gearbox with 20/40.
Day 195 (11th September 2017)
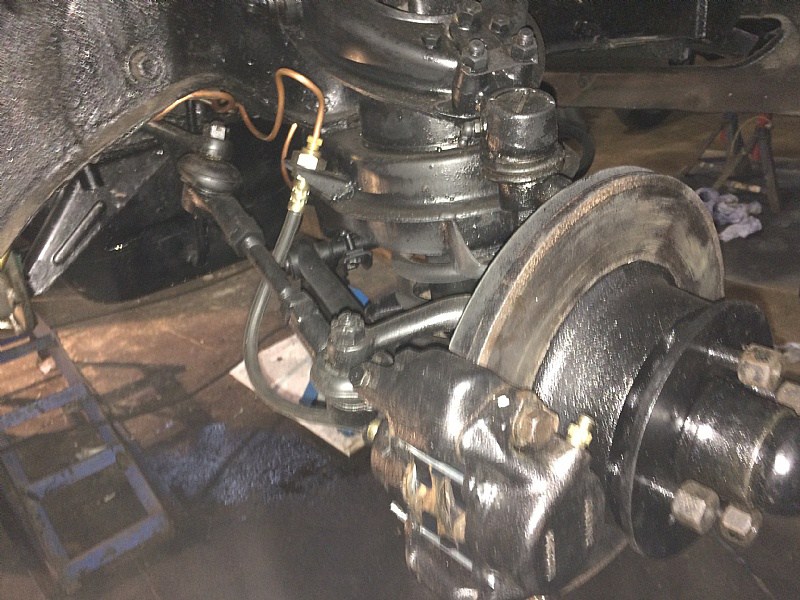
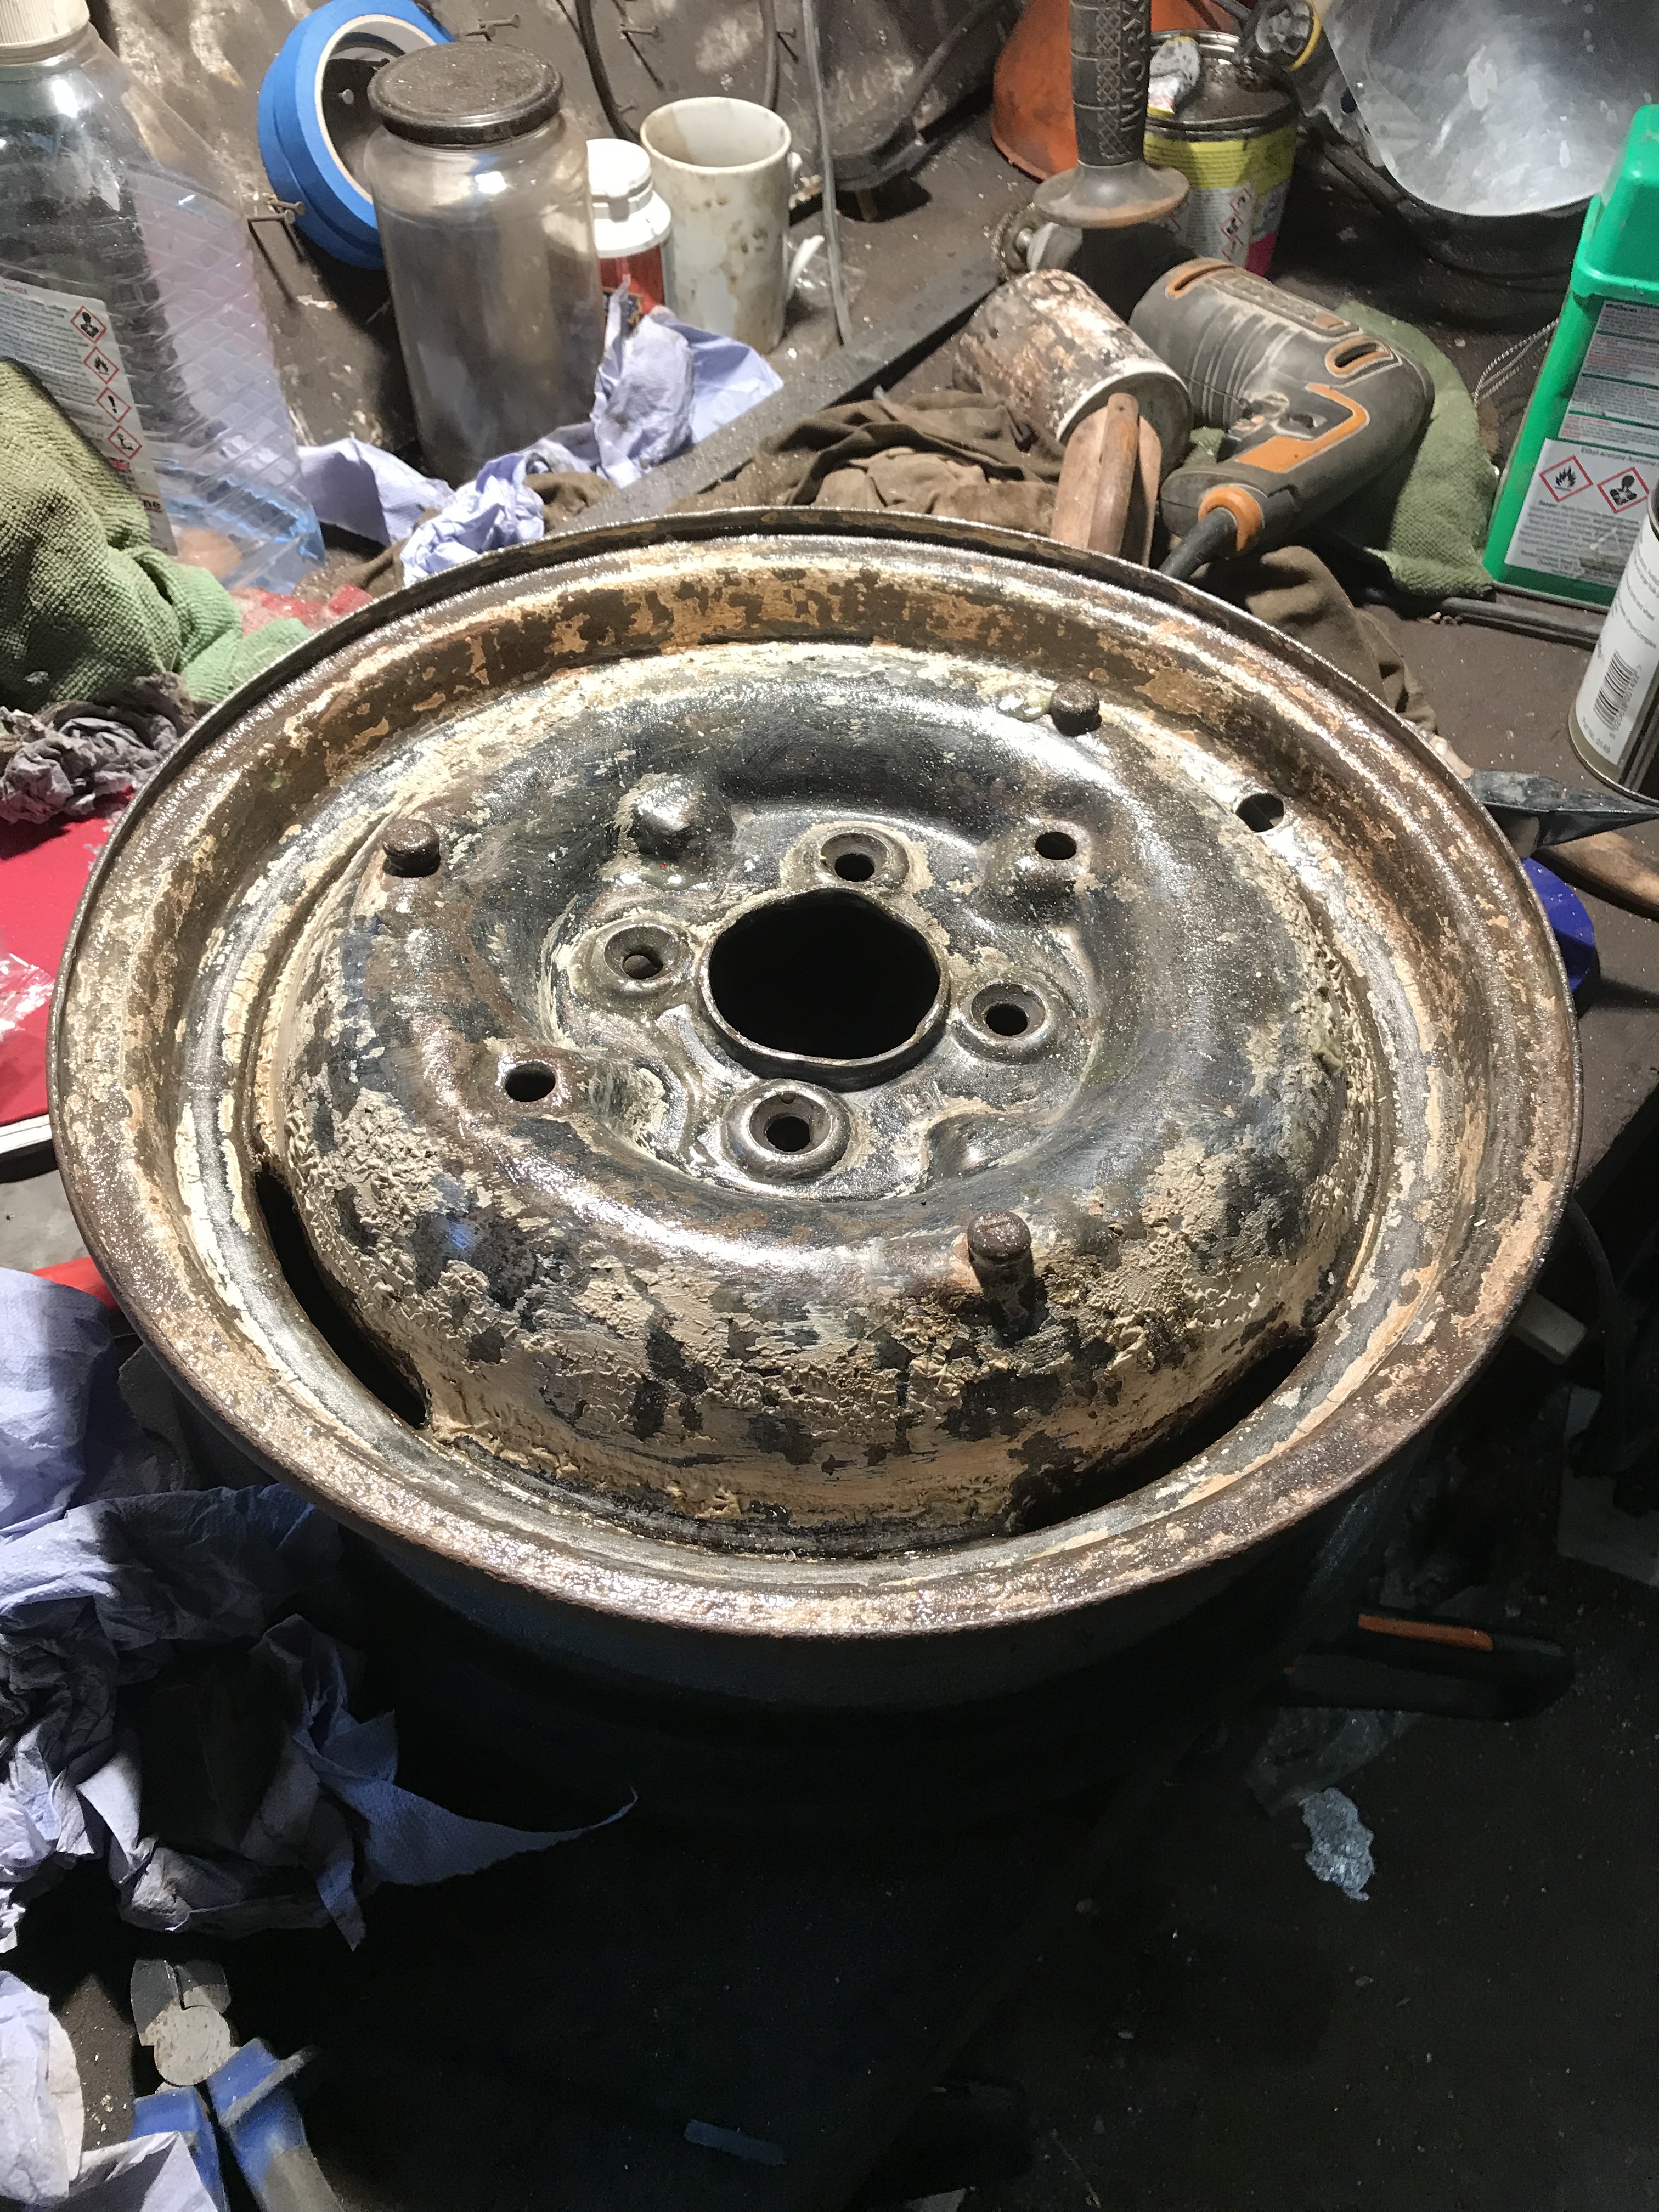
Topped up the steering box and replaced oil in the rear axle. Both surprisingly painless jobs. Started work on the brakes with the nearside rear. In pretty good nick (see photos). I hope I can get away with just replacing seals etc.

Not sure what I will find inside that wheel cylinder
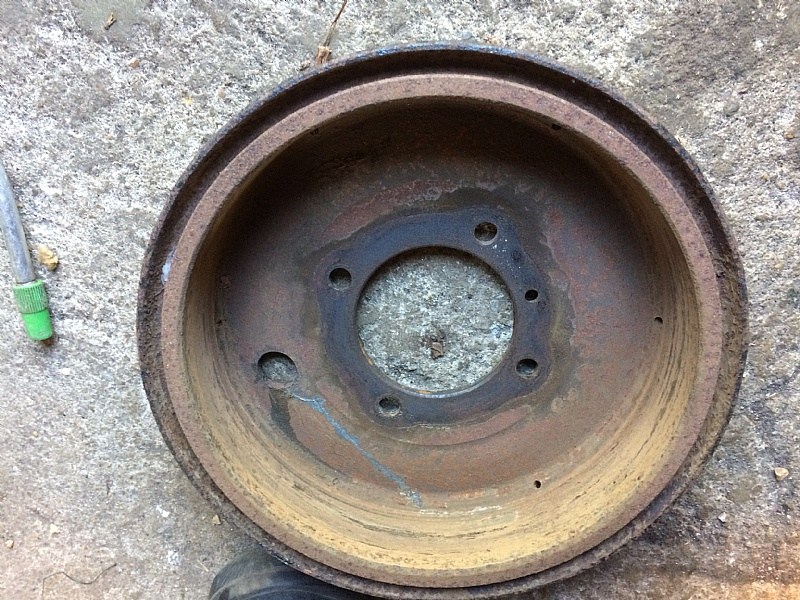
I reckon this will scrub up OK.
Day 196 to 250 (12th September to 5th November 2017)
A long and pretty tedious process of cleaning and refurbishing the brakes front and back. I wanted to re-use as much as I could, so replaced all the seals on the rear and the pistons and seals on the front and new master cylinder/hoses/pipes all round. One sentence to explain it, six weeks to do it all!
It’s now all bled, so I have left it to settle before doing it again and to allow any leaks or other problems to show themselves.
I plan to grease everything on the underside and install the new fuel line before dropping in back to the ground and seeing if she will roll (and stop!).
Here are the new brakes….
Master cylinder and four way splitter/brake light switch.
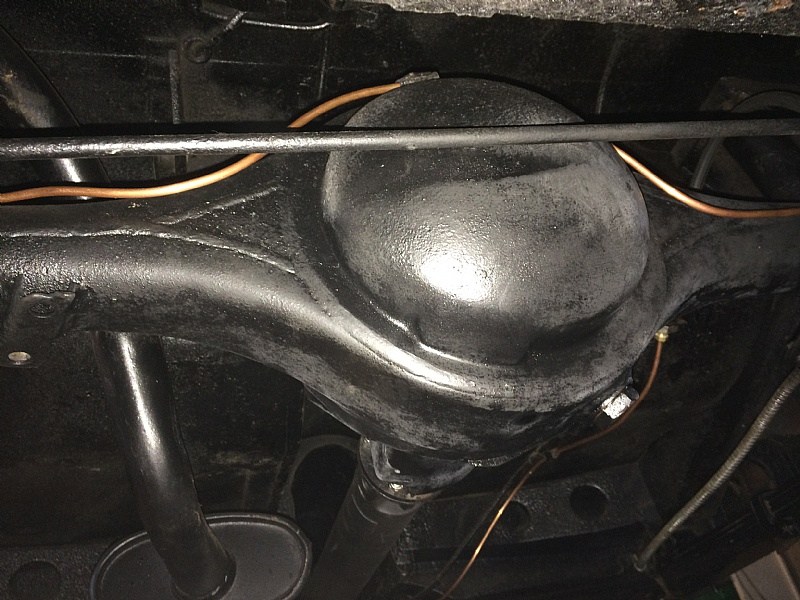
Pipework over rear axle

Nearside rear. Note repaired drum (yeah I dropped it) and what looks like rust coming back (although it may be the light!)

Here is the offside rear. Rear splitter and handbrake (greased and adjusted).

Near side front (scene of major fluid leak due to someone leaving the pipe connector finger tight). No, I haven’t had the discs skimmed. I have some hardly worn, but very old, pads I Intend to use while it rolls around the workshop/drive and then replace with decent when its ready for the road (which could be months away). I will assess disc quality then.
Offside front. Looking at this I think the ‘rust’ is actually a reflection of the the light.
Assuming there are no ongoing problems with the brakes; that’s another mile stone reached.
DAY 251 to 259 (6th to 14th November 2017)
Brakes bled, leaks fixed, permanent fuel line in, all grease nipples suitably attended to..so time to go.
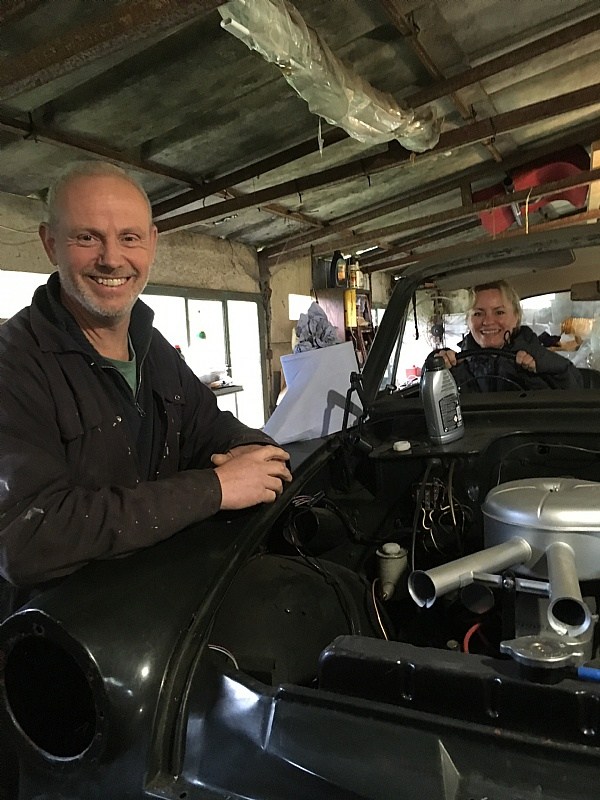
Happy owner and brake bleeding assistant (odd to see oneself ageing – yes that was me leaning against the Orange Avenger in 1982, then in the Rapier in 1989 and here in 2017).
And here we go.. First time under its own power

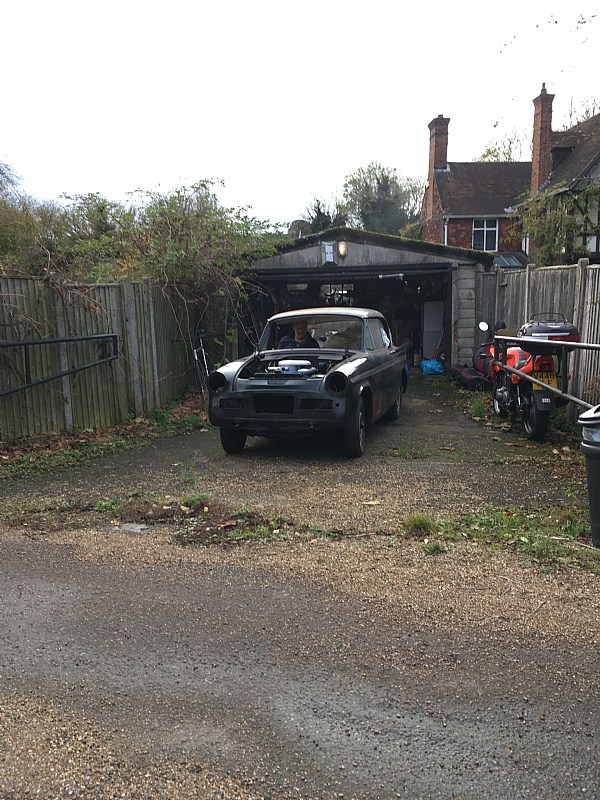
Nice for the old girl to see daylight at last. Is sitting nice on the springs (they haven’t been compressed for 34 years).

They don’t build ’em like that anymore do they? The wide angle lens on a modern iphone compliments the Rapier’s 1950’s styling.
On with work. Much to do on niggles, engine bay ancillaries, paint, interior and body fittings/trim. It’s getting cold in the garage now too.
DAY 260 to 287 (15th November to 12 December 2017)
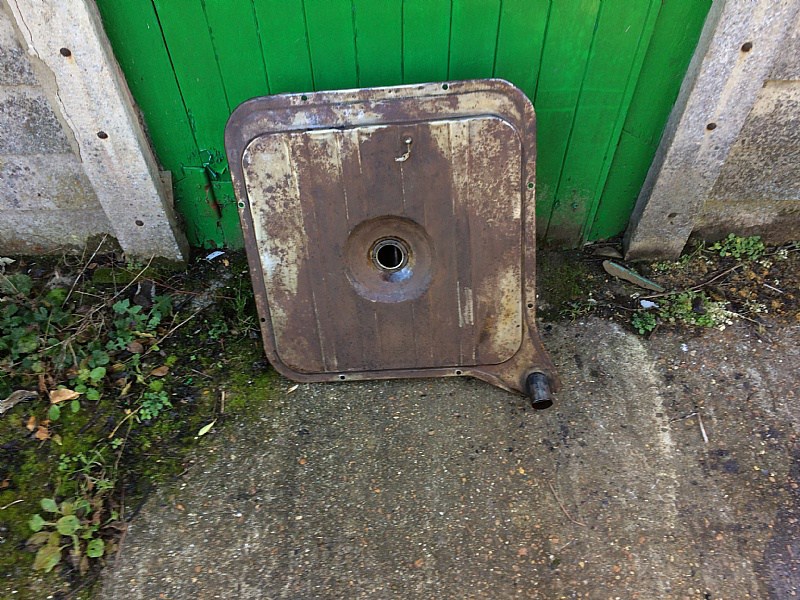
This started with the tank coming off for the first time ever (to my knowledge) it looked to be good inside and out with just a bit of petrol gum and rust spots on the bottom and light surface rust here and there. The sender unit looked good and seems to work.
The outside was partially undersealed (possibly by me back in the 1980’s – but see ad. from 1963!) but while not getting worse had sealed on existing rust spots. In the end all the underseal got scraped off, the whole lot was wire brushed then rust proofed, primed and painted in black. I filled the tank with cider vinegar (I happened to have several gallons as a result of a failed home brew experiment back in 2013) and left it for a week.
I used that time to look at the long pedal on the brake. This is now much improved by the replacement of the new service part seal on the hand brake piston which was too tight in the wheel cylinder. I fitted a new spring to the pedal (sourced from an Imprezta waste gate!) and used the existing spring on the clutch whose own spring was missing (there is much evidence of 1960’s or 70’s bodge work on the clutch with many missing or broken parts – the kind of thing you would expect from the ancestors of Kwik fit and their like).
The next job was the dynamo as the car wasn’t charging. I spent some time reacquainting myself with the function of the control box and did a bit of cleaning in there too. The upshot is it now charges. The Ammeter is very happy. Next job was the clattery valves. I reset them, and all were loose. It’s now much quieter. I ran the car for around 20 minutes and it settled down but is still unhappy on tick over, so the carbs need a closer look.

Dynamo parts ready to go back together. Impretza wastegate/brake pedal return spring also sneaked into this picture.
By the time this was all done the tank had stewed for a week. No leaks! I syphoned off the vinegar. Took the tank outside and poured in hot soapy water. I gave it a rigorous shake and then poured it out. I did this several times with clean hot water until it was coming out clean. Then I stuck the jet wash in from every conceivable orifice. I dried it with a fan heater, compressed air and a hairdryer until it was hot to the touch. When I was happy it was dry, I put about two pints of a 50/50 mix of petrol and 20/50 and shook vigorously. I repeated this six times, each time filtering the petrol oil mix back in though a paint filter. I got a fair amount of debris out and in the end the mix was coming out pretty well clean.
The tank got a bit of touching up and the sender and other bits and pieces went back on ready for the tank to be reinstalled. I intend to run a temporary fuel filter (although there is no provision for one in the fixed line from tank to carbs) to hopefully remove any debris I have not got already. The oil may cause a little smoke but there can’t be more than a cupful left in the tank coating the surfaces, so I’m not too worried.
The tank as it came off the car.
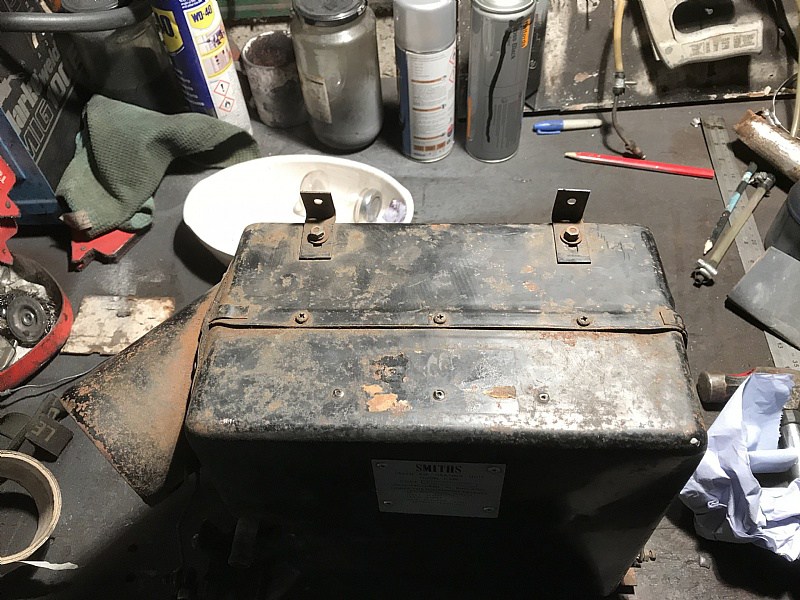
The top after a clean.
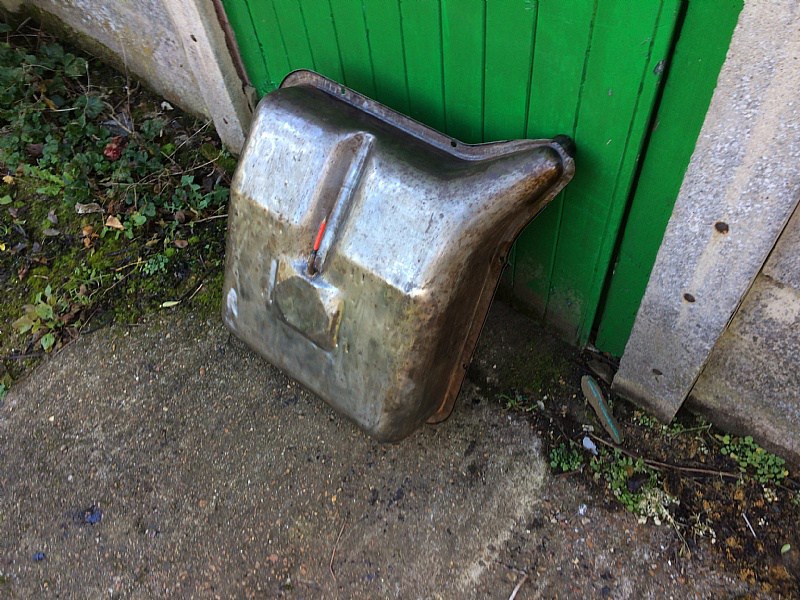
The bottom after underseal removal.
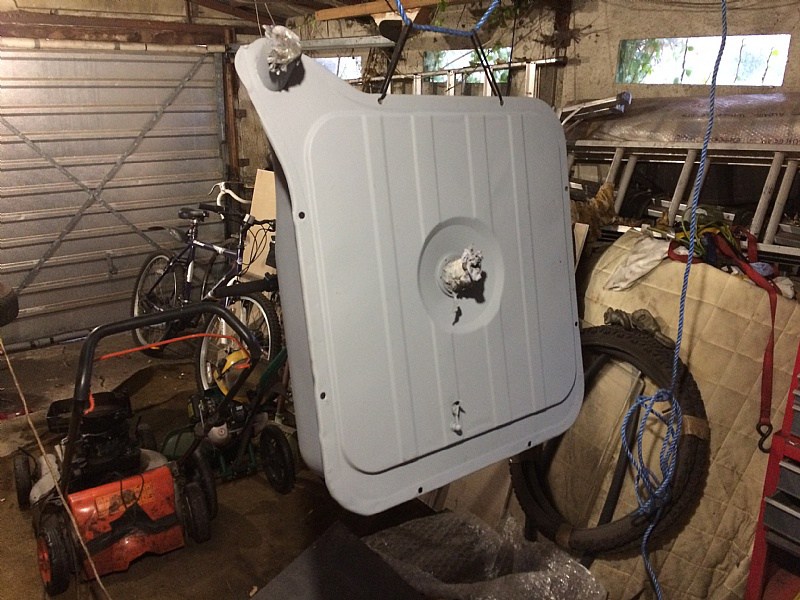
In primer.

And all done.

The inside. Not too bad after 57 years; 35 of them not moving.
DAY 288 to 311 (13th December to 5th January 2018)
How did I spend Christmas?
Cleaned up tank ancillaries (filler neck, breather etc) then prepped the underside of the boot floor and replaced the tank. I set up a temporary fuel filter arrangement and gave it four gallons – no leaks and no crap through. Good.
Next job was getting the thermostat housing welded and skimmed by the guys at Brands and with a new gasket courtesy of some gasket paper cut to size, put all that back together. It seems OK. I replaced the access panels in the boot and on the bell housing and fitted the boot and bonnet (for now).
Then onto the horns and wiper motor. Picture below shows the horns done and the wiper motor waiting for attention.

DAY 312 to 337 (6th to 31st January to 2018)
Next up was the heater and blower motor. These were stripped, tested and cleaned. The blower just needed cleaning and painting. The heater got a coat of black and some new foam and a couple of cable clips and it was ready to go back in with new hoses. It all seems to work, but doesn’t seem to generate much heat! To be fair the car is never running up to temperature and has no windscreen!
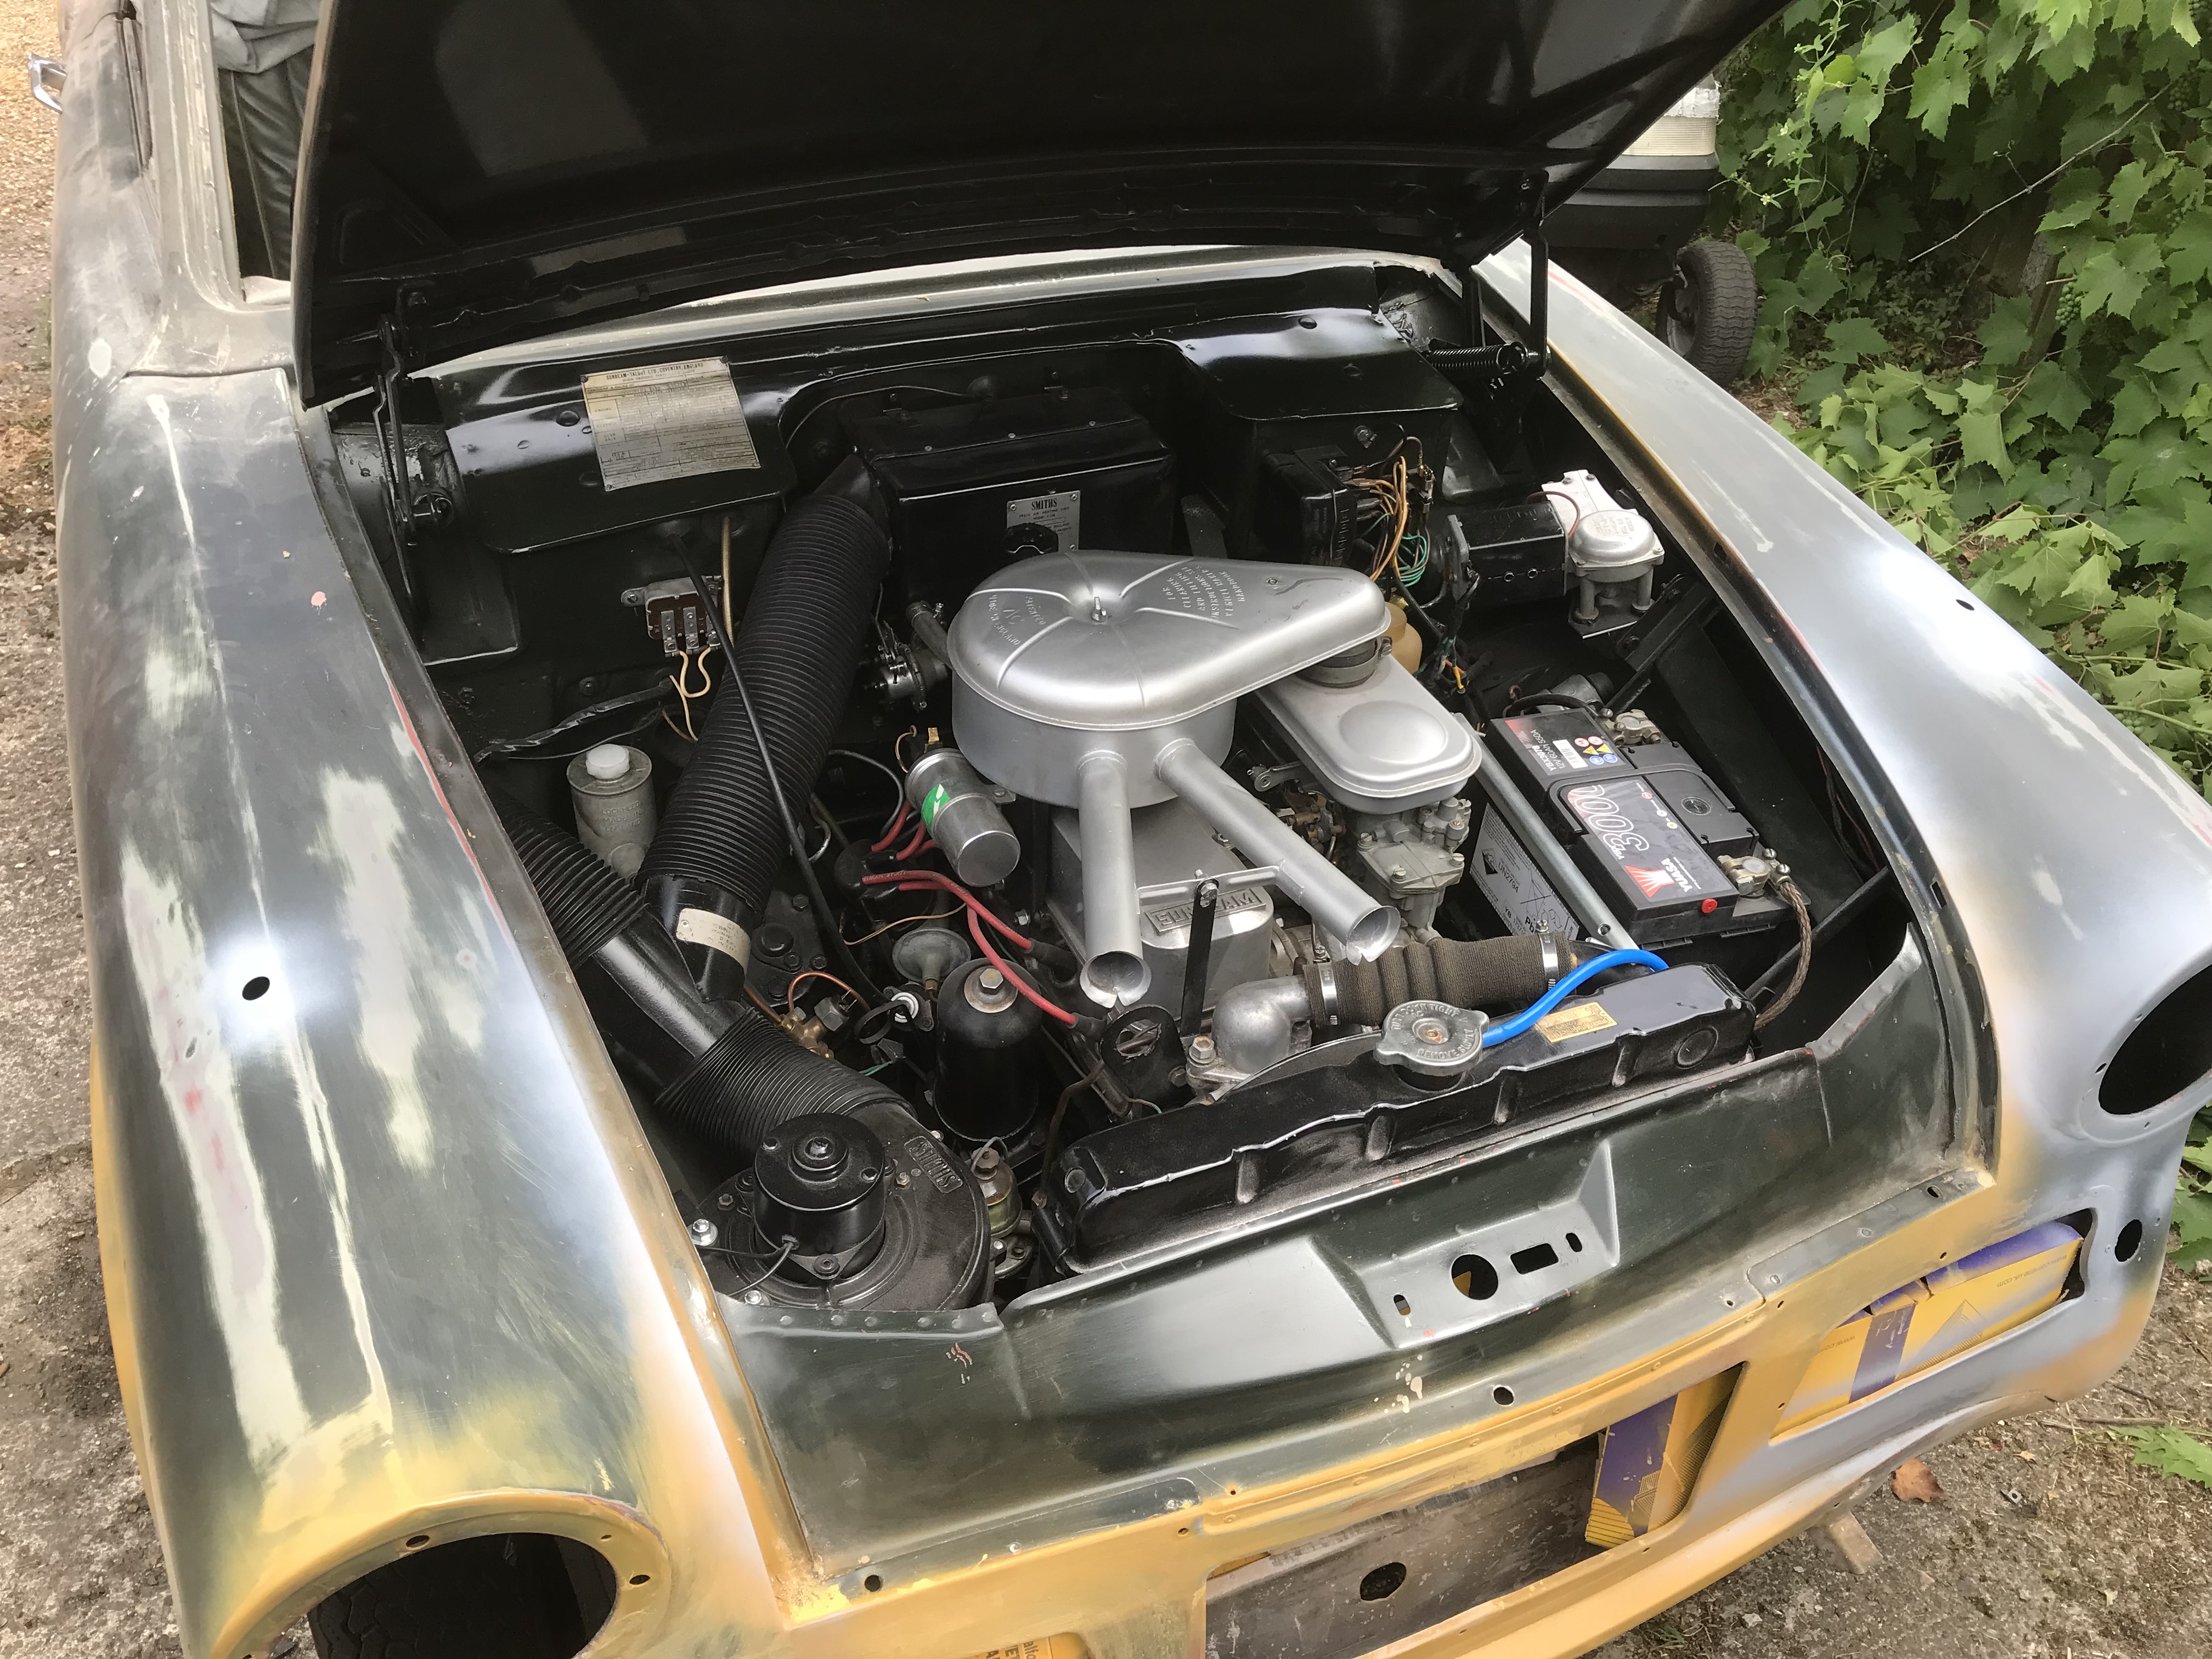
With all that lot in the under bonnet is pretty well done. Here is how she looks at this stage.

DAY 339 to 446 (2nd February to 20th May 2018)
Much of this time was lost to other commitments (welding most of a new body on to our very rusty Fiat Punto). Sunbeam jobs done included a new battery, carb removal and full rebuild, dynamo off and repainted, rad off and touched up, some repainting under the bonnet. One year in came and went (under the Fiat).
With the carbs back on she runs really sweet, smooth tickover and quick start/restart. Even has some power and spins the wheels!
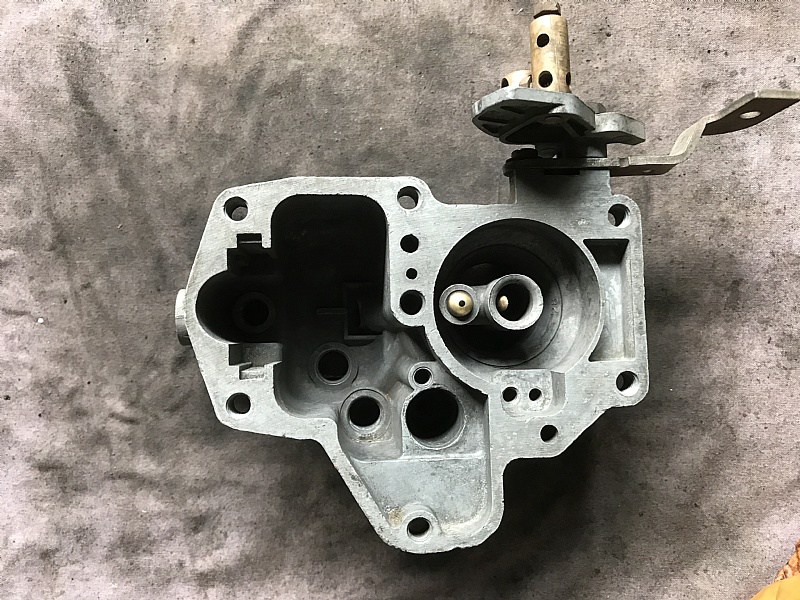
Below carb no2 before….

…..and after.
DAY 447 to 470 (21st May to 13th June 2018)
With some trepidation started rubbing down the paint. This proved to be quite soft and a 120 grit in a hand block got rid of 80% of the imperfections. I’m now onto more troublesome surface rust on the lower front and rear panels and sills. Next up dents. The doors, boot, bonnet, radiator and tank will all need to come off before final prepping for primer. My hope is to have the top coat finished by the end of the summer (Day 470 is Wednesday June 13th 2018).

Day 471 to Day 503 (14th June to 16th July 2018)
All of this time has been spent on the long and arduous process of prepping. All the rust has been located and treated. Only one tiny pinhole on the NS rear wing bottom, cut away and filled. The rest is just surface. Rubbed back and treated with Kurust.
All the dented areas have filled and primed at least once. For many this took numerous attempts to get right. The bonnet and front panel is done, now working on the rear of the front wings, where new panels were welded in back in the early 1980’s; badly, as it turns out. Much hammering, grinding and filling required to get all of the heat ripples out, It’s tempting to skimp here and say ‘ that will do’ but I know I will regret it. So much for ‘just getting back on the road’. Did I mention that deep down, I’m a perfectionist?

It’s going to look worse before it looks better! The engine bay is now getting a bit dusty despite my best efforts. Nice to take an occassional peak and compare this with the early pictures of it in red oxide primer – it helps keep the faith, with the body looking like a breakers yard car. Maybe I should have put the engine in afterwards like normal people do, BUT I didn’t really expect it to run so was ready to take it out again anyway. Never mind.
Day 503 to 580 (16th July to 1st October 2018)
A long process of repair, painting, repairing again. Always finding more dinks and marks.
Removed the boot and bonnet. Also removed both doors and stripped these down. Sanded everything back with 120, then 240. Filled any small imperfections (of which there were many) with stopper. Removed, the tank and radiator. Prepped and painted the area behind the grills in satin black (this how it was done at the factory, so the body colour wasn’t visible – more noticeable on lighter coloured cars (and missed by many/most restorers). Prepped the inside of the boot and the door frames.
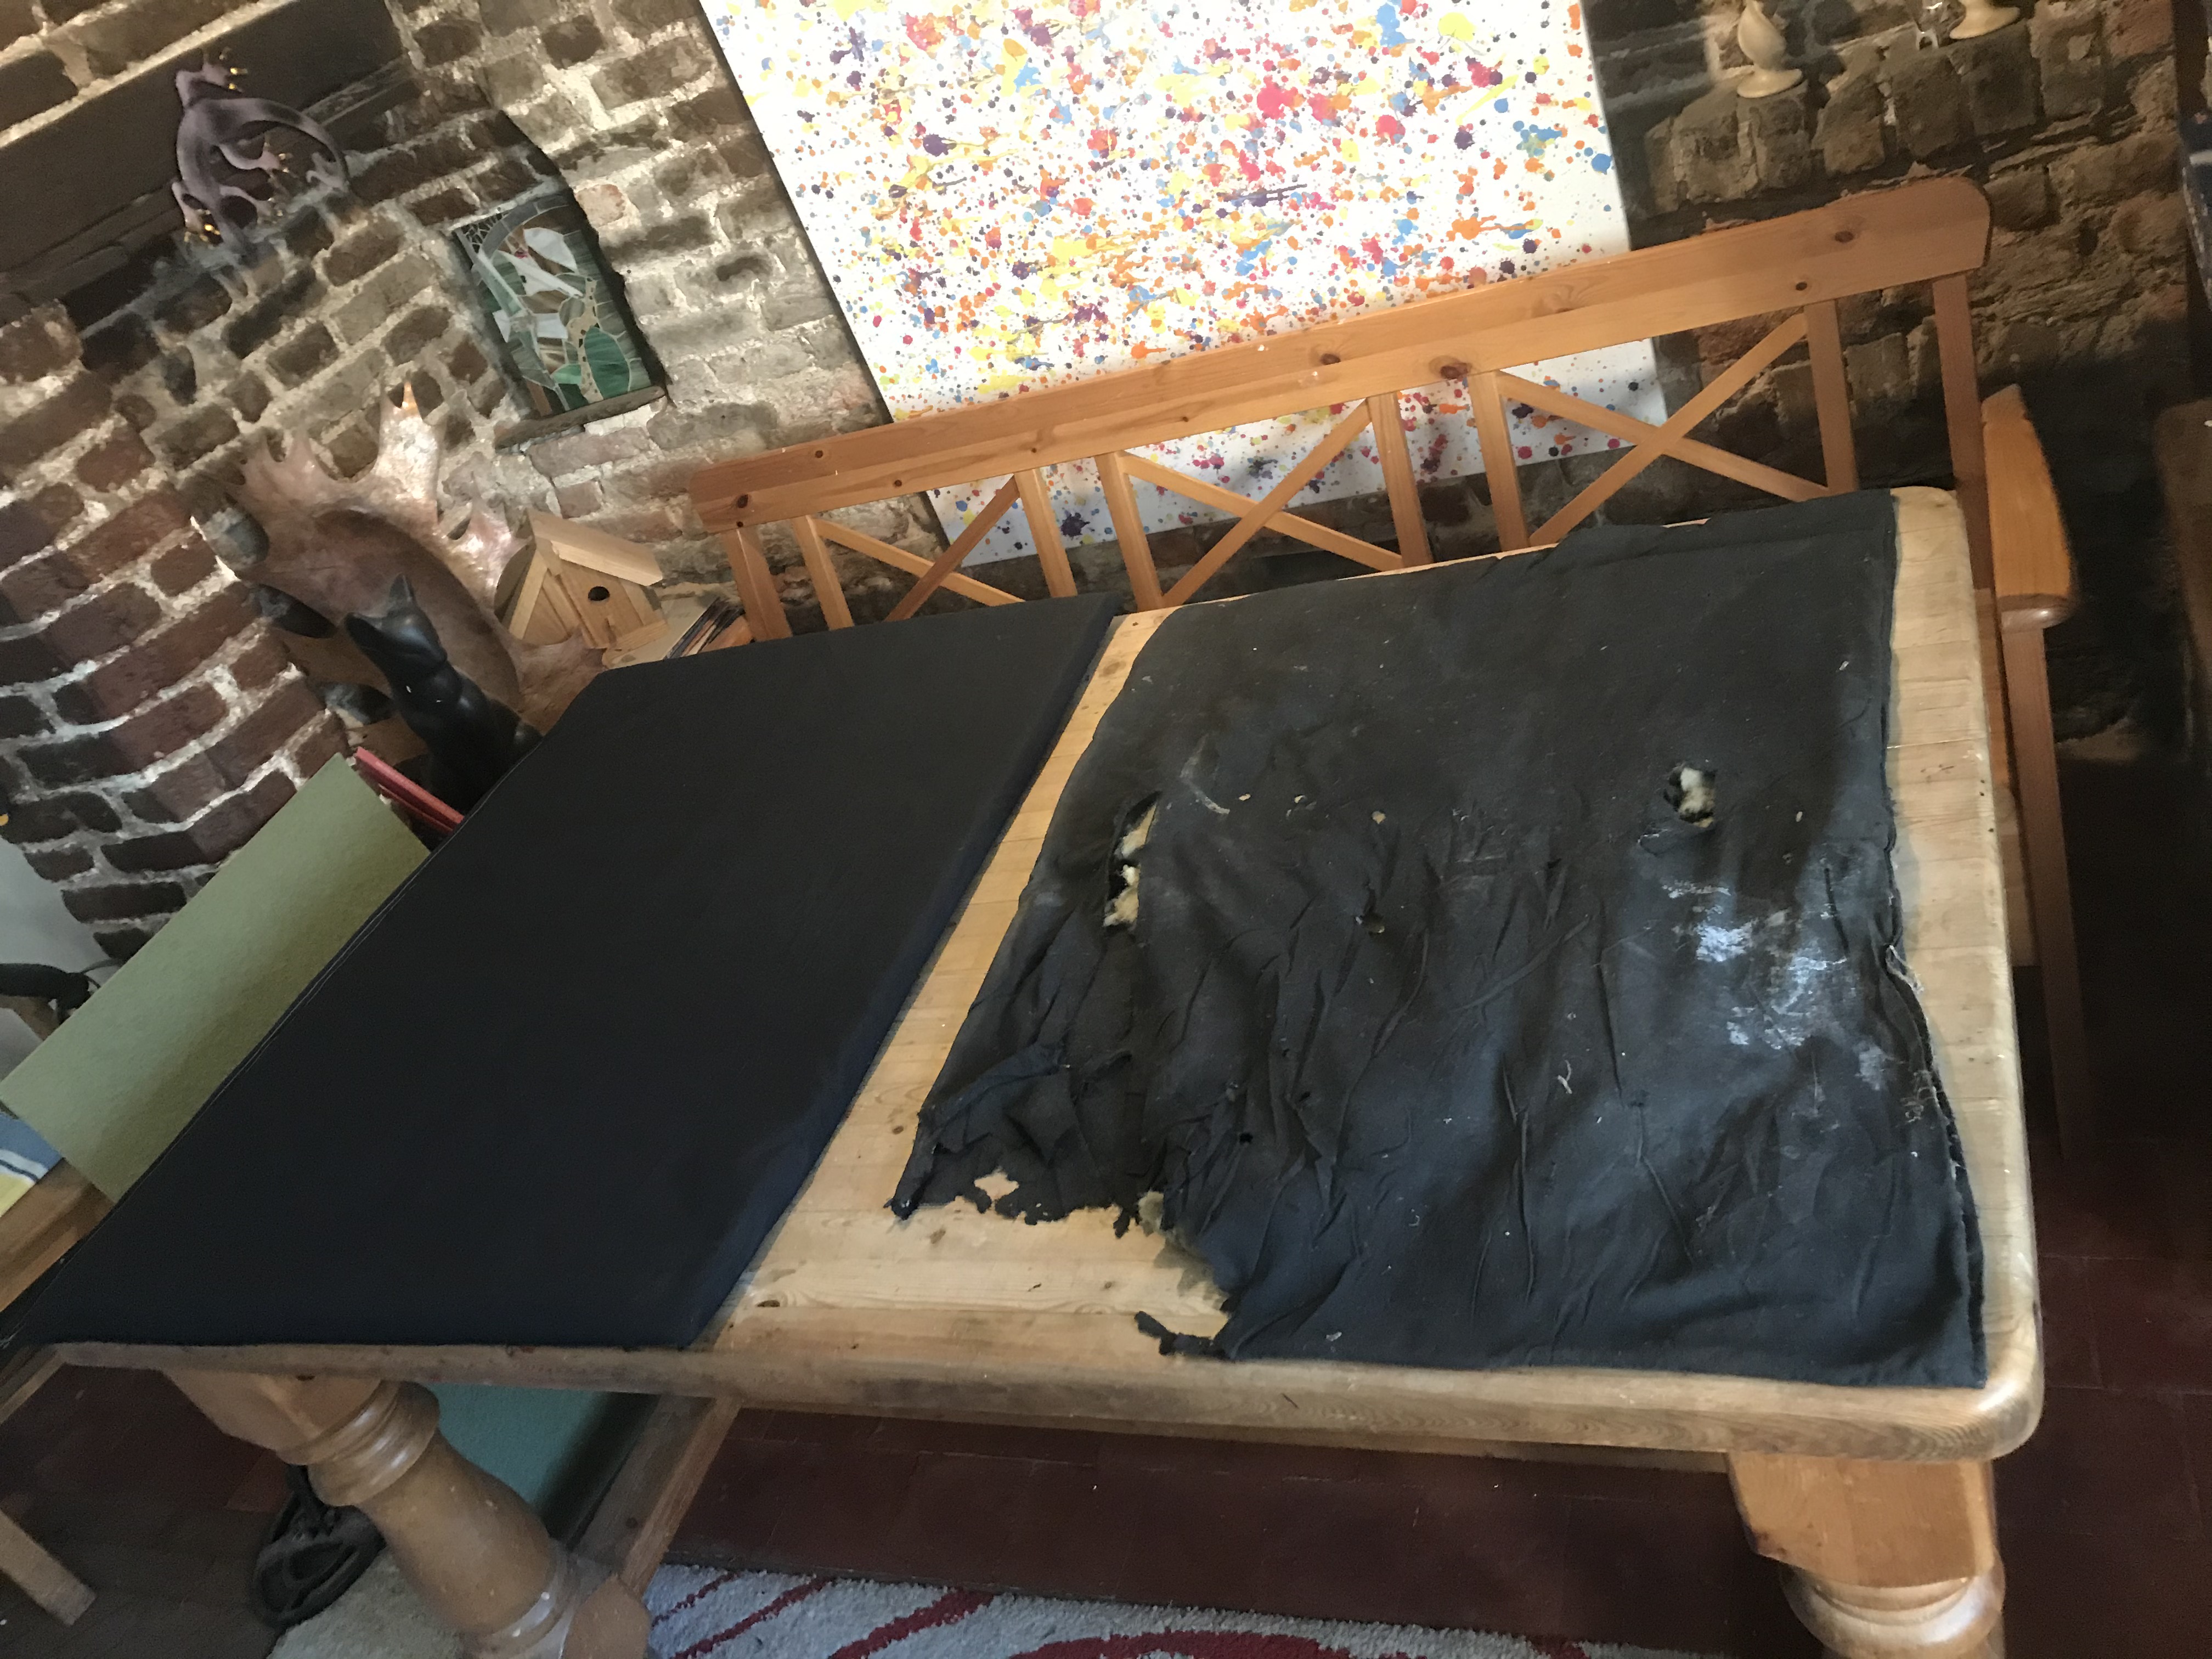
Part of this process was to remove all the window and door rubbers, all of which will need replacing. Also, while emptying the car noticed that the seat foam and the seat vinyl has had it (The foam is turning to dust and the vinyl splitting though old age) the back seat is a bit smelly too! On the way noticed the hand brake rubber was split and bought another at a pricey £25.00. The eBay man I bought it from had a fit when I observed this was expensive, as it turned out a piece of crap too.
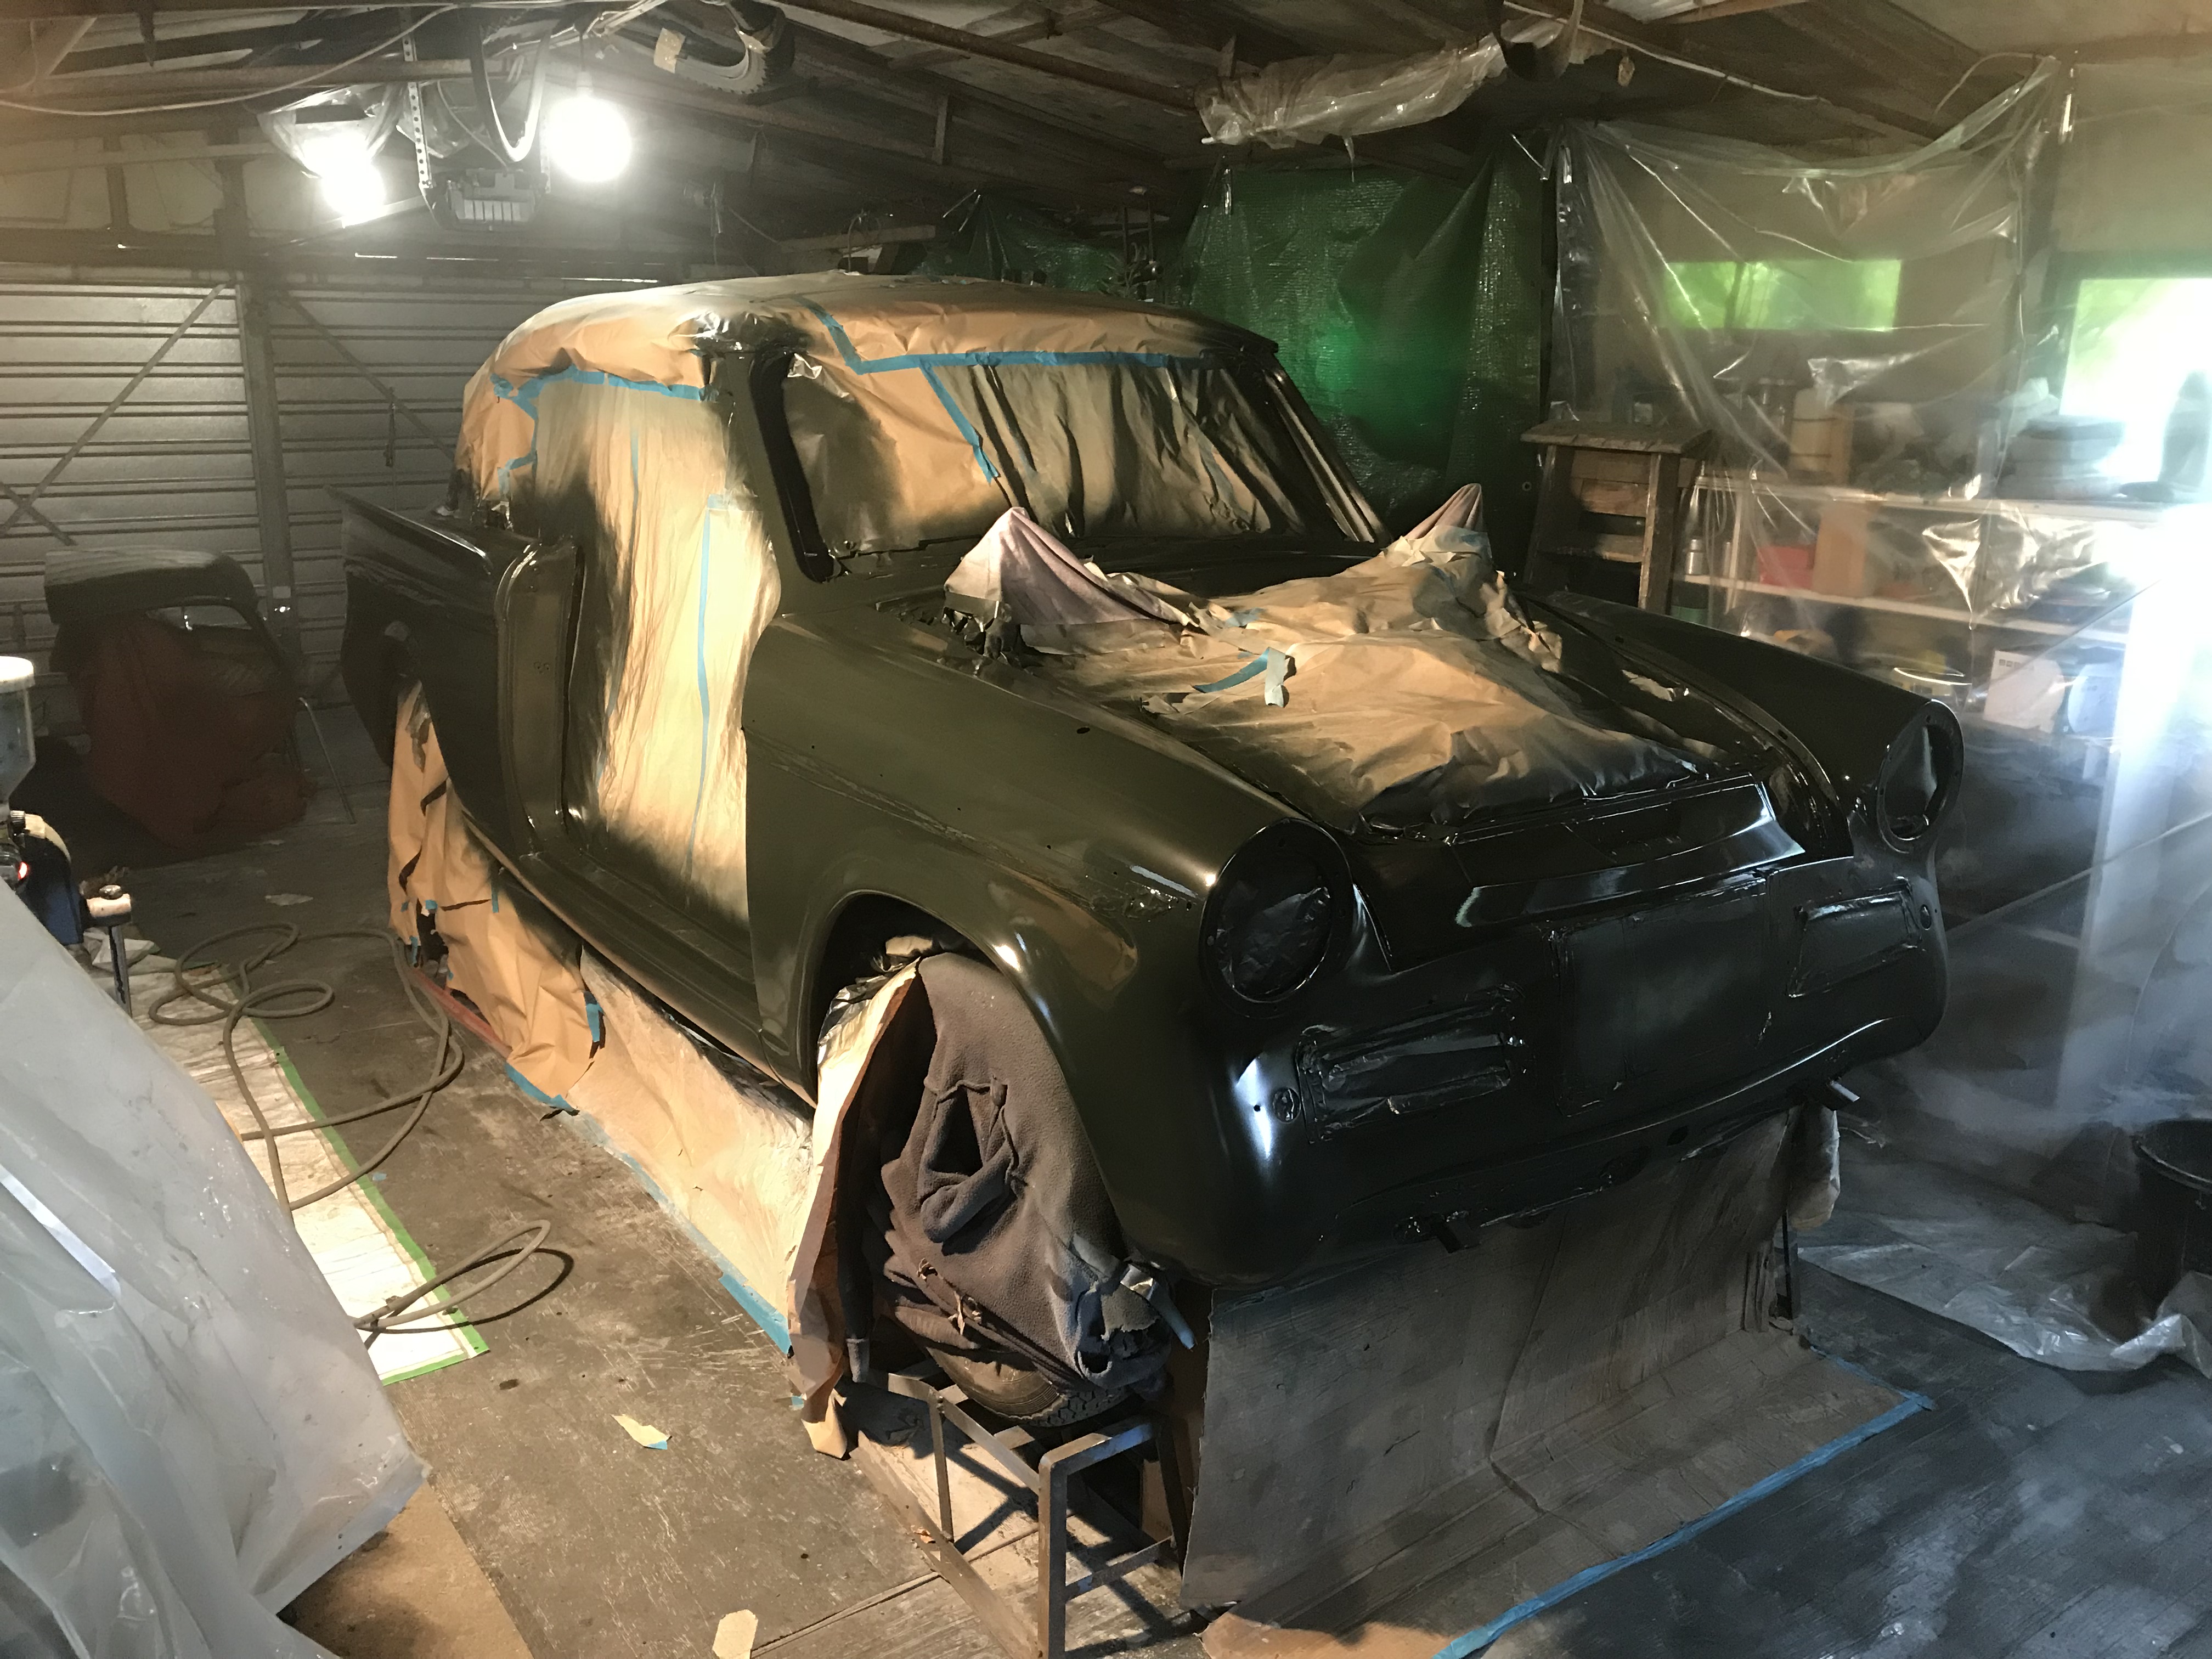
Put the car on ramps and masked it up. Cleaned the garage and hung plastic sheets to create a makeshift spray booth.
The car got three coats of P88 filler primer, although this proved to be a bit of nightmare as firstly my 24 litre compressor proved wholly inadequate, cutting out for half an hour or more after ten minutes use. Having purchased a 100 litre replacement, the crappy old spray gun I had been using (for the primer) broke. The fan adjuster sheared off. Moderately annoying.

Next up was another round of stopping small scratches and dents before wet flatting the primer with 600. Before doing the top coat on the roof, I took the car off the ramps. Washed everything down with clean water and dried. Just before I painted I ran over everything with a tack rag.
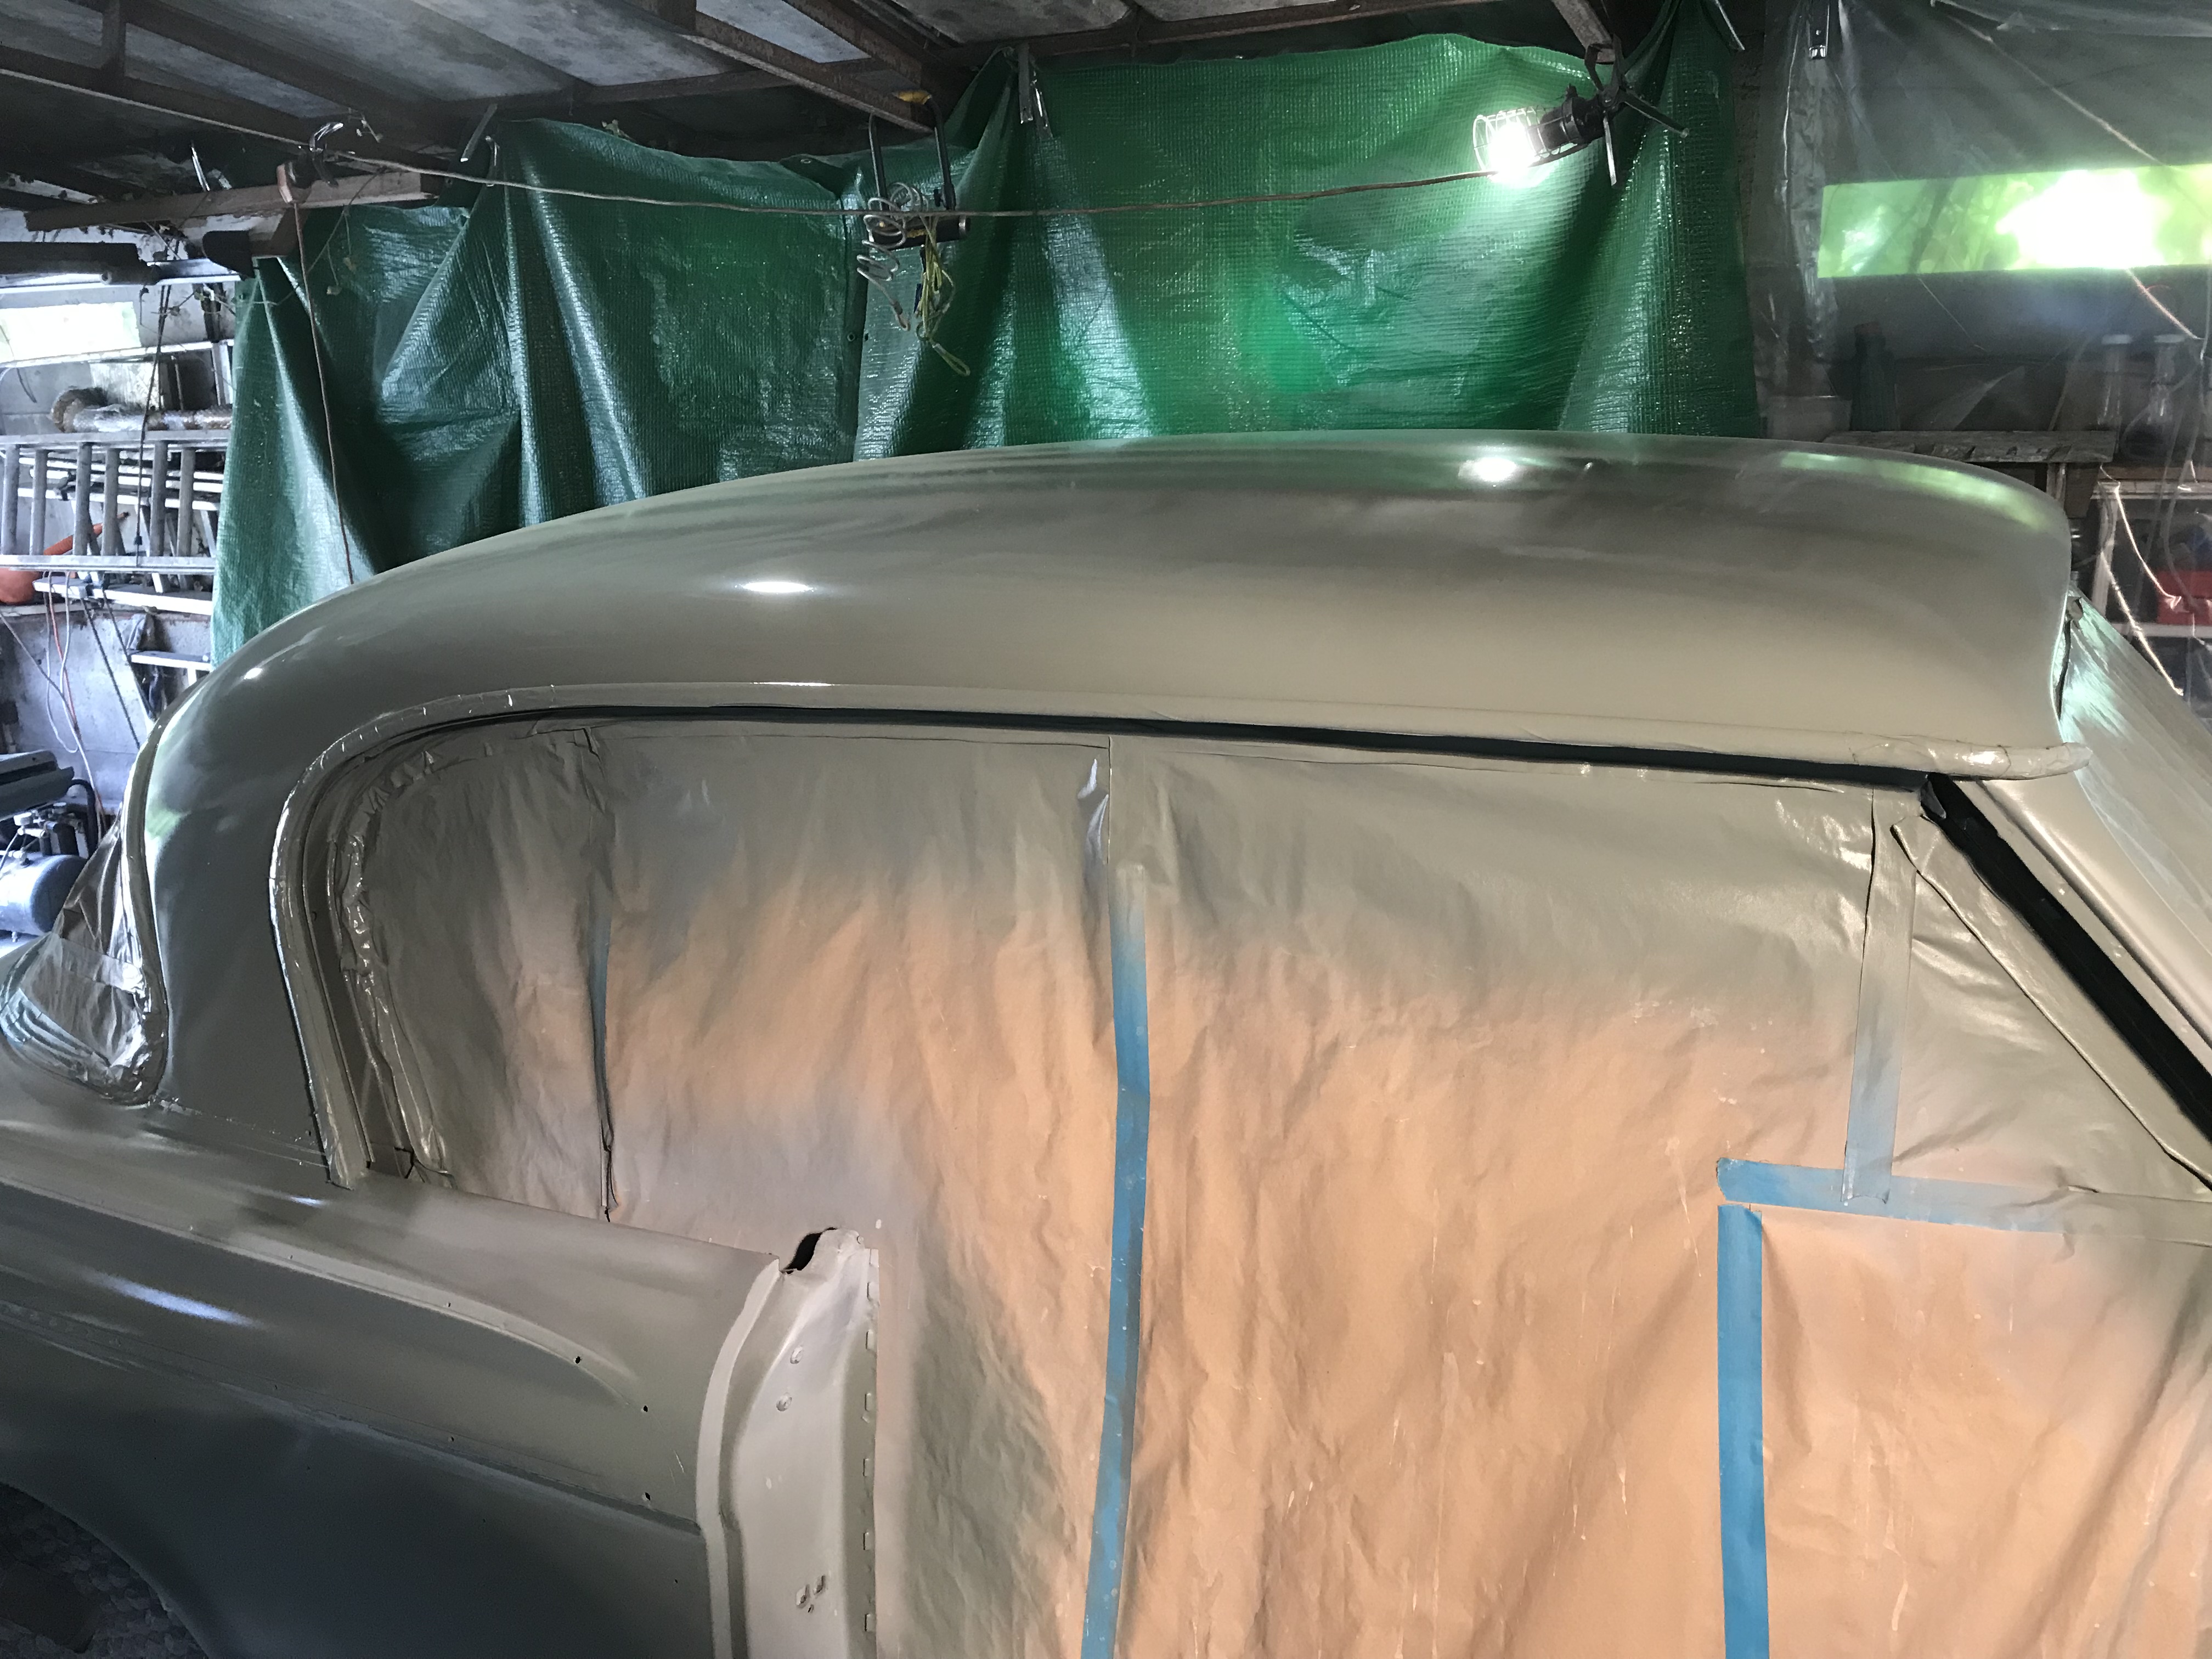
Now armed with a decent Sealey gun, I was quite pleased with the finish on the sage green…although the roof will need some flattening… well, it all will. Over the next few days I put the car back on the ramps, re-masked over the sage green (roof and side stripe) and did final prepping for the velvet green.
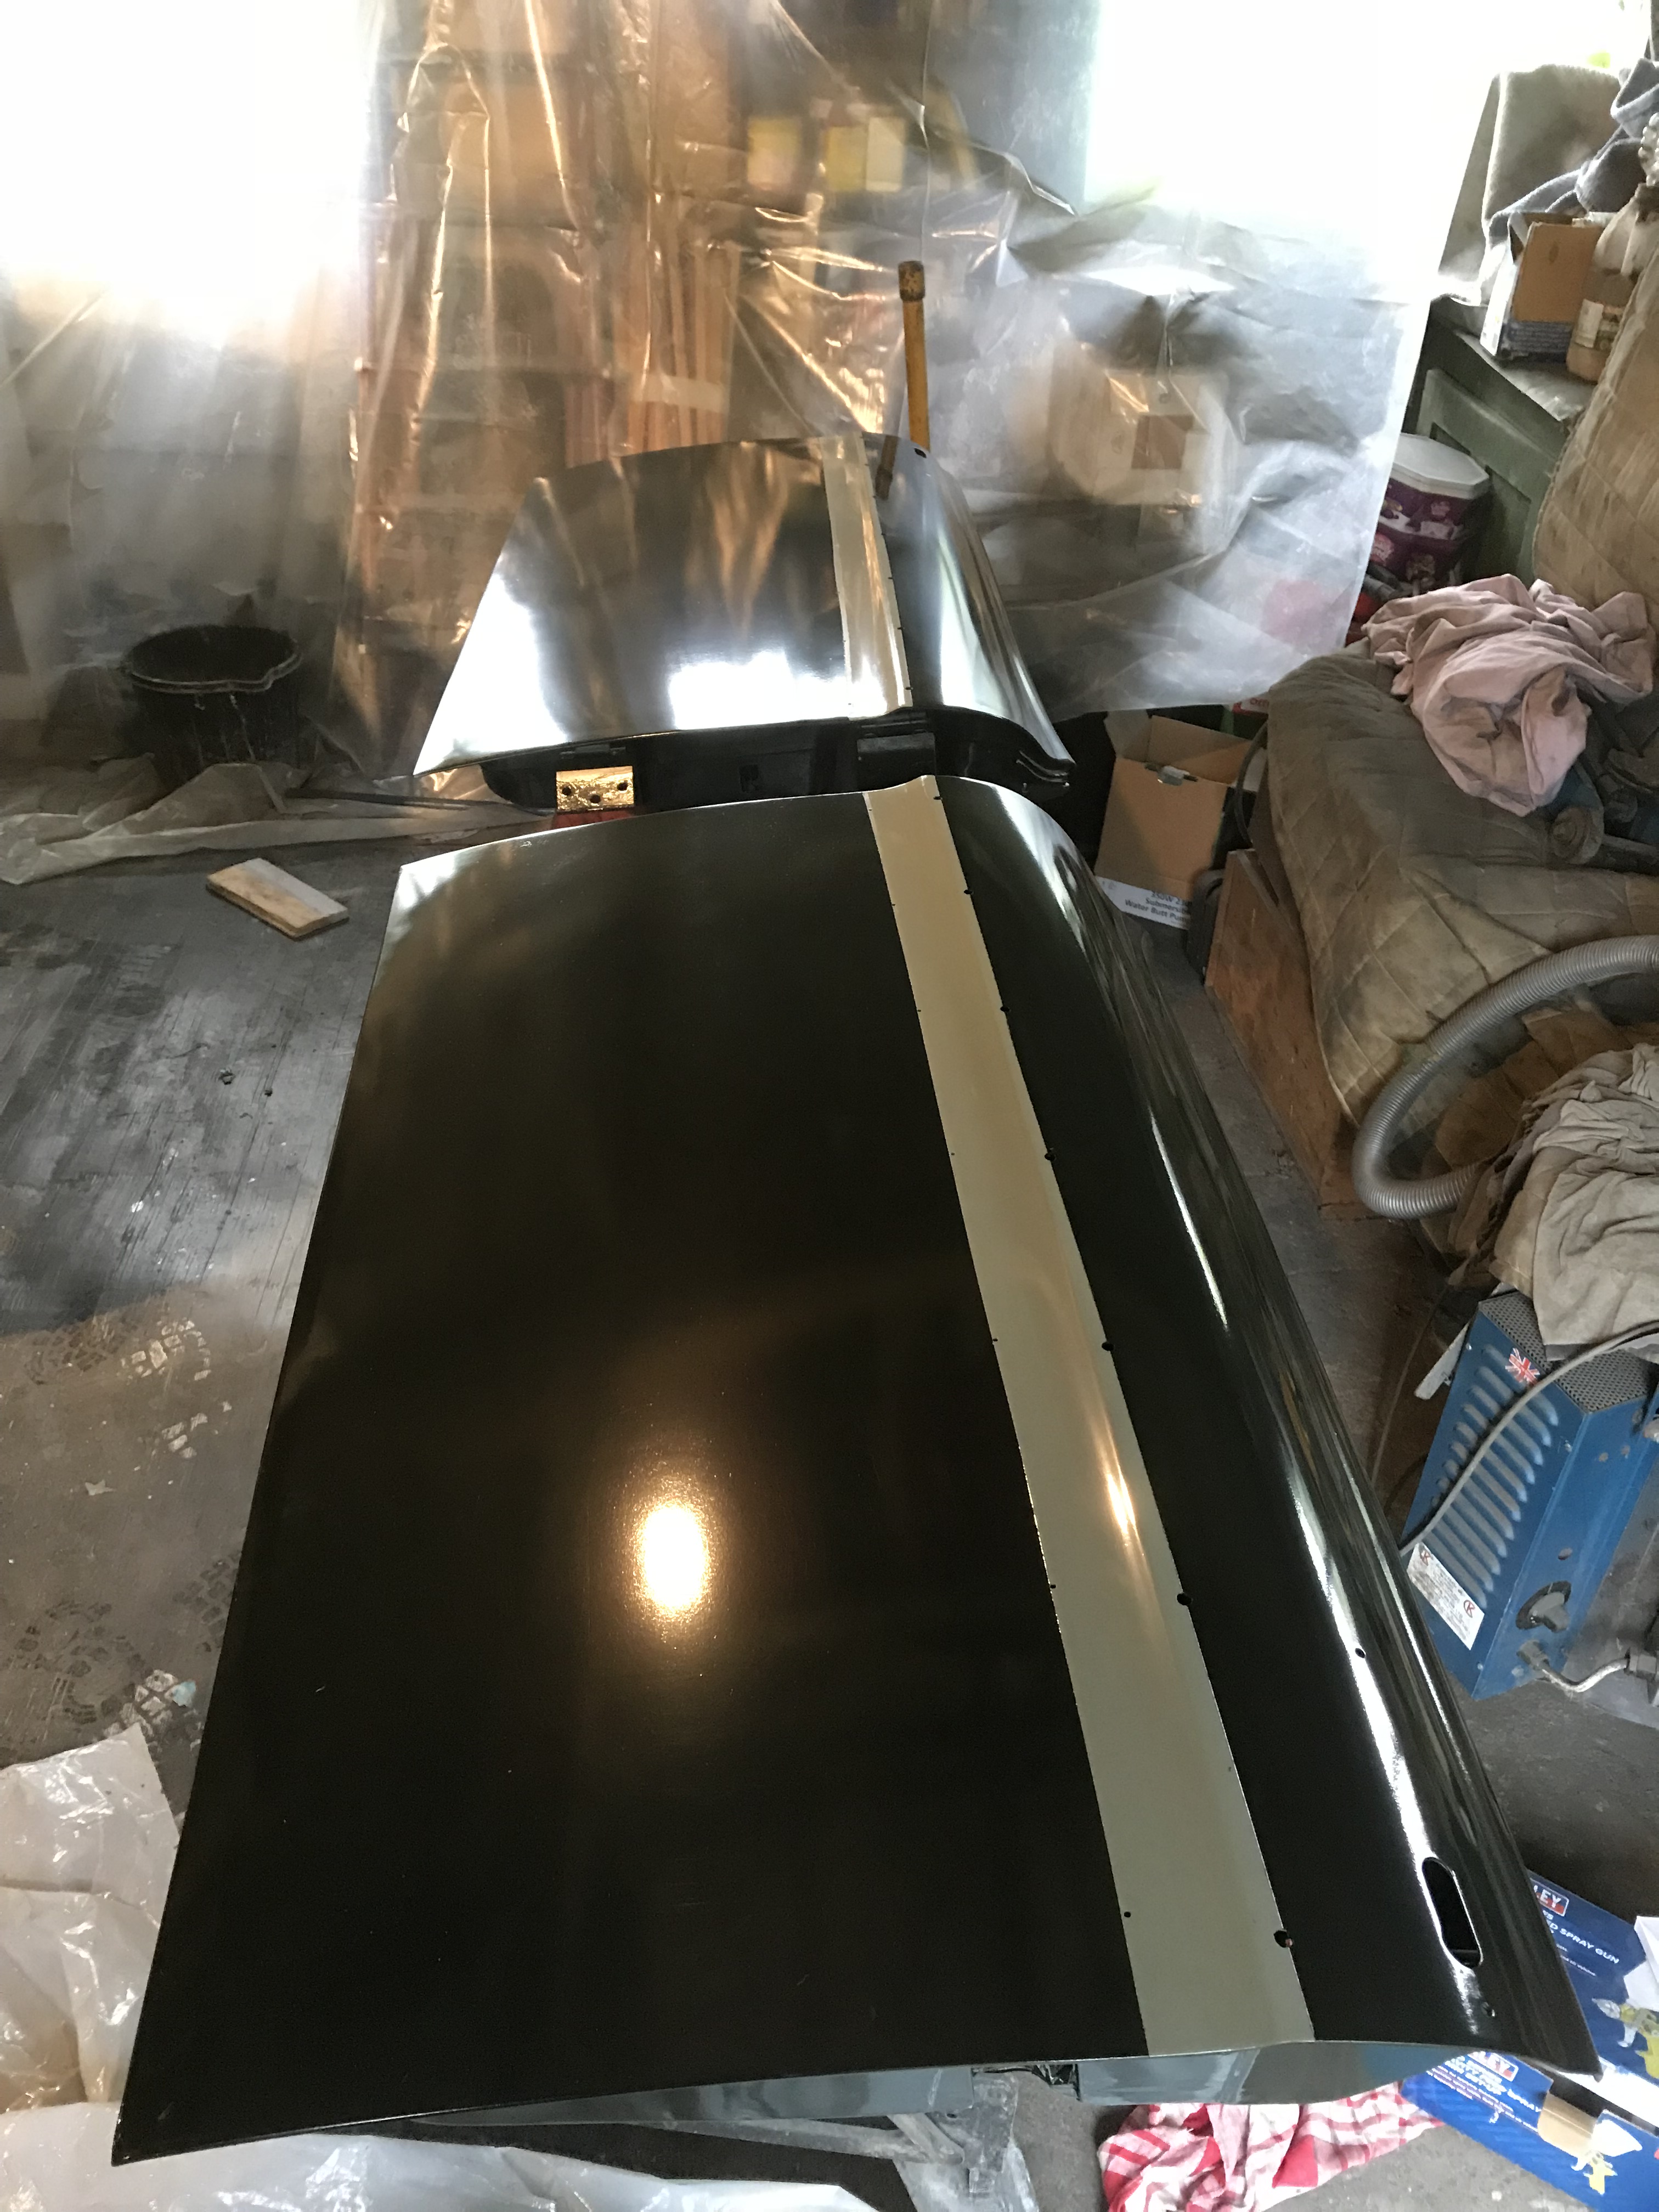
Painted the inside of the boot, bonnet and doors and also painted the rear inside trims, headlight eyebrows and a few other loose bits. The next day, did six coats of velvet green on the outside of the doors, bonnet and boot, the odd bits and all of the body.
Again, I’m quite pleased, but do have a few small runs and some orange peel to sort out.
Getting there though! All in it has had 6 litres of primer and 6 litres of velvet green top coat and 2 litres of sage green – that’s nearly three gallons of paint.

A nice boot lid!
After a day, I removed the masking and…

I think after this I will have to turn the car round – there are too many photos from this angle! Below – doors.
Day 581 to 623 (2nd October to 13th November 2018)
The first thing to do after the removing the masking was….nothing! The paint was so soft. After a week I tackled the many small runs by wet and drying them flat with a small block of wood and a 1500 grit. After two weeks started the long and laborious job of flattening it all down with a 1500 then a 2000 grit wet and dry, then rubbing compound, T-cut and finally polish. Although it looked good straight out of the gun, it was quite orange peely, so this entailed a lot of elbow grease and a lot of time. It took six weeks.
In between times I found a guy to do the seats. I thought through the whole fuel filter issue (do I or don’t I have one) and had a look at the chrome.
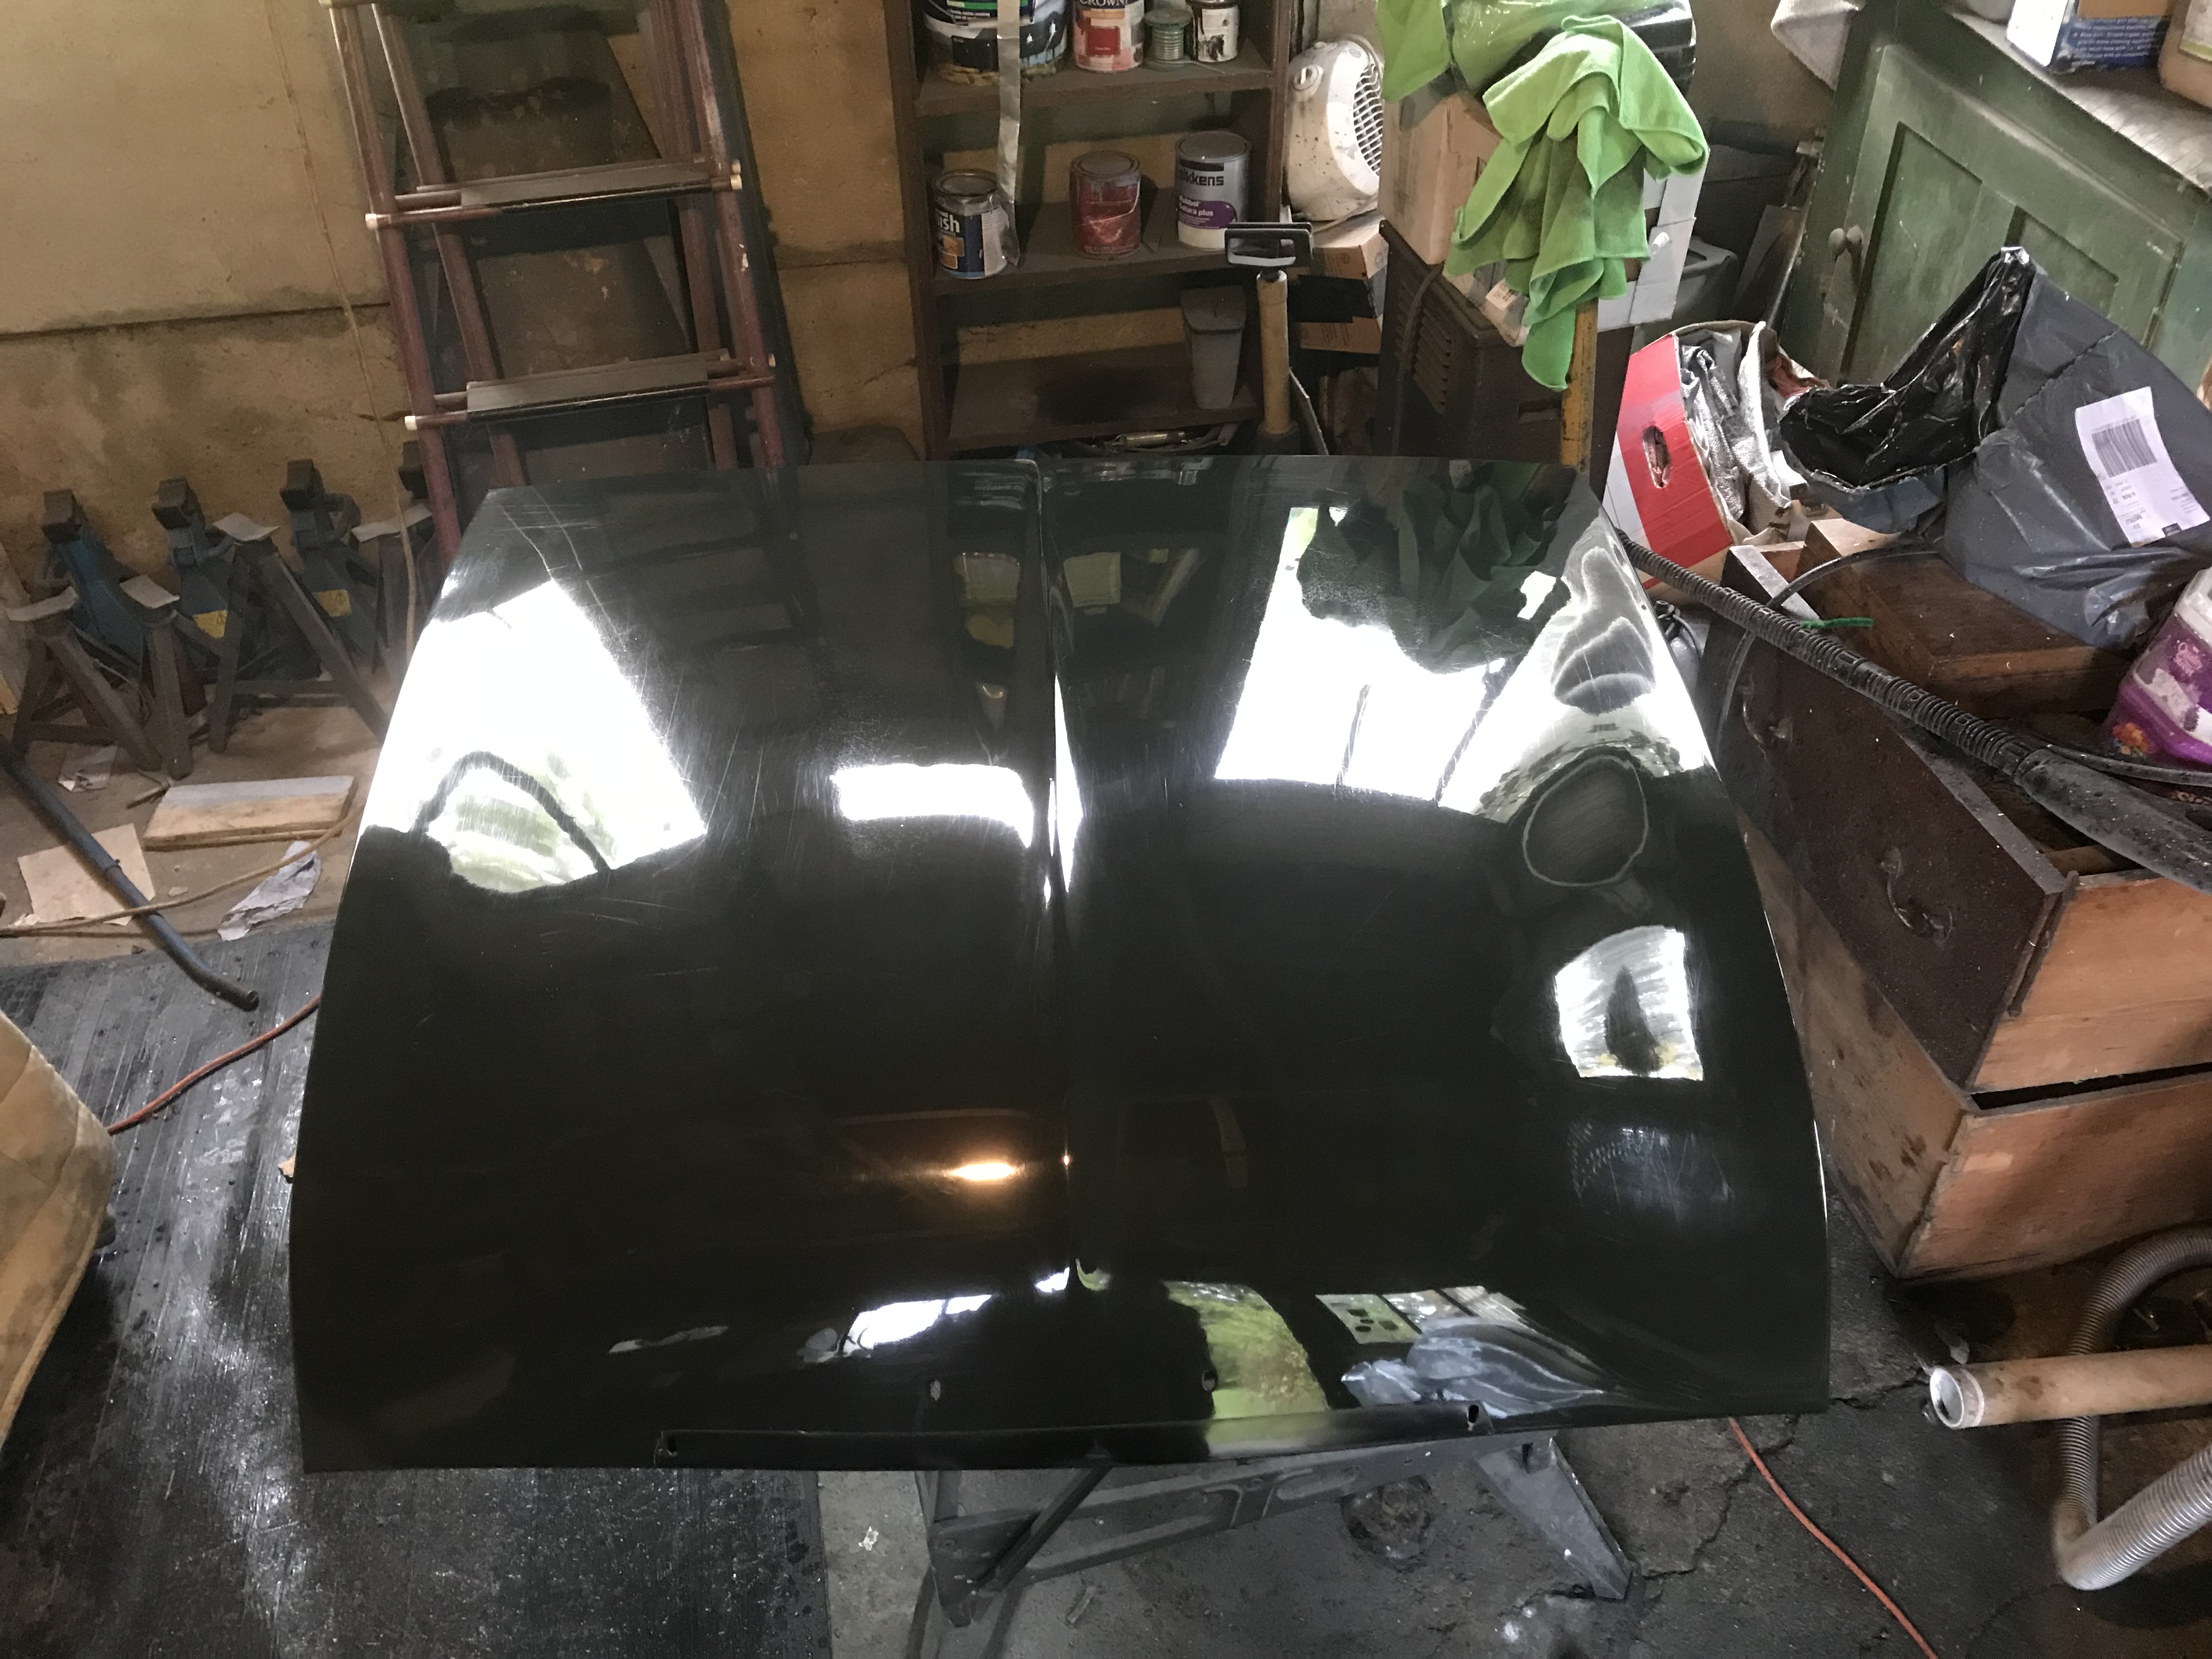
The bonnet after the finishing process. I’m please with the filling on the left hand front. This paint job isn’t perfect; its come through in a couple of places and suffered a few chips here and there. But for just the cost of the paint, I’m pleased.
Day 624 to 657 (14th November to 17th December 2018)
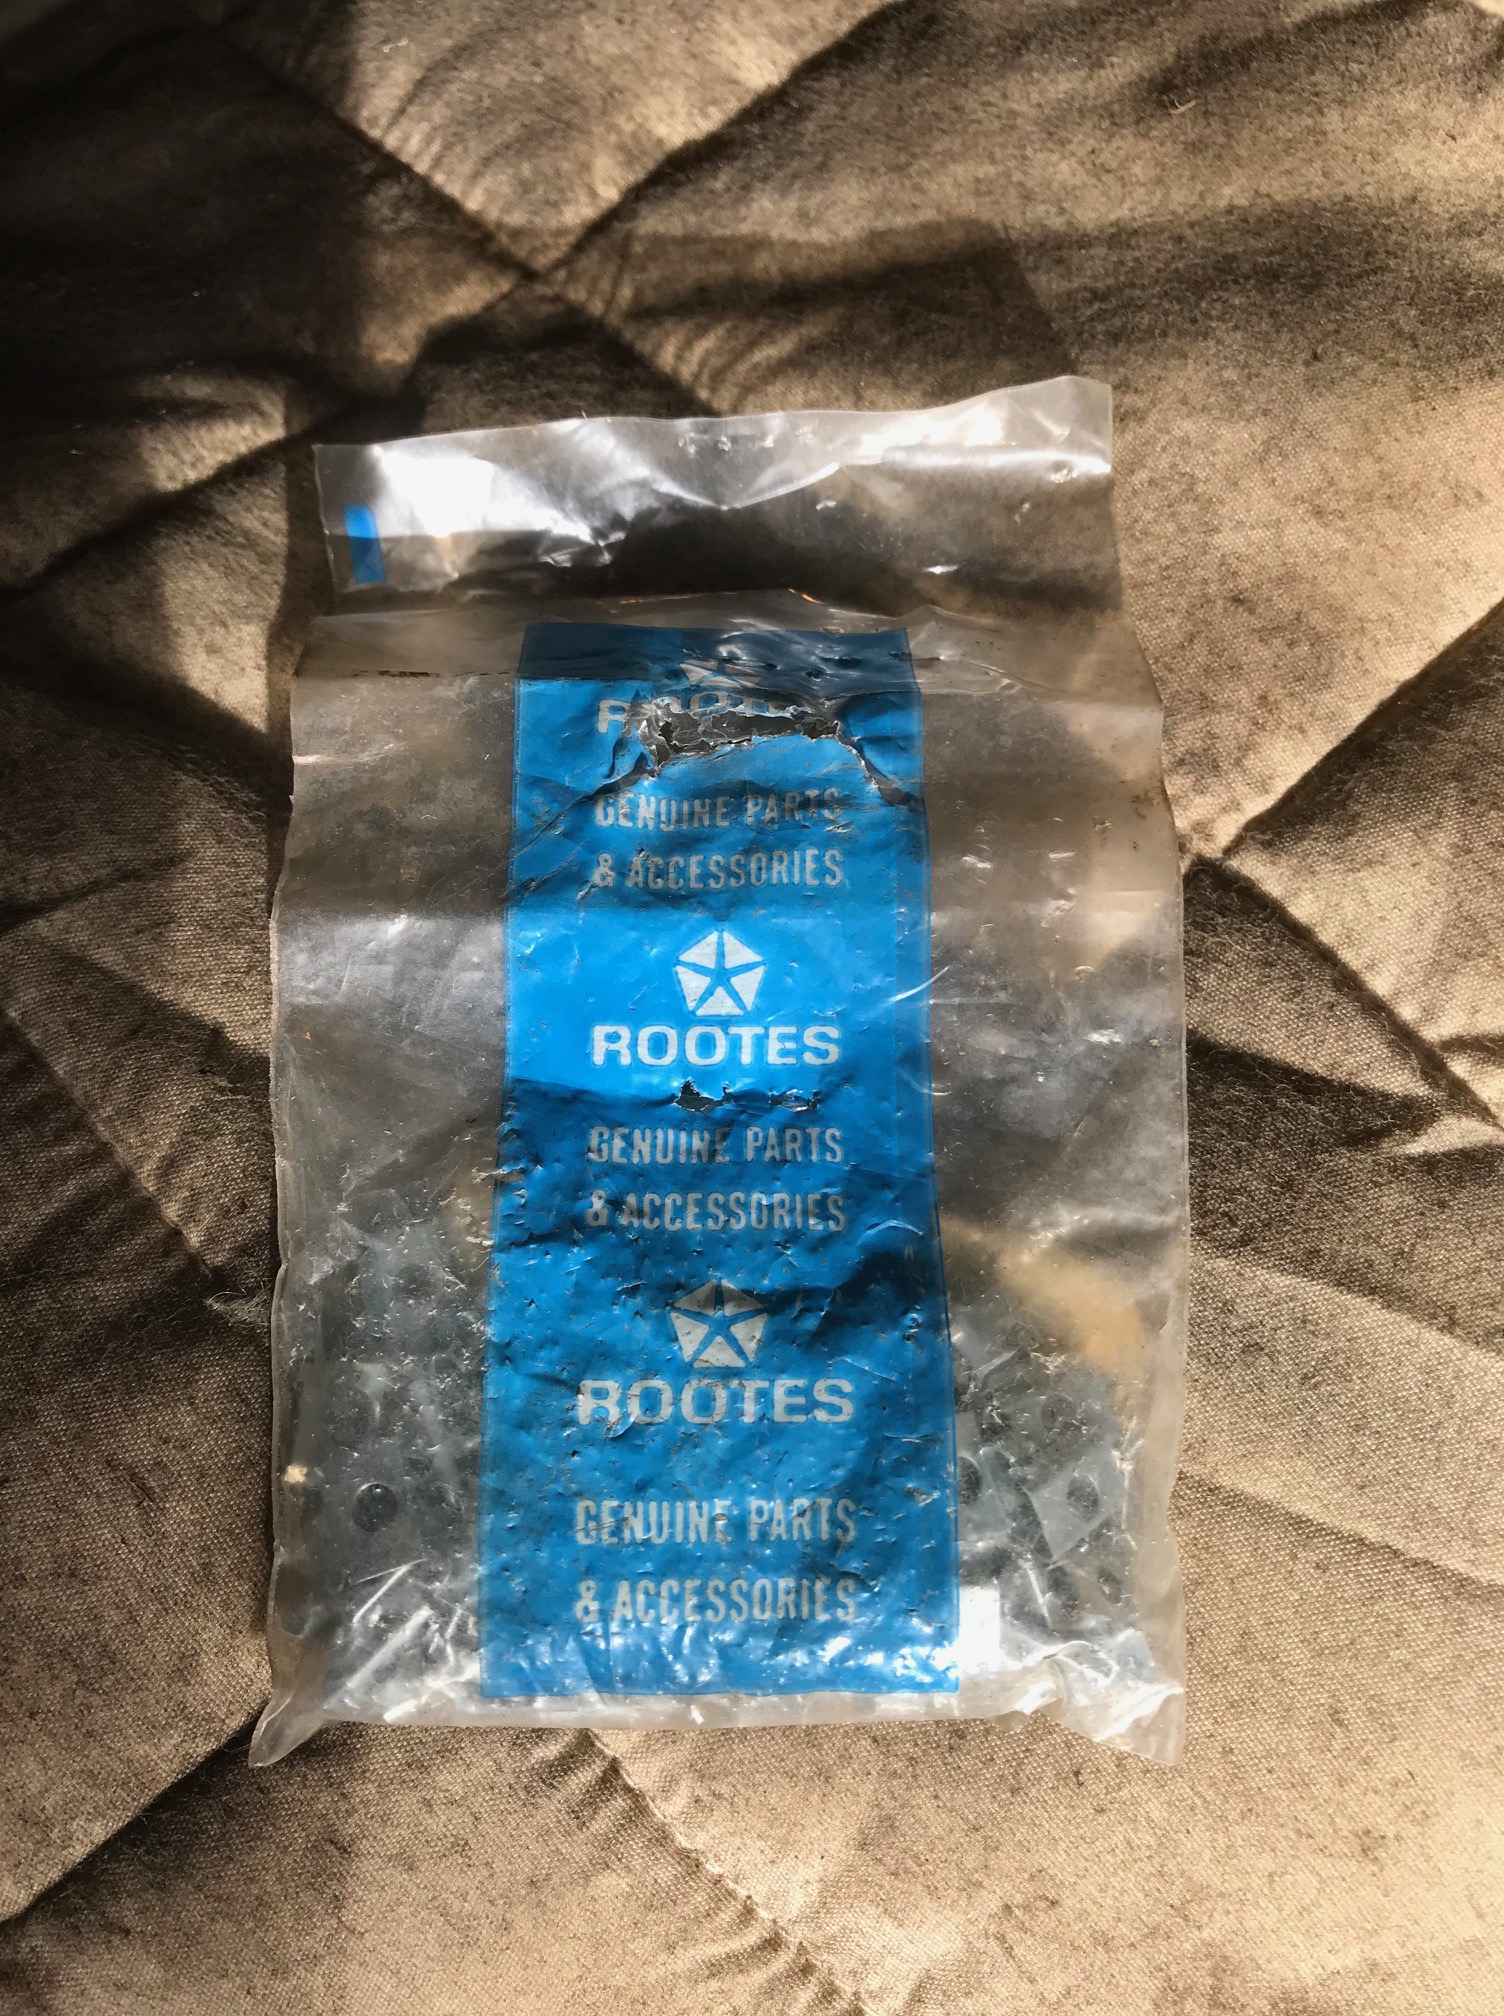
Cold out there now! I cleaned up engine bay, replaced the radiator having removed and replaced clips on the bypass hose. replaced fuel tank and fitted the permanent fuel pipe. I decided, rightly or wrongly, that the filter in the fuel pump would do the job as Rootes intended, so that’s how I did it. There was nothing in the filter that has been in the line since the engine first ran – so that’s the decision. Fitted the boot lock and rubber and cleaned up and repaired the boot mat (having washed it in the bath – shssh!!!). It looks like a car!
Day 657 to 668 (17th to 28th December 2018)
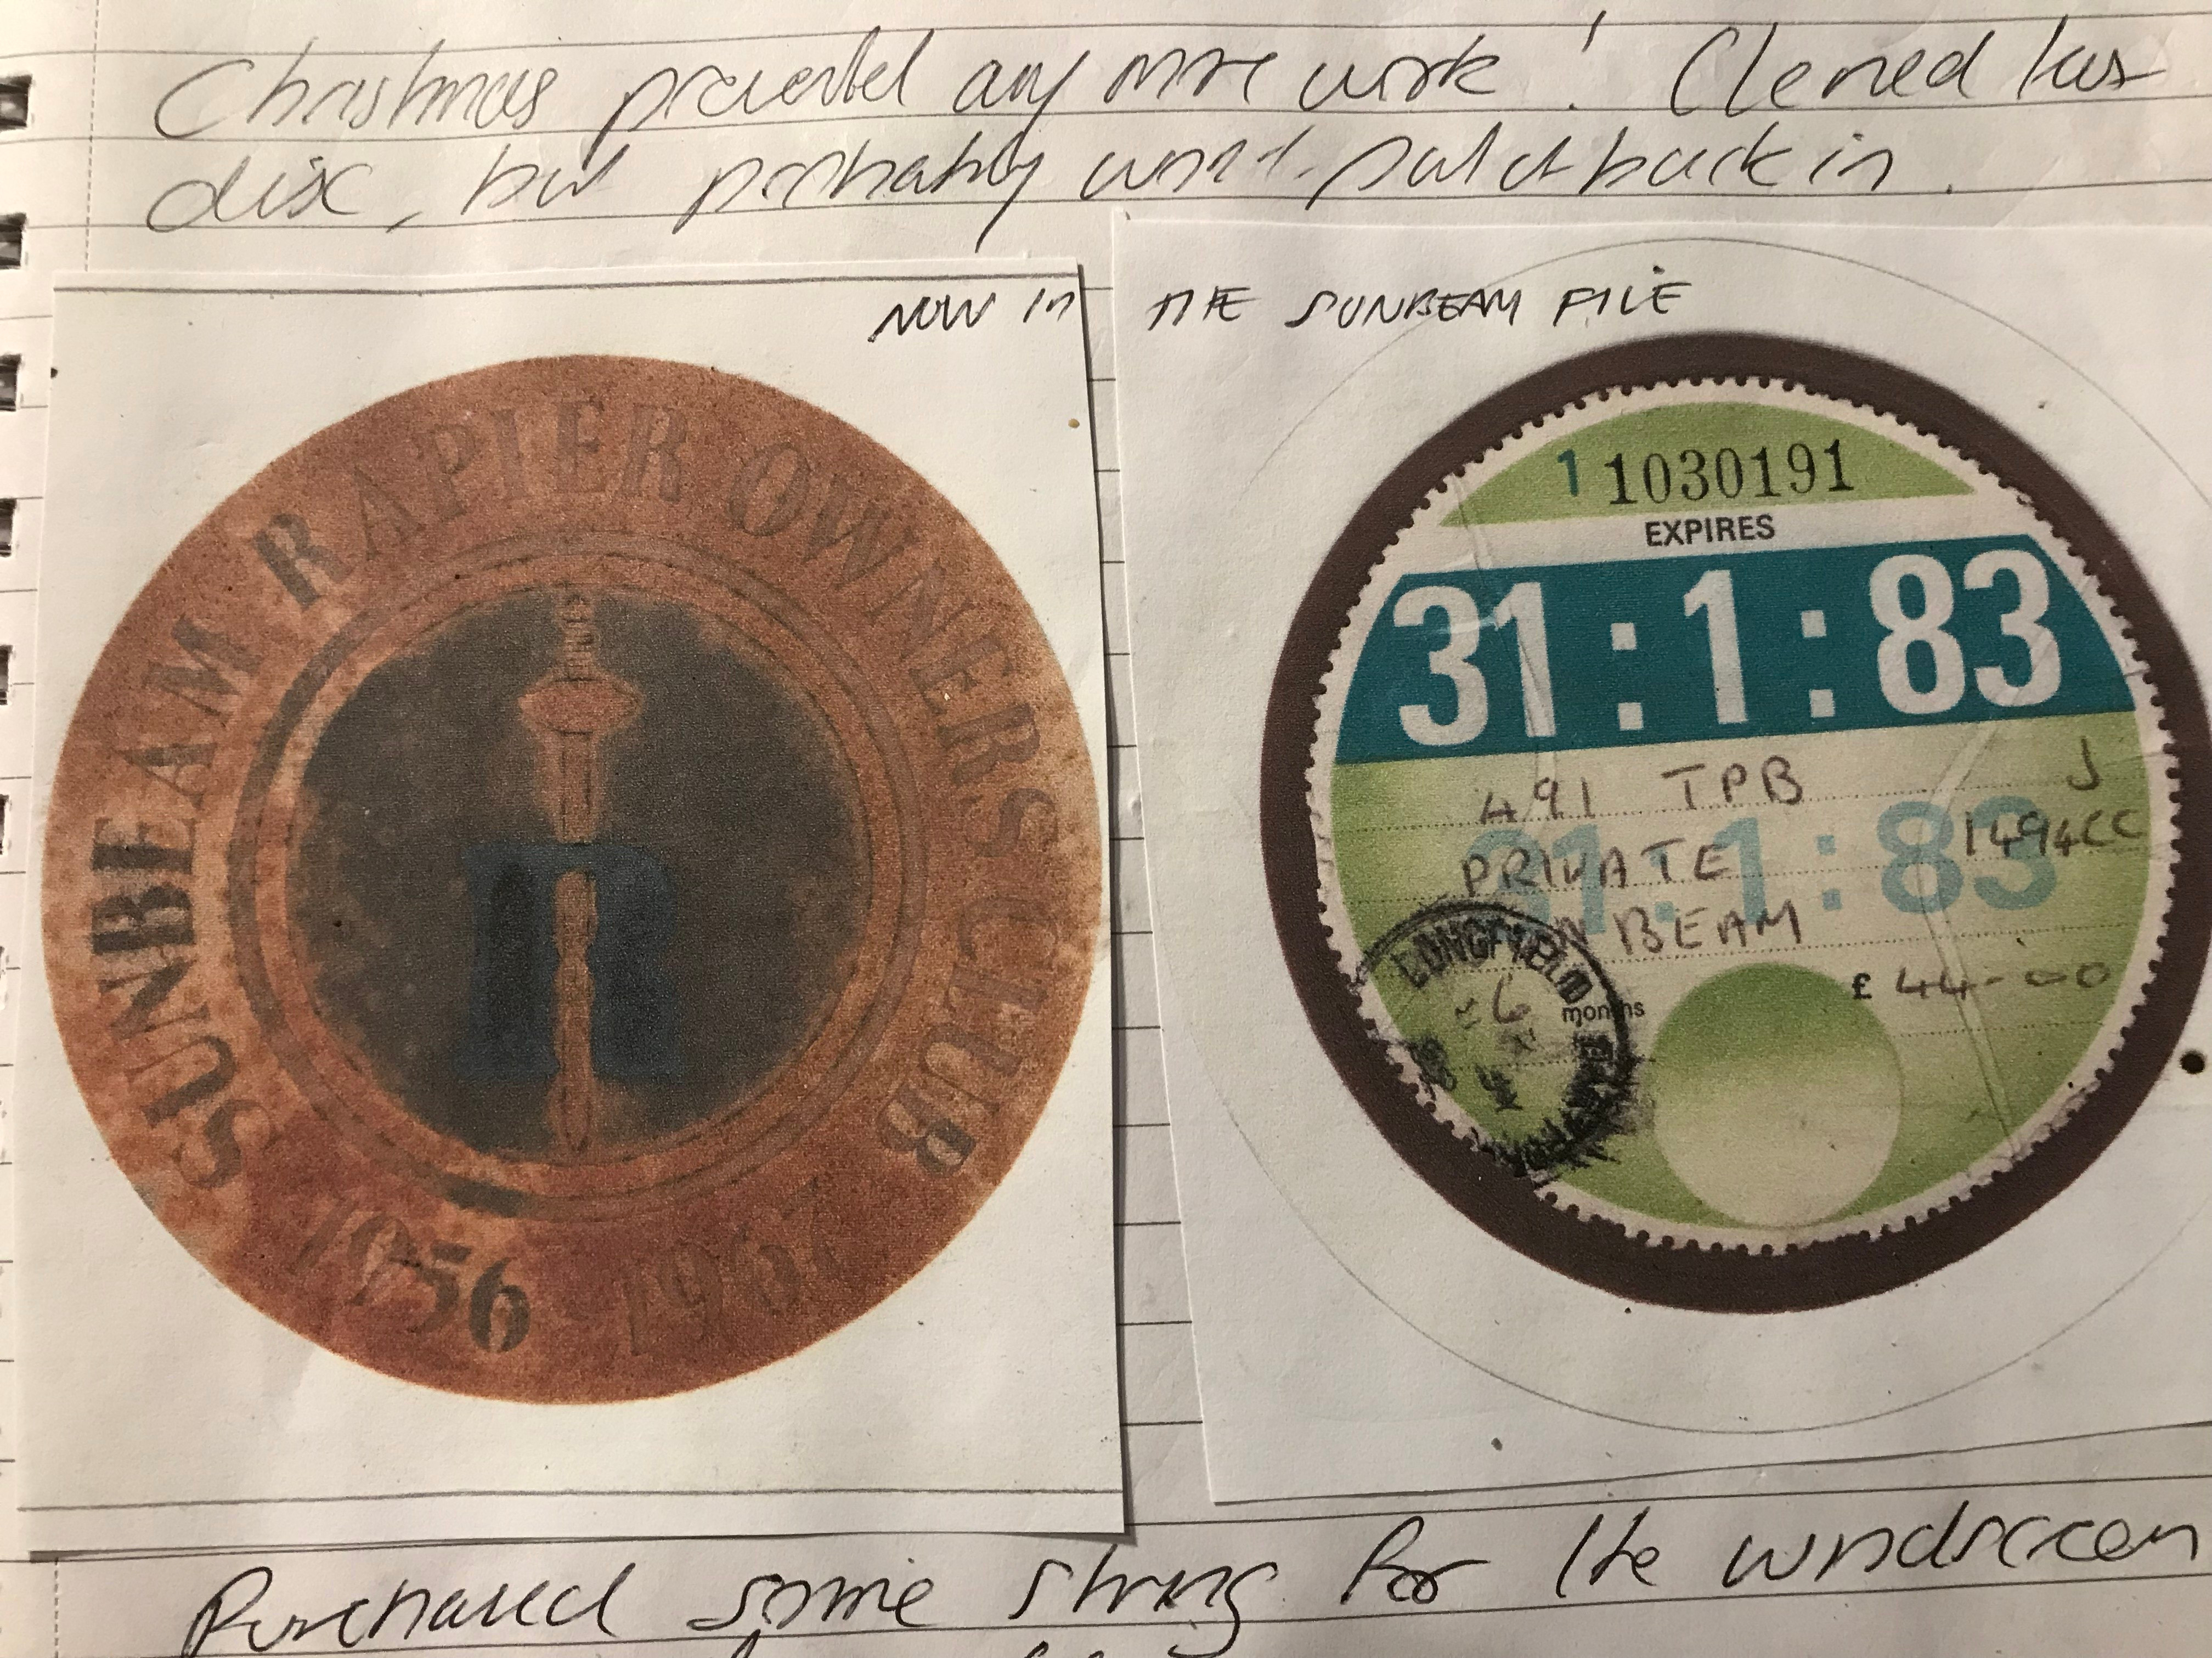
The run up to Christmas. Fitted the boot and associated locks, the various small parts (rubbers and ID plates) to the bonnet and all the locks and release mechanism. Cleaned and examined the windscreen and the new rubber. Removed the last tax disc (expired 31st December 1983) and the Sunbeam Rapier Owners Club sticker, which pre dates the inclusion of the fastback. Sadly too faded to use again.
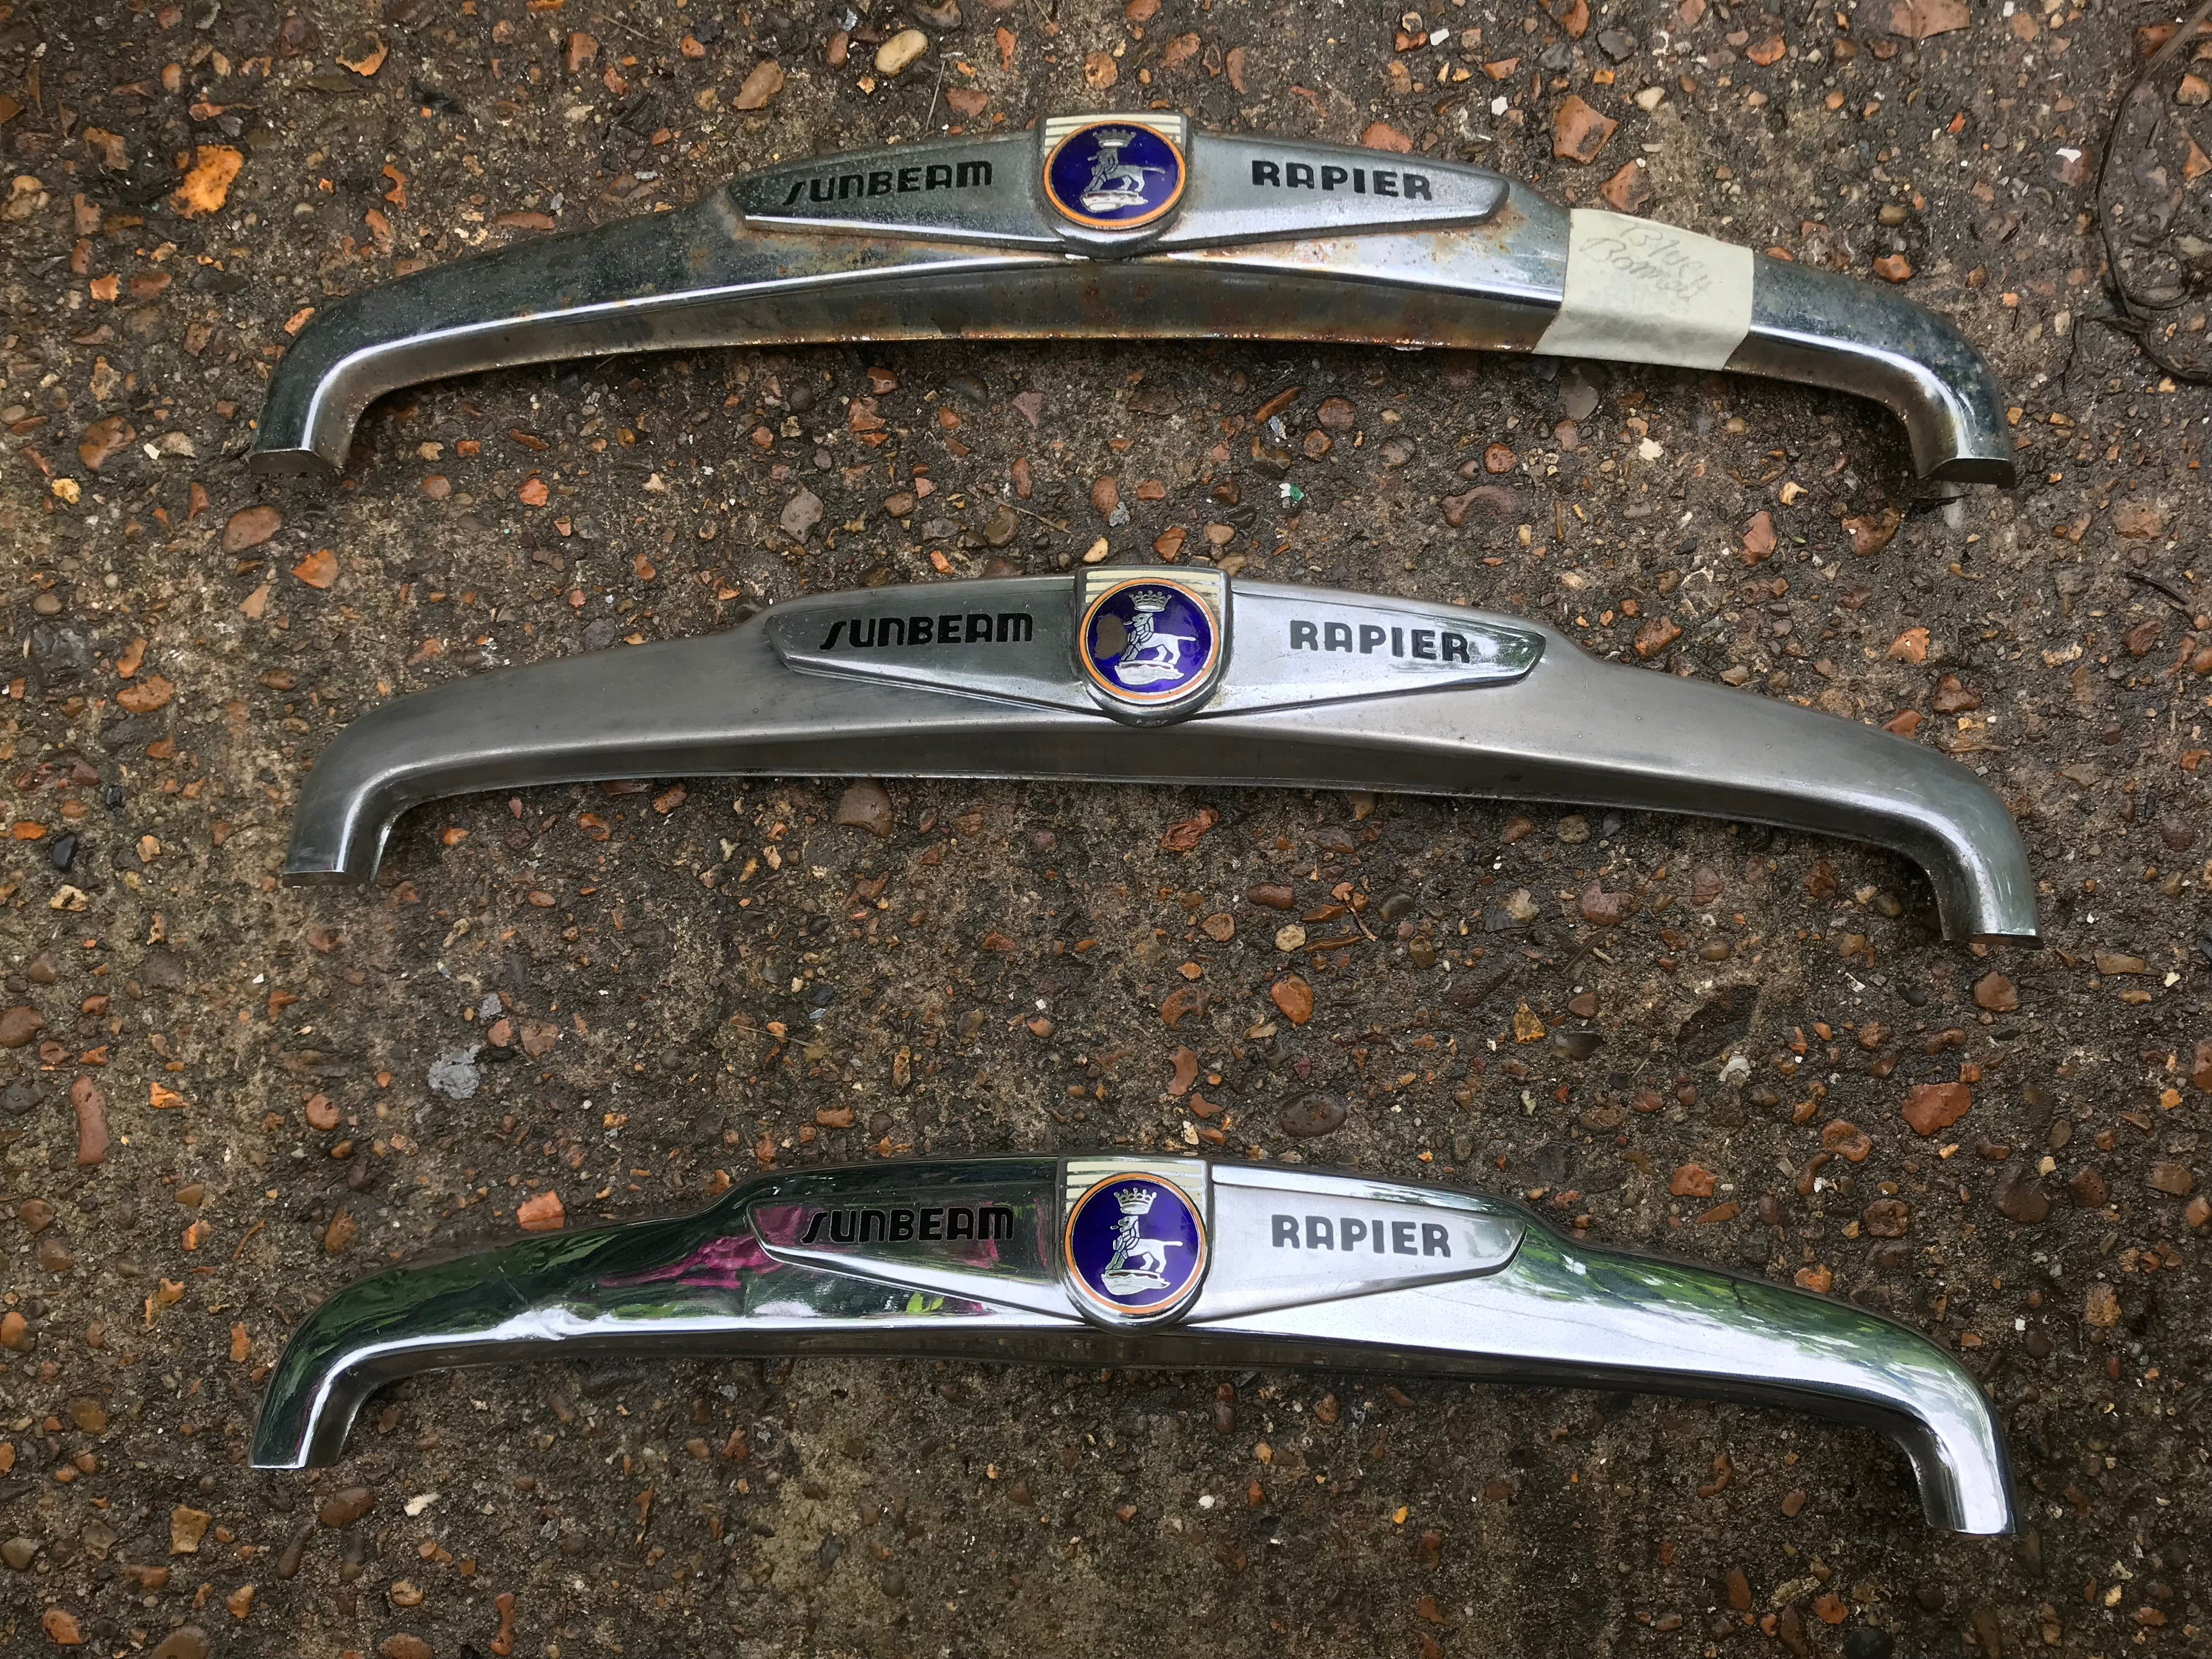
Also with the help of my wife and son fitted the bonnet, cleaned up the stainless steel surround for the windscreen and started to look at the ‘Sunbeam’ letters for the boot. These and the rapier scripts for each rear wing were dirty and missing studs.
Cleaned all traces of old rubber from the doors and inserted new replacements. They’re not the same but look fine.
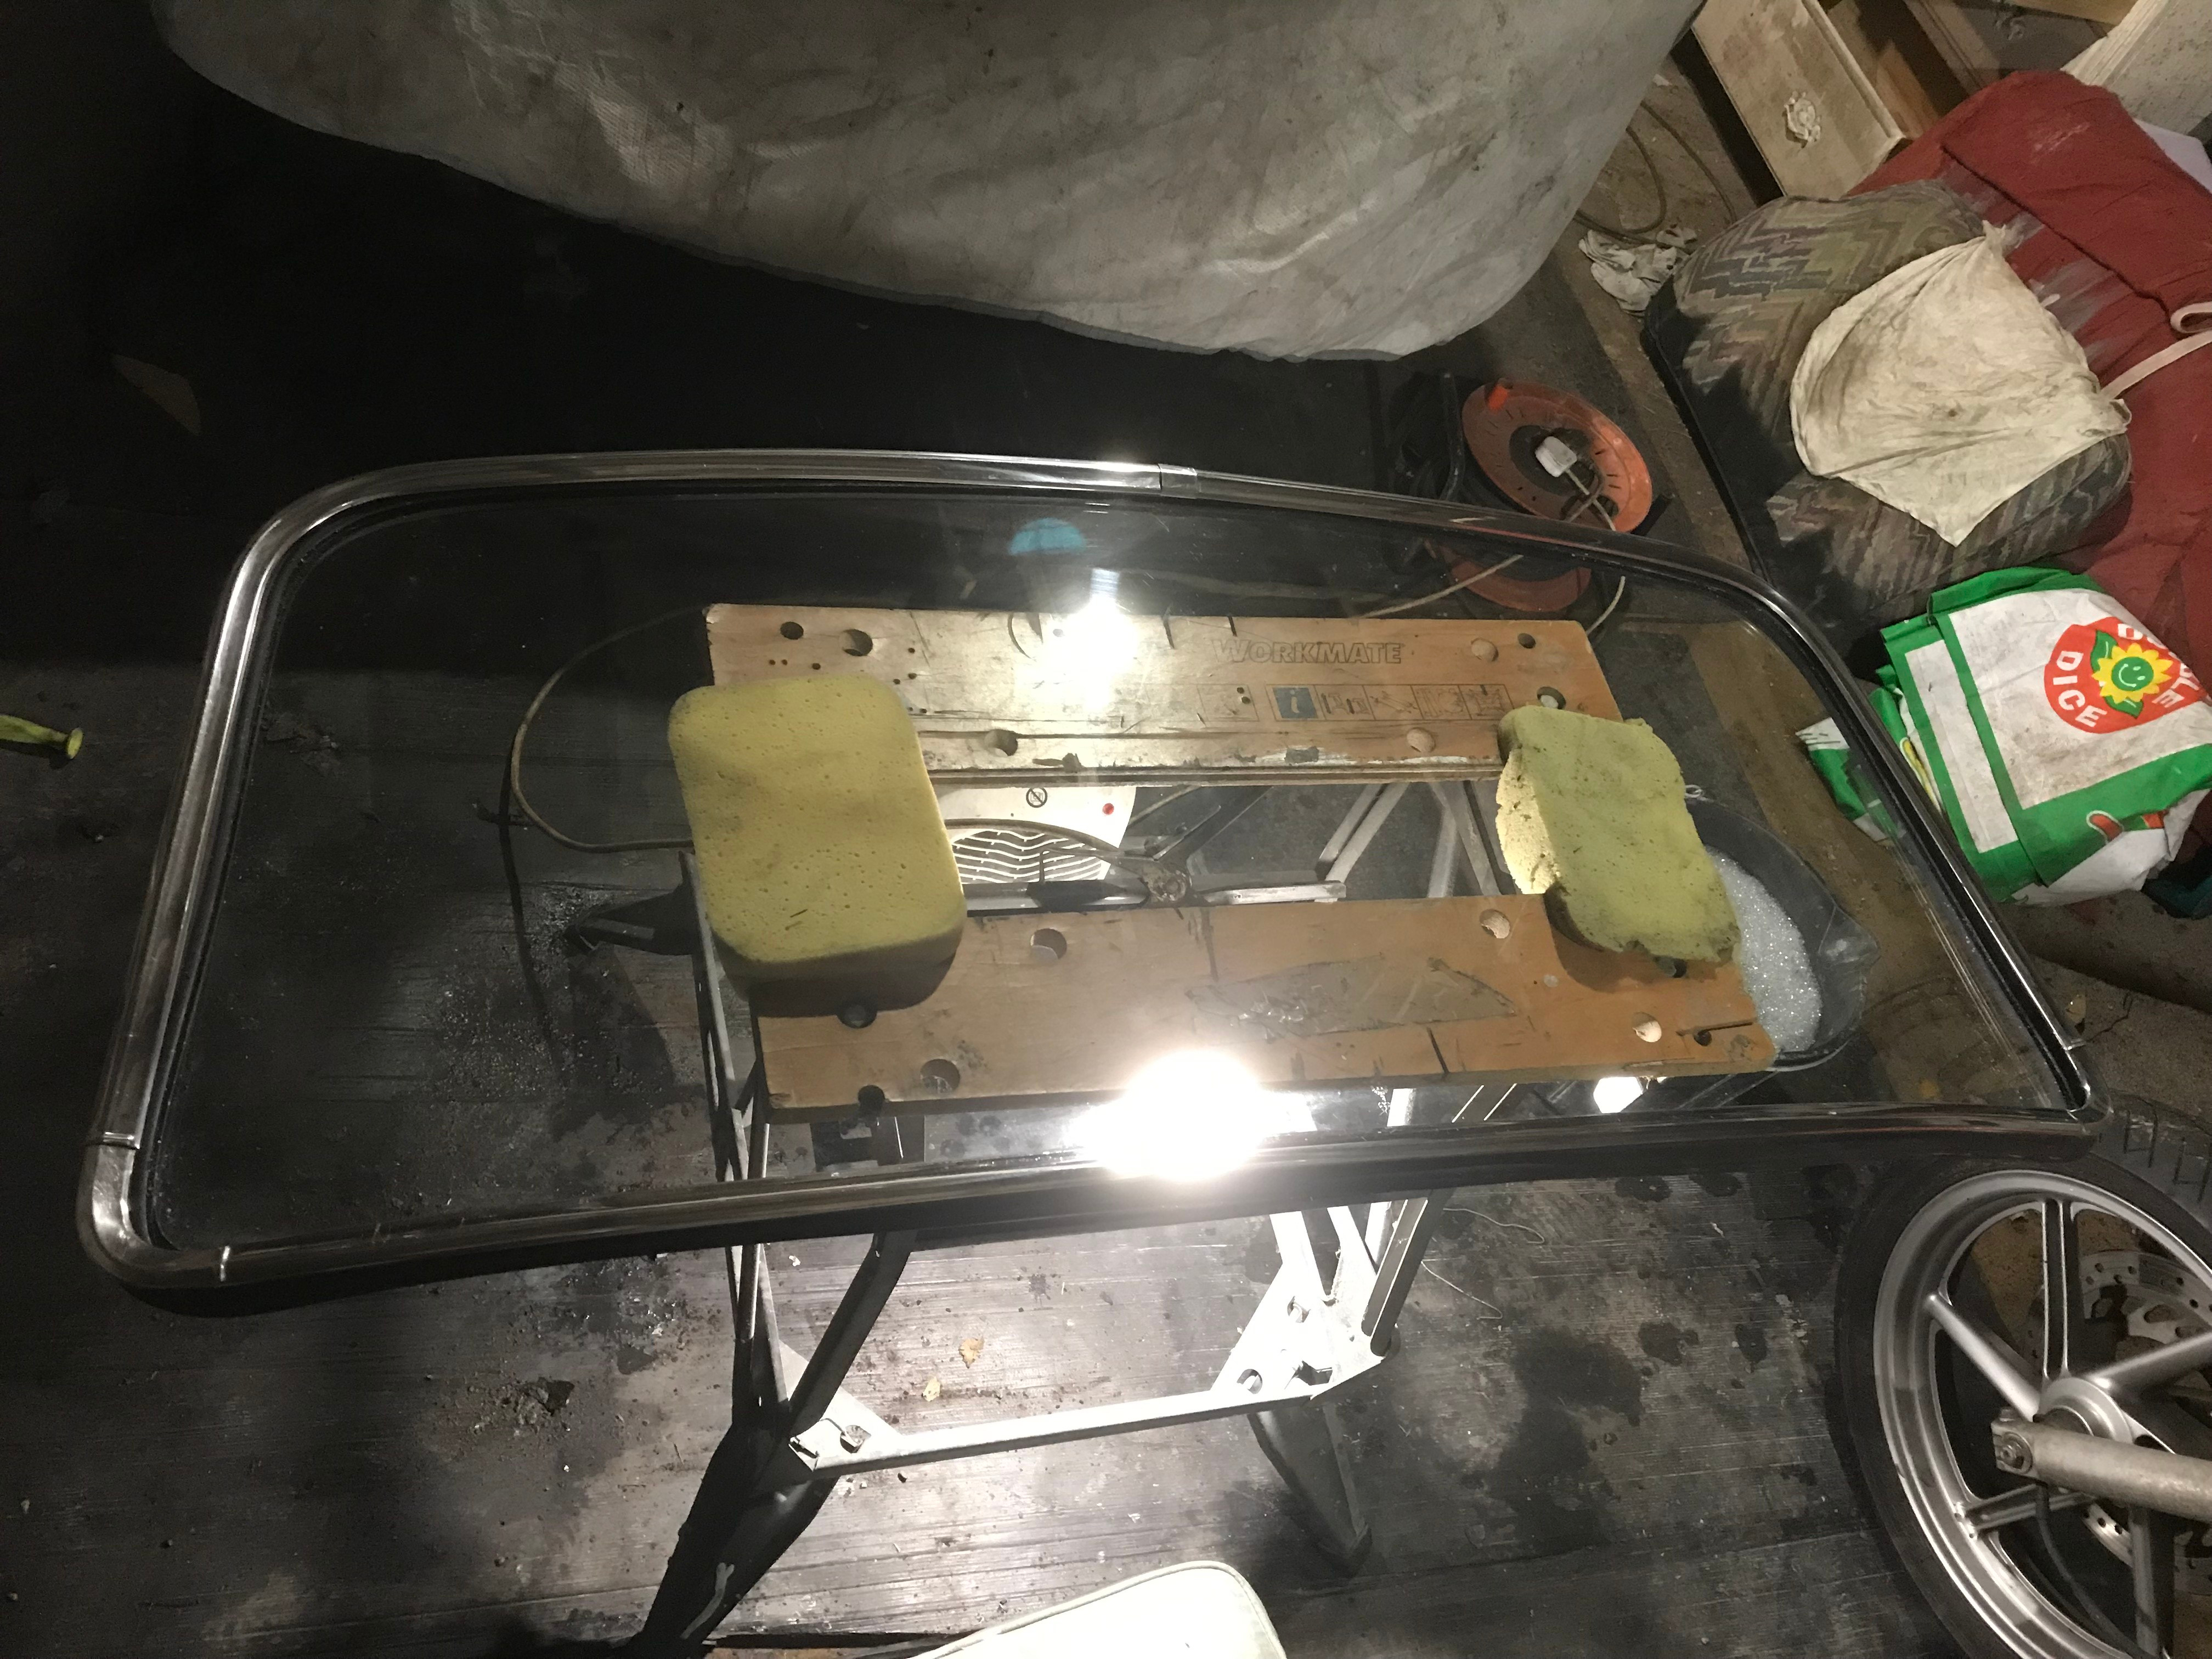
The windscreen. Fitting this and the boot letters were to take me to the lowest point of the project so far over the next few weeks.
Day 669 to Day 701 (29 December 2018 to 30 January 2019)

I also embarked on sourcing replacement trim parts and spent a fair sum on quarter light rubbers, rear side window seals, A and C pillar seals, furflex, rear plinth seal and window weather seal. I bought some ‘original mini’ check straps and cut and welded these to utilise the new mini bumps stop part and my old curved shape. These are the finished items.
During this cold period, I also sorted the chrome and ordered various small gaskets and trim pieces as I found them. Many new chrome bits are available, but at a price. If I was going for a concourse finish, I would need grills, boot plinth, wing cap (rear O/S), Rapier scripts and door handles. I’m not really sure on the concourse v original debate, but these parts add up to hundreds of pounds, as does re-chroming. So I will run with what I have.
I hammered out a dent in the boot plinth and then tackled the letters – for the first time. Many of them had broken studs and I reasoned that some 2.4mm of tig rod and some aluminium solder would work. I bought some friction bushes to fit these..
The first problem was that the car had much smaller holes so it became clear that friction bushes would not work. The original Rootes literature refers to spire nuts, but I couldn’t find any that seemed right, so opted for starlock washers. These worked BUT required a degree of force (by means of a small 8mm socket) and I could not weld or glue a joint between the delicate letters and the new studs that didn’t break. In the end I put these aside and decided to re hang the doors.
This went well and my new check straps seem to be holding out.
Day 702 to 718 (31st January to 16th February 2019)
Two weeks of effort on one job. Getting the windscreen in. What a nightmare!
The rubber didn’t look like a brilliant fit but I naively thought it would all squeeze into place eventually. With the help of my wife and a friend we got the screen in using the rope technique. This wasn’t without incident as the rope did cut into the rubber a little here and there (inexperience on my part). Then I tried to fit the stainless steel trim. This is not the simple slot in type on some more budget cars of the era (including the many Avengers I routinely popped windows in and out of) but a complicated flattened ‘C’ profile that engages with a slot in the rubber on the inside and clicks over a ridge on the outside. This is installed with a special service tool as below…

Hours of effort, various bent bits of metal and other attempts at custom tools, followed by hours on Google watching people have the same fight with Spitfires, Stags and even a Rolls Royce (which all share this design) lead me to the conclusion that this is a pig of a job. I’ll be the first to admit I was a beginner on this and it’s a lost art, but I could not get the trim on. In the end, I took the screen out again (tense moment – would I break it?). I didn’t, but I did spend a long time cleaning off the sealant I diligently applied first time round.
I took the whole lot inside and tried again (this is probably a job for July not February). I had read somewhere that the joint in the seal should be at the bottom of the windscreen. But in desperation I turned it round so it was at the top. Could this be the problem? It seemed to sit better on the corners. Worth a try.
I also gleaned that it was sometimes better to install the trim onto the rubber first, off the car; then put it all in together (this is the Rolls Royce method!). So I tried that. To cut a long story short, I got the same happy and smiling team back out to the garage on a freezing afternoon and we tried again. Finally we got it in. There was some scratches as a result of this. I’ll add them to the list! I am trying to picture the factory back in 1960. Am I seeing guys inserting a tool that looks like a potato peeler on six separate pieces of trim, or the same guys plonking a pre-assembled unit onto the car? Doubtless someone will know.

Day 719 to 725 (17th to 23rd February 2019)
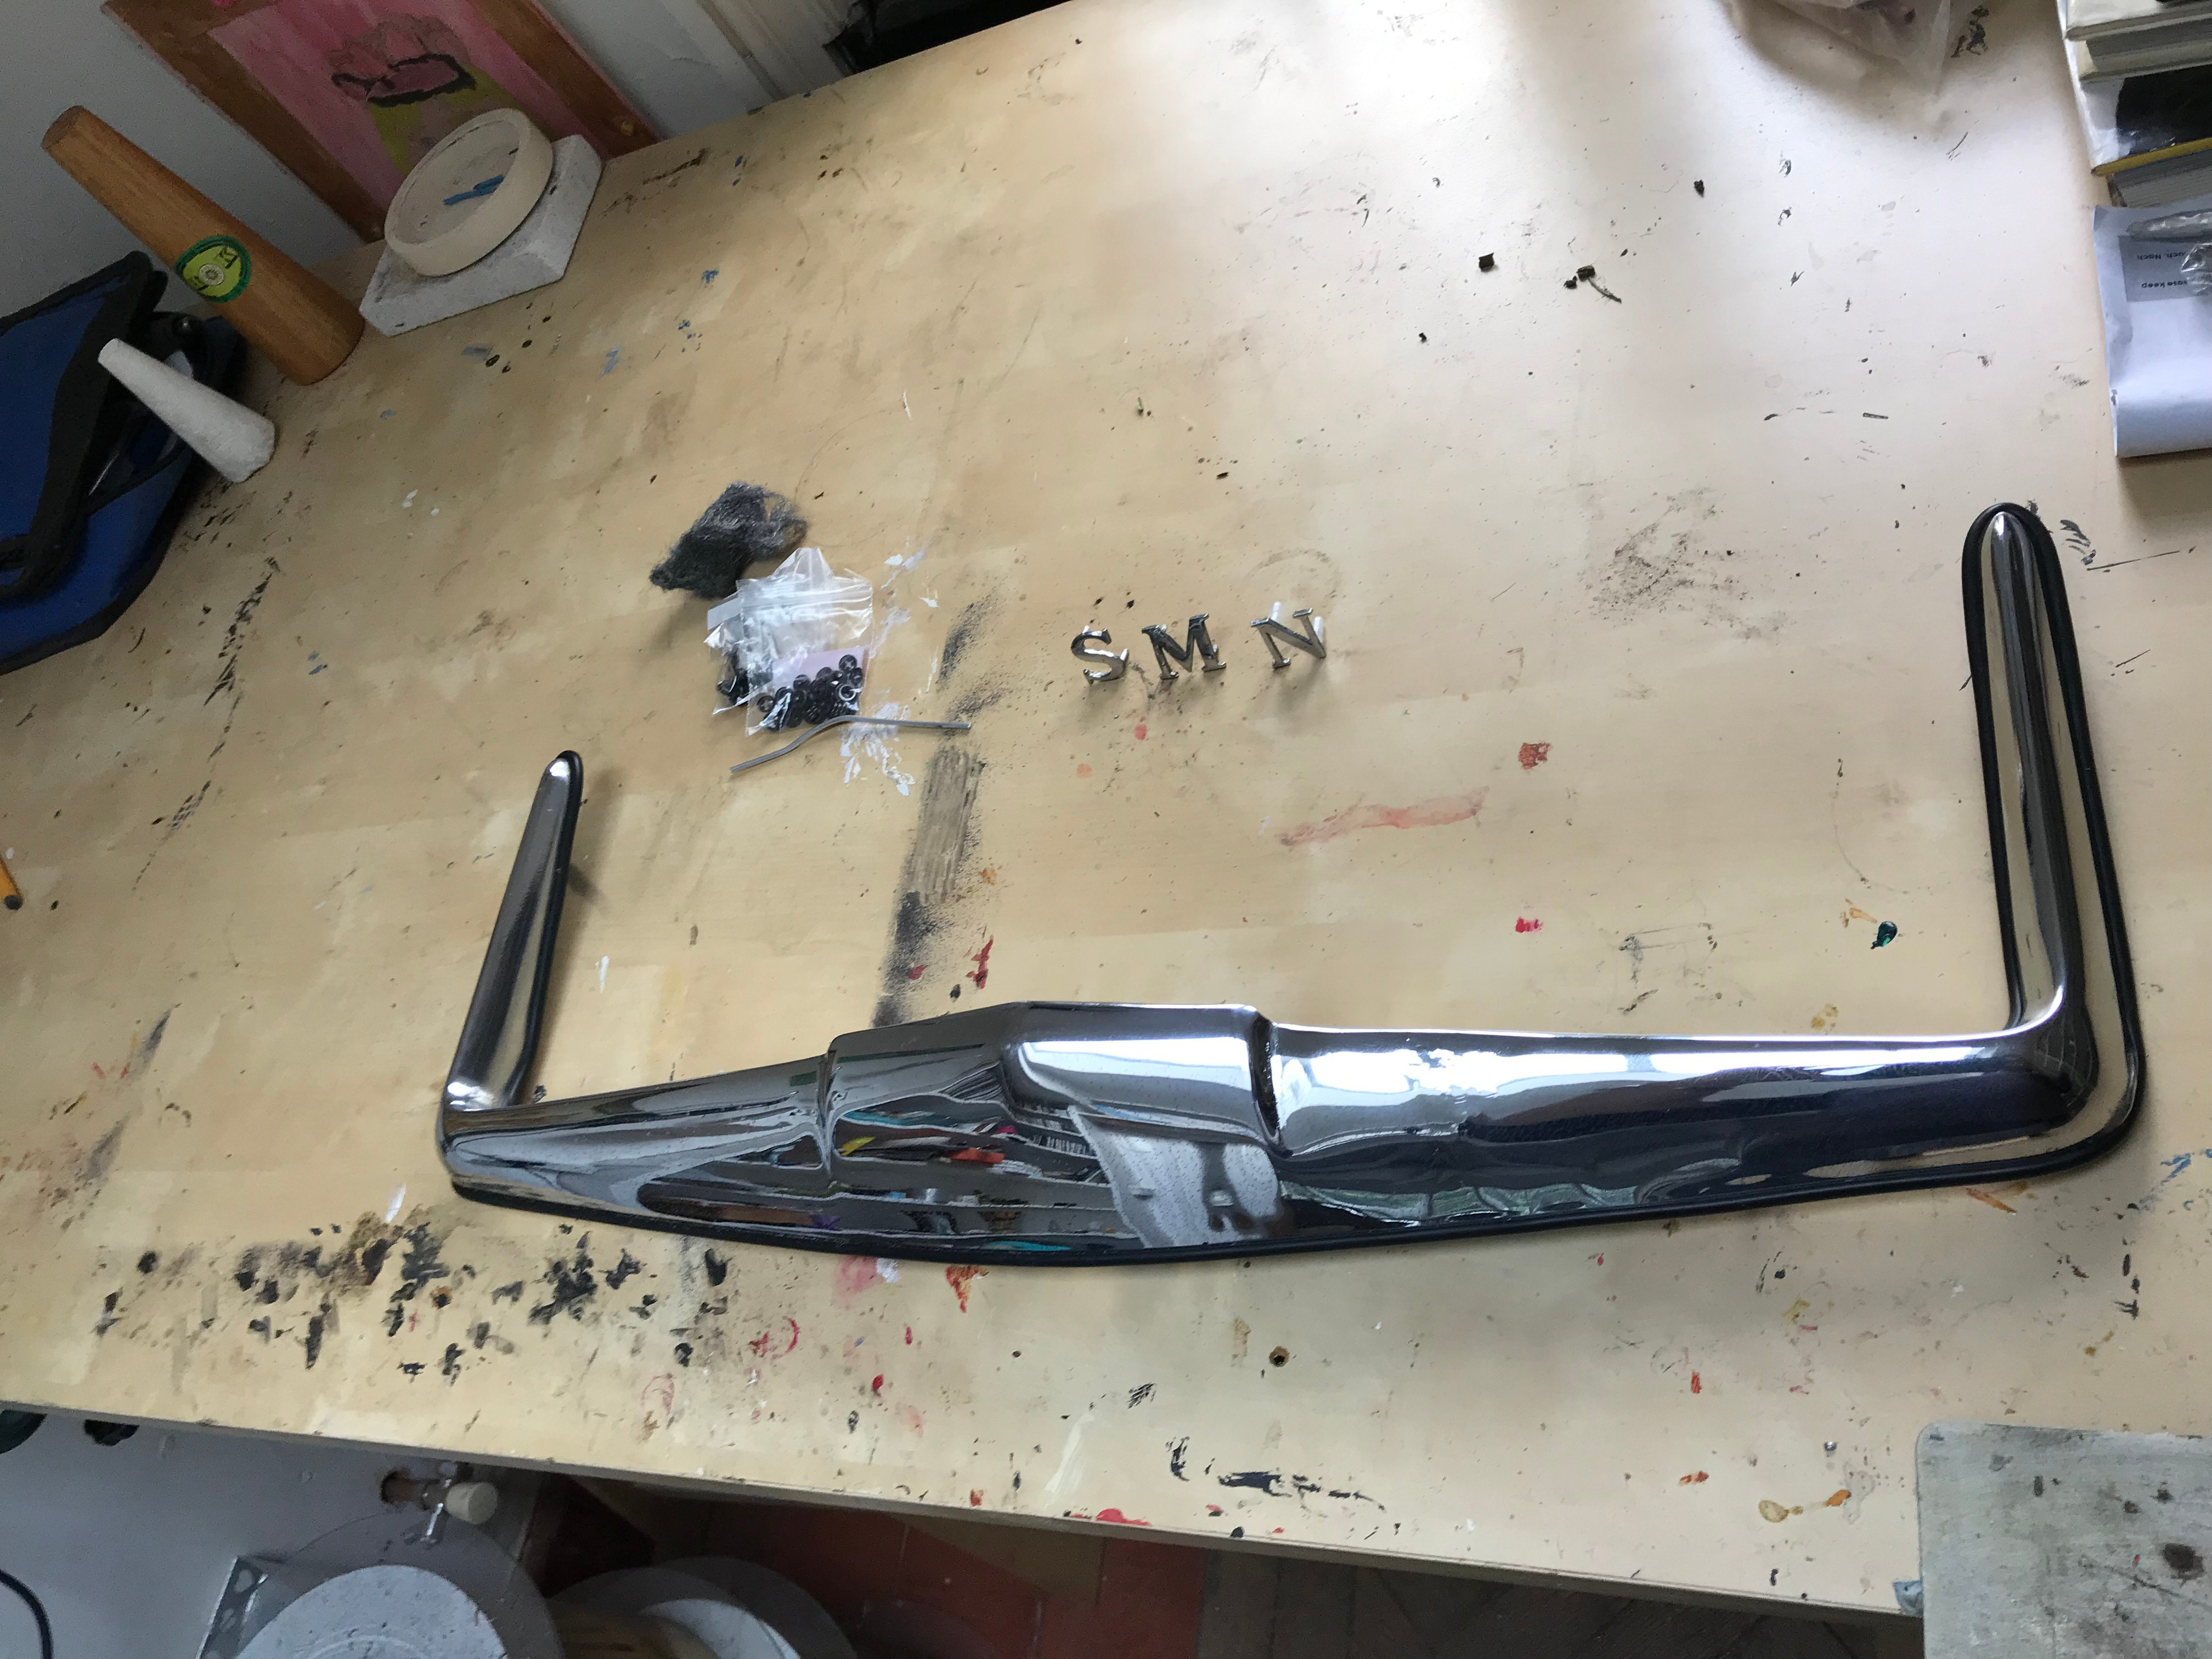
Letters. Six small pieces of cast aluminium. It should be easy right? Wrong. I lost count of the number of times I tried to solder and glue these studs on. I could have drilled bigger holes to accommodate the big welds needed to hold them on, but I was loathed to hack about the car. The Club sell a new set for £40.00 – but the club are not always easy to deal with and it was becoming a point of principle. So on and on it went. An evening soldering, gluing and swearing, followed by a test fit and breakage. More swearing. The ‘E’ broke into two pieces, The ‘M’ melted. My wife tried to cast copies of them in pewter, but we couldn’t get the studs right. In the end I got four letters on OK (the ‘U’,’N’,’B’ & ‘A’) and for the other three I eventually glued the studs on, then the letter to the car, and then glued a friction bush over the stud and to the inside of the boot (for the ‘S’ the ‘E’ and the ‘M’).
After that I fitted the plinth. Even this fought me, as it seemed to be twisted, but eventually I got it on. After some fiddling, even the number plate light works.

The E consists of four parts glued together.

After all that, I just hoped I spelt it right!
At this point after four months I got the seats back. £750.00. Am I happy? Not really. The work the bloke showed me he had done before was excellent. He has powder coated the frames and replaced all the foam. But the colour match on the replacement panels is poor – well that is forgivable given that 58 years have passed. But the stitching/gluing and fabric fit is in places, a bit naff. Do I wish I’d tried myself? Not sure.
All in all my confidence has been knocked in quick succession; the windscreen, letters and the seats have either been very hard or not quite as good as I hoped. And now the trim. Historically, my weakest area. And now I have twenty individual pieces of stainless steel and chrome trim to fit. Much of this got damaged while it was being removed (by me) back in 1982. Now I have to put in all back on. Yikes.
Day 730 (28 February to 2019 10th April 2019)
Two years after the project started.
The side trims consist of a thin lower strip one for the front wing, door and rear wing attached with rivets and clips. Fortunately, I bought a pack of the clips back in the 1980’s, so armed with a riveter I set to. After a bit of trial and error with test pieces, I started. Riveting was easy and much to my surprise the trim did clip on OK
So glad I bought these way back when.
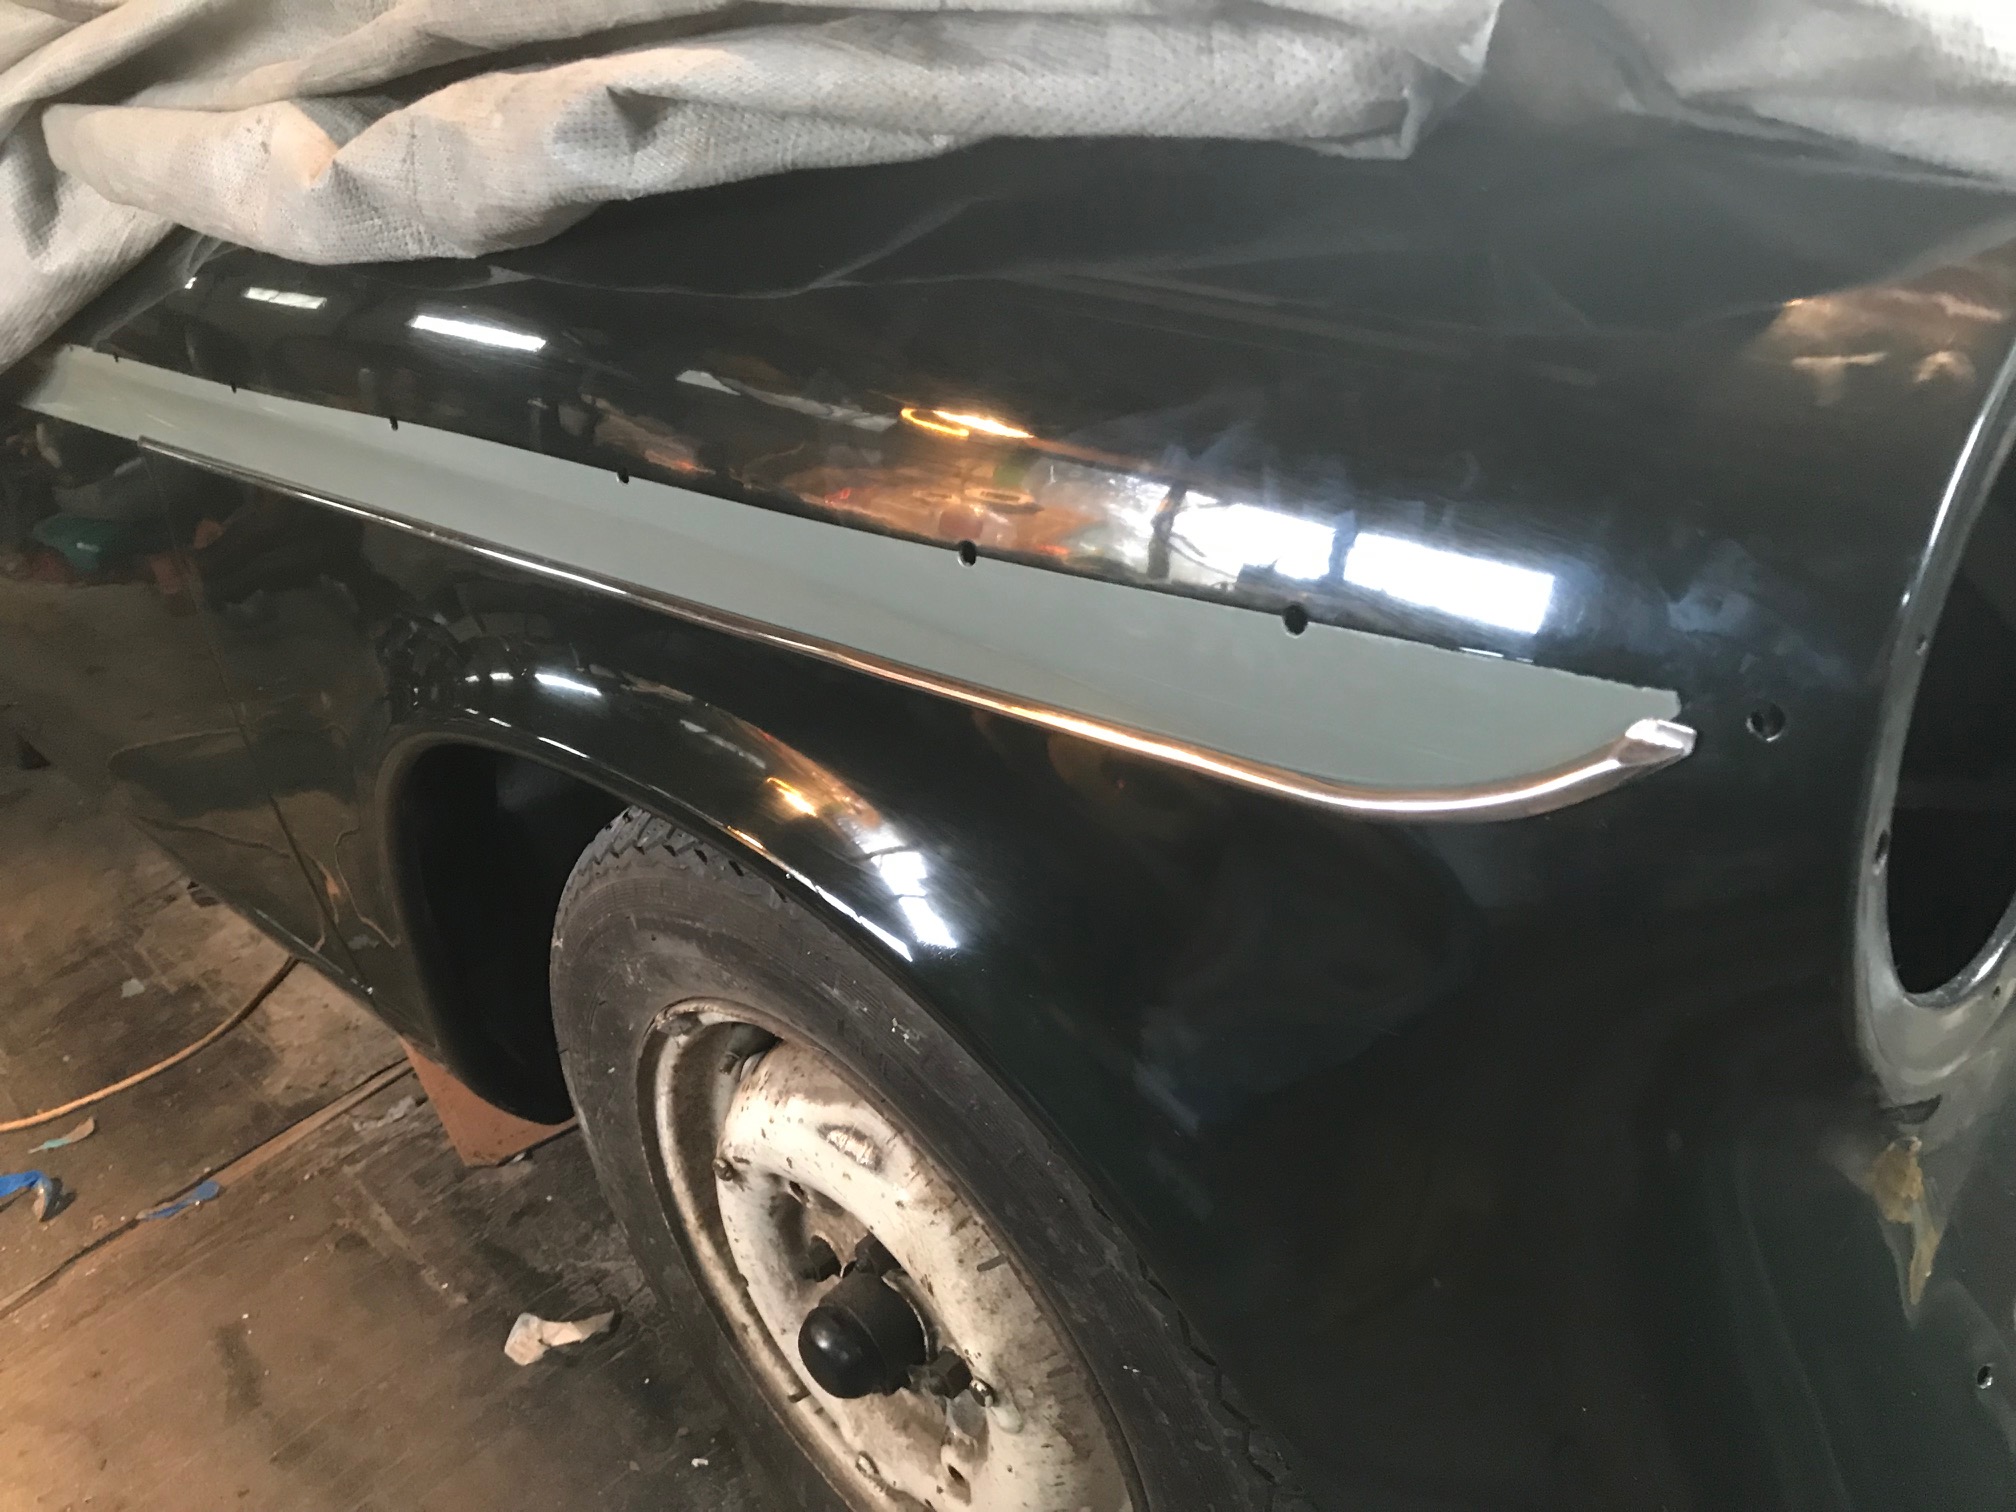
After my previous nightmares, this job was a pleasure. Good to know I painted the sage green flash in the right place.
The rest of the narrow strip went well. After that, it was just a case of taking each piece, cleaning it, repairing any damage and fitting. However, I made the decision that with the exception of two clips at the front of each door (which is double skinned) all the other mouldings would be attached with removable clips, even though Rootes used a mixture.
This meant I needed to manufacture about forty of them. Originally they had been made of steel and had rusted. I decided to clean and paint the salvageable ones and make the new ones from copper with brass screws. The clips consist of a rectangle of copper sheet (sourced from 22mm plumbing pipe) with a central hole (4.5mm) into which goes a 4mm set screw and this is soldered in place. Theses then slide into the C profile moulding and through the hole in the body. On the other side a rubber washer (I made these from a sheet of rubber matt and a belt hole punch) and a stainless washer and brass nut. Some of the holes were fiddly to get to, but it was a great way to do it.

An army of trim clips.
The fin end caps, Rapier scripts, body to roof (C pillar) trim went on next, then the rear wing lower end strips and finally the mirrors. Each piece had its quirks, but I’m happy with the results.

Starting to look like a car!

Just about the worse shot to show off the trim (apart from the mirrors).
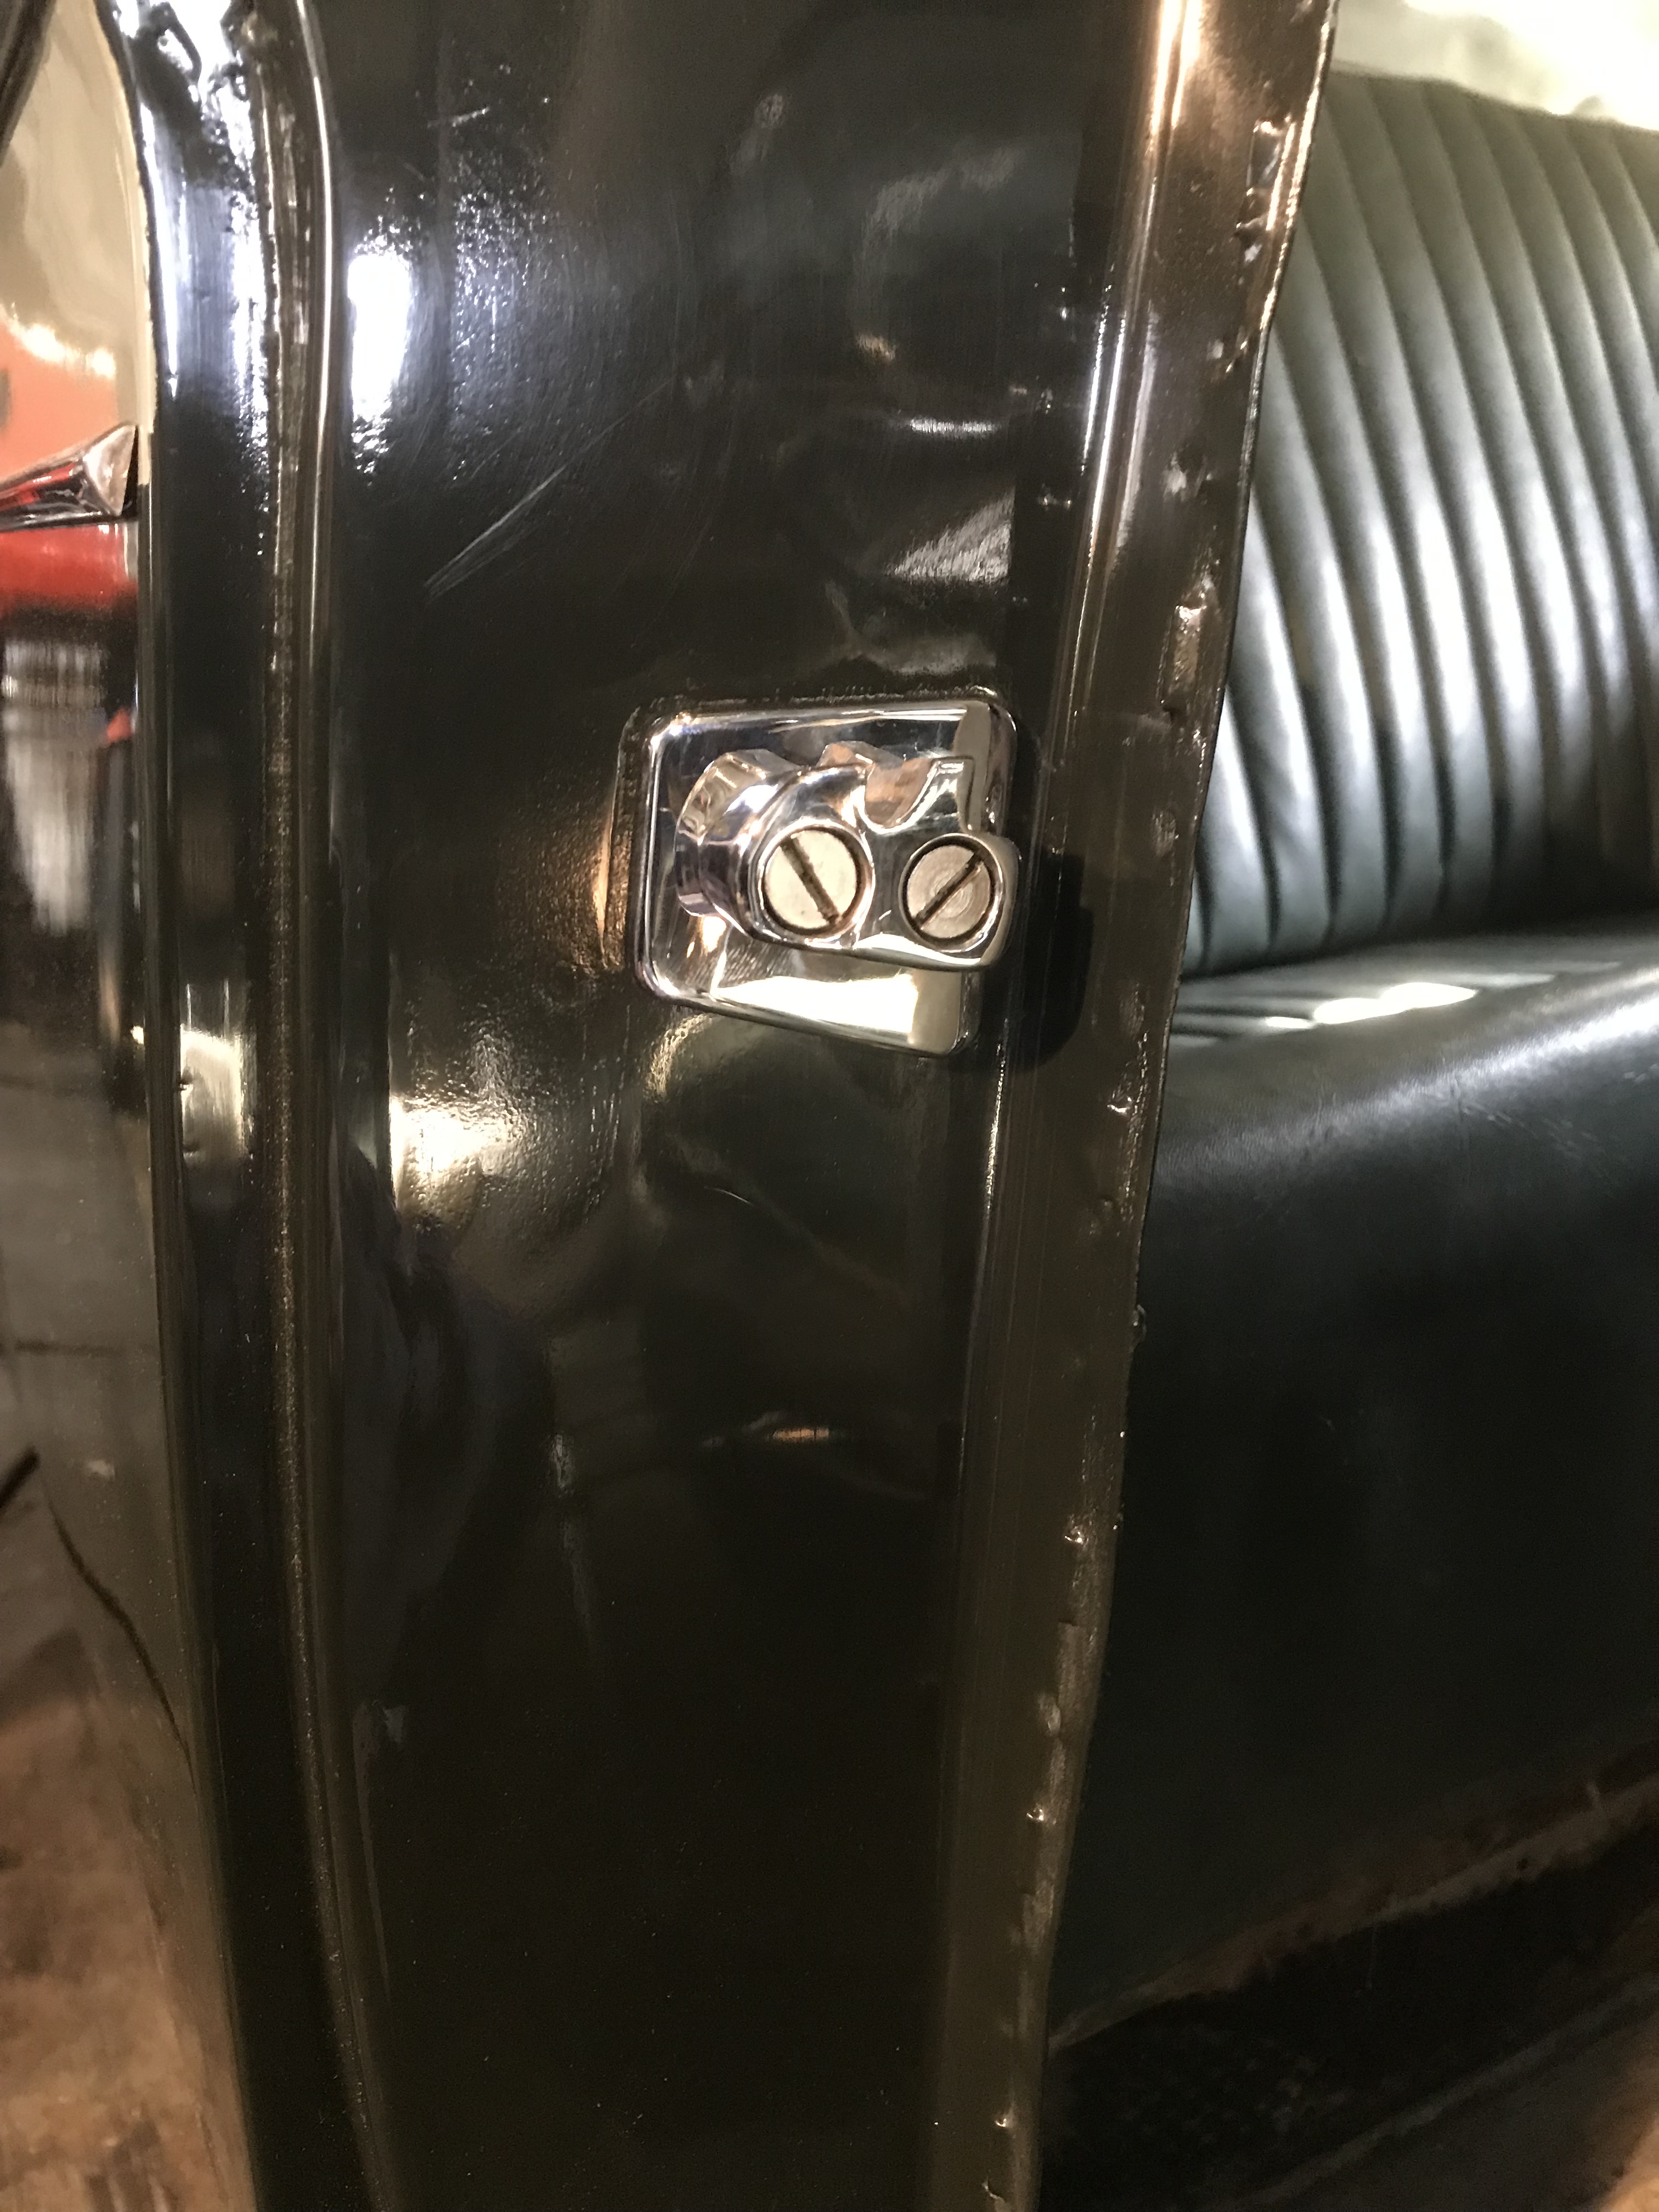
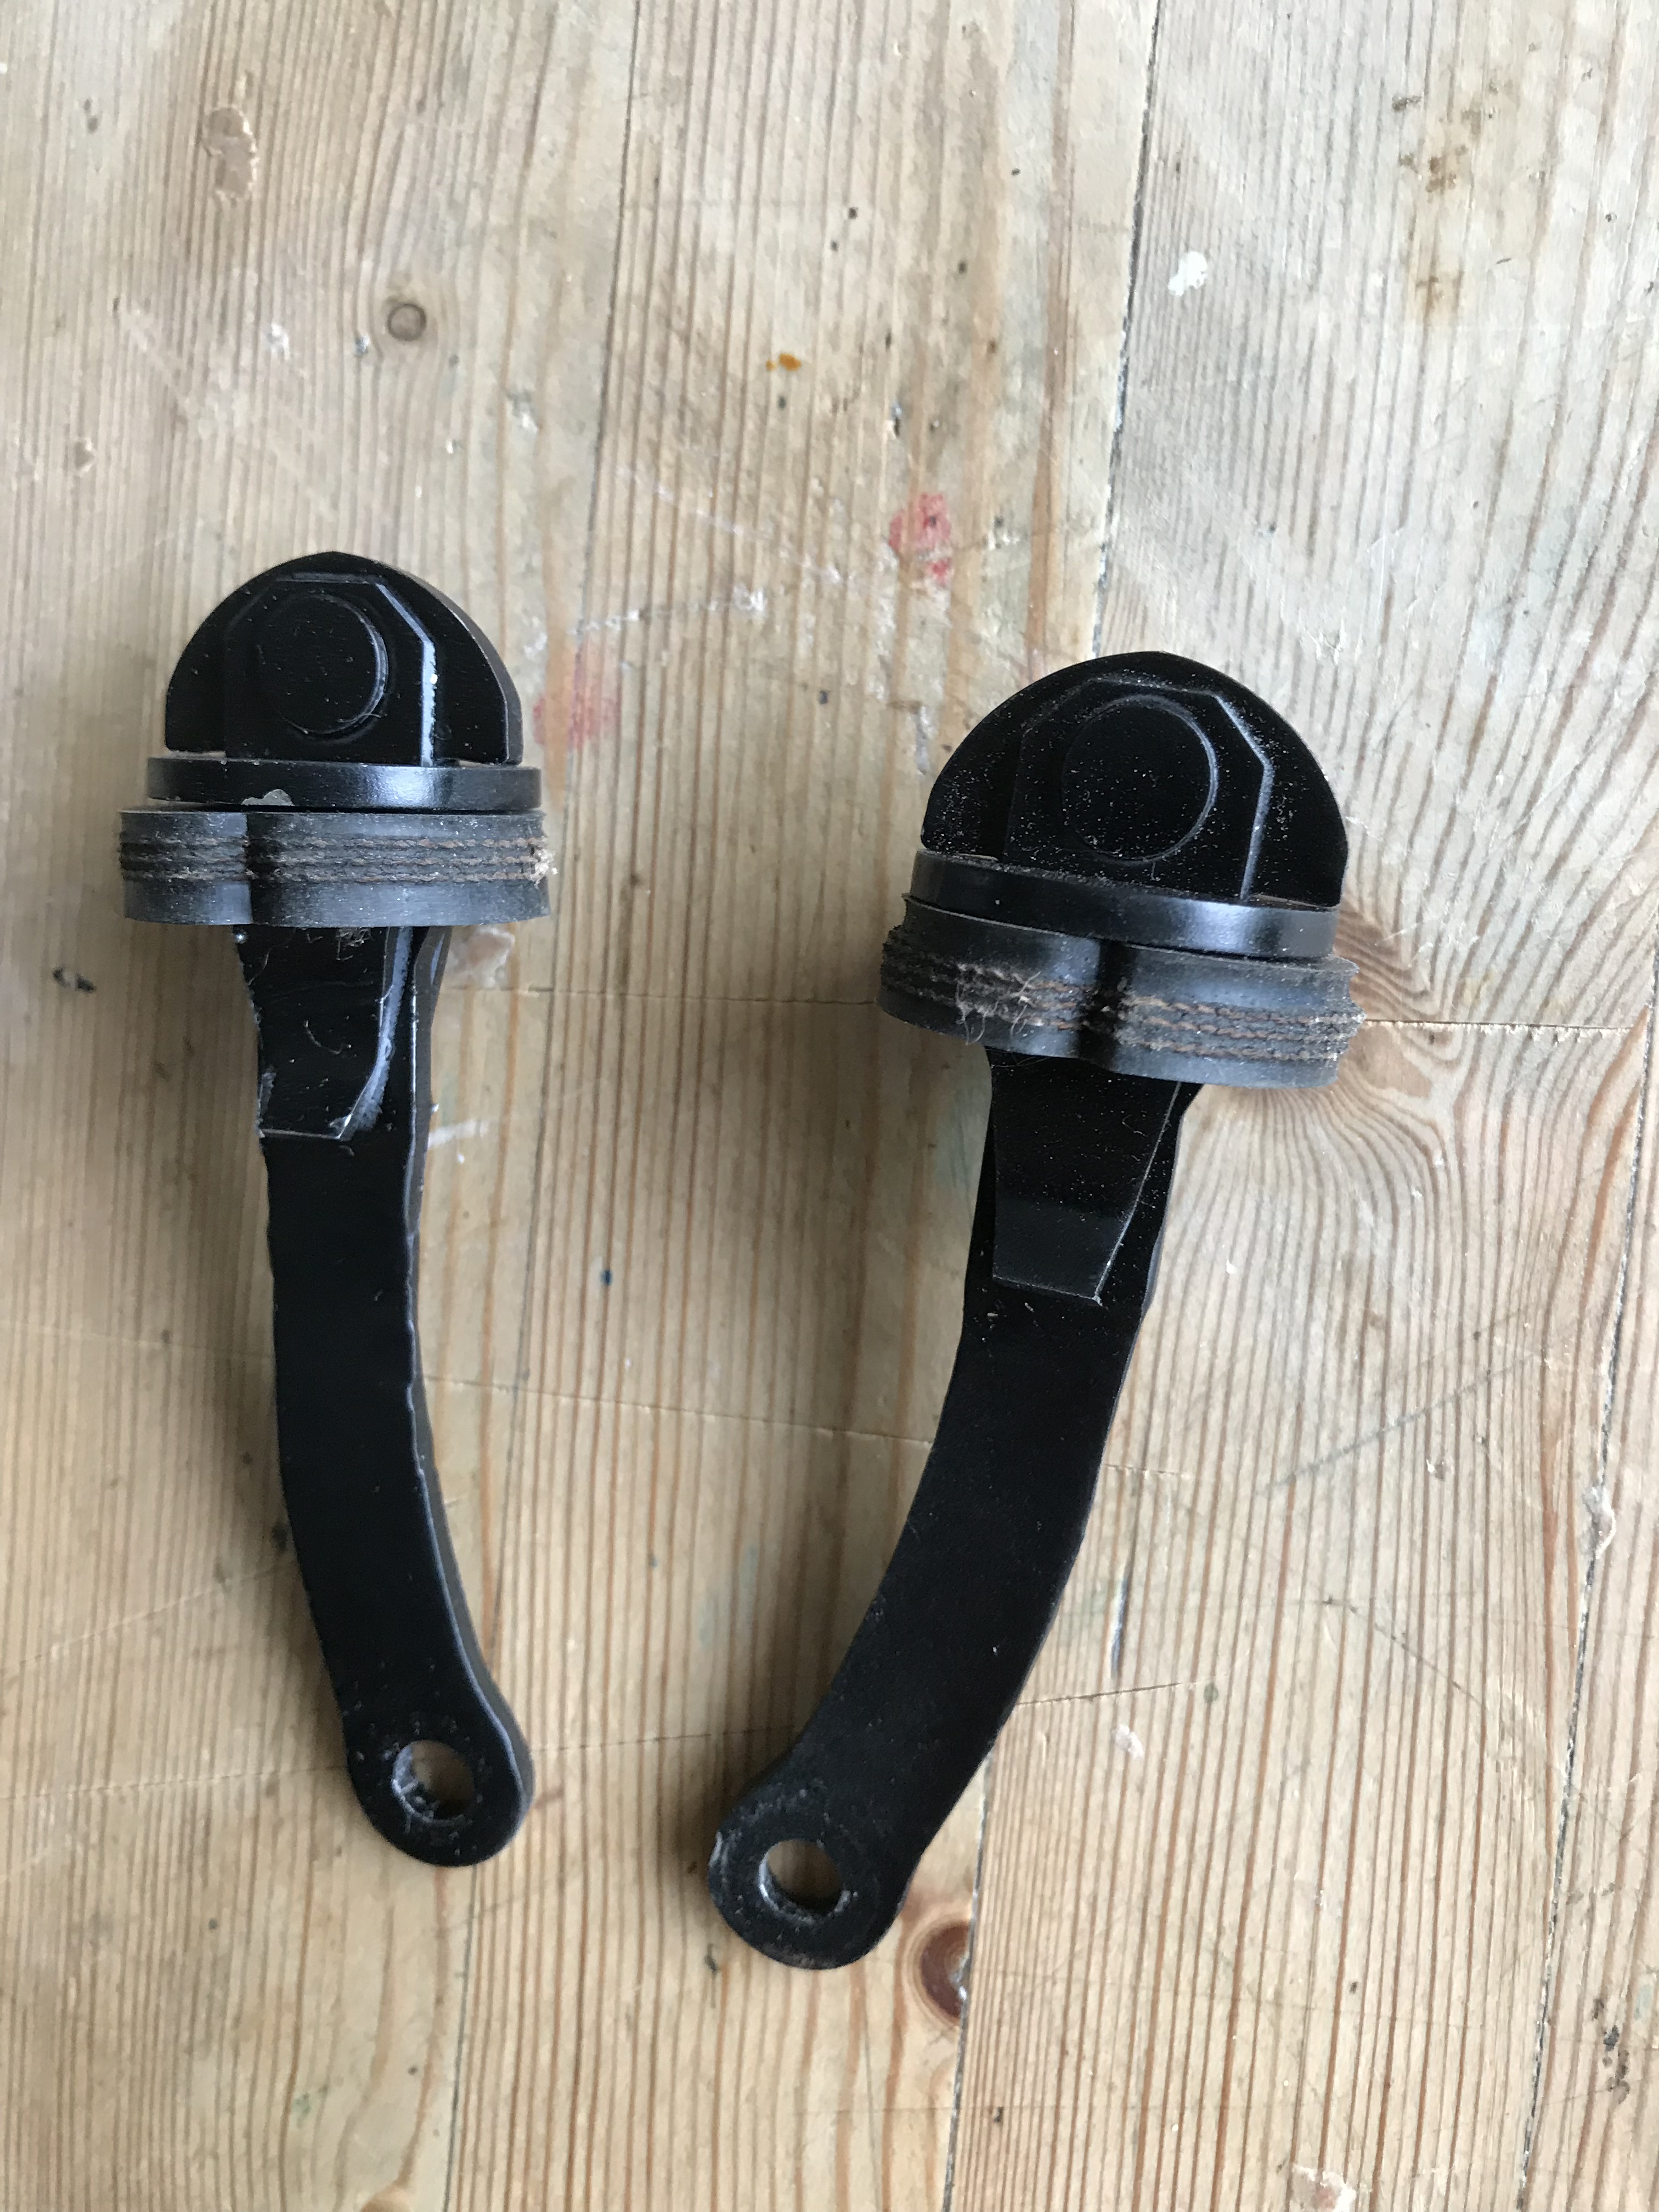
The next job is the doors. Catch cleaned and fitted.
Day 773 to Day 793 11 April 2019 to 2 May 2019
I dismantled, cleaned and replaced the rubbers in both quarter-lights. They both cleaned up well and the fur window tracks were in good condition. Fitted the quarter-light assemblies with new ‘top hat’ sealing rubbers. Cleaned and fitted the door latches, handles, bump stops (with new pads). Adjusted the door rubbers to fit the new parts. Cleaned and tested the window regulators. Next up was some remedial work on the rear window tracks (both re-used) and then I cut and fit the new weather seals. Before it all finally went together I figured out that the seal clips needed fitting to the door, then the glass had to go in and then the weather seals. Before the final fit, I cleaned, rust proofed and painted the inside bottom of the doors and rear window voids. Finally, the window was raised and the winder mechanism squeezed in and engaged (not as bad as I thought). Front doors done!

Day 794 to Day 801 (3 to 10 May 2019)
More or less repeated the process with the two back windows. These flap about a bit as the furflex rubber needs to go in and that can’t happen until the carpet is ready. Its great to revisit the quirky way they go down. The weather-seal design is poor compared with modern cars – no wonder they rust.
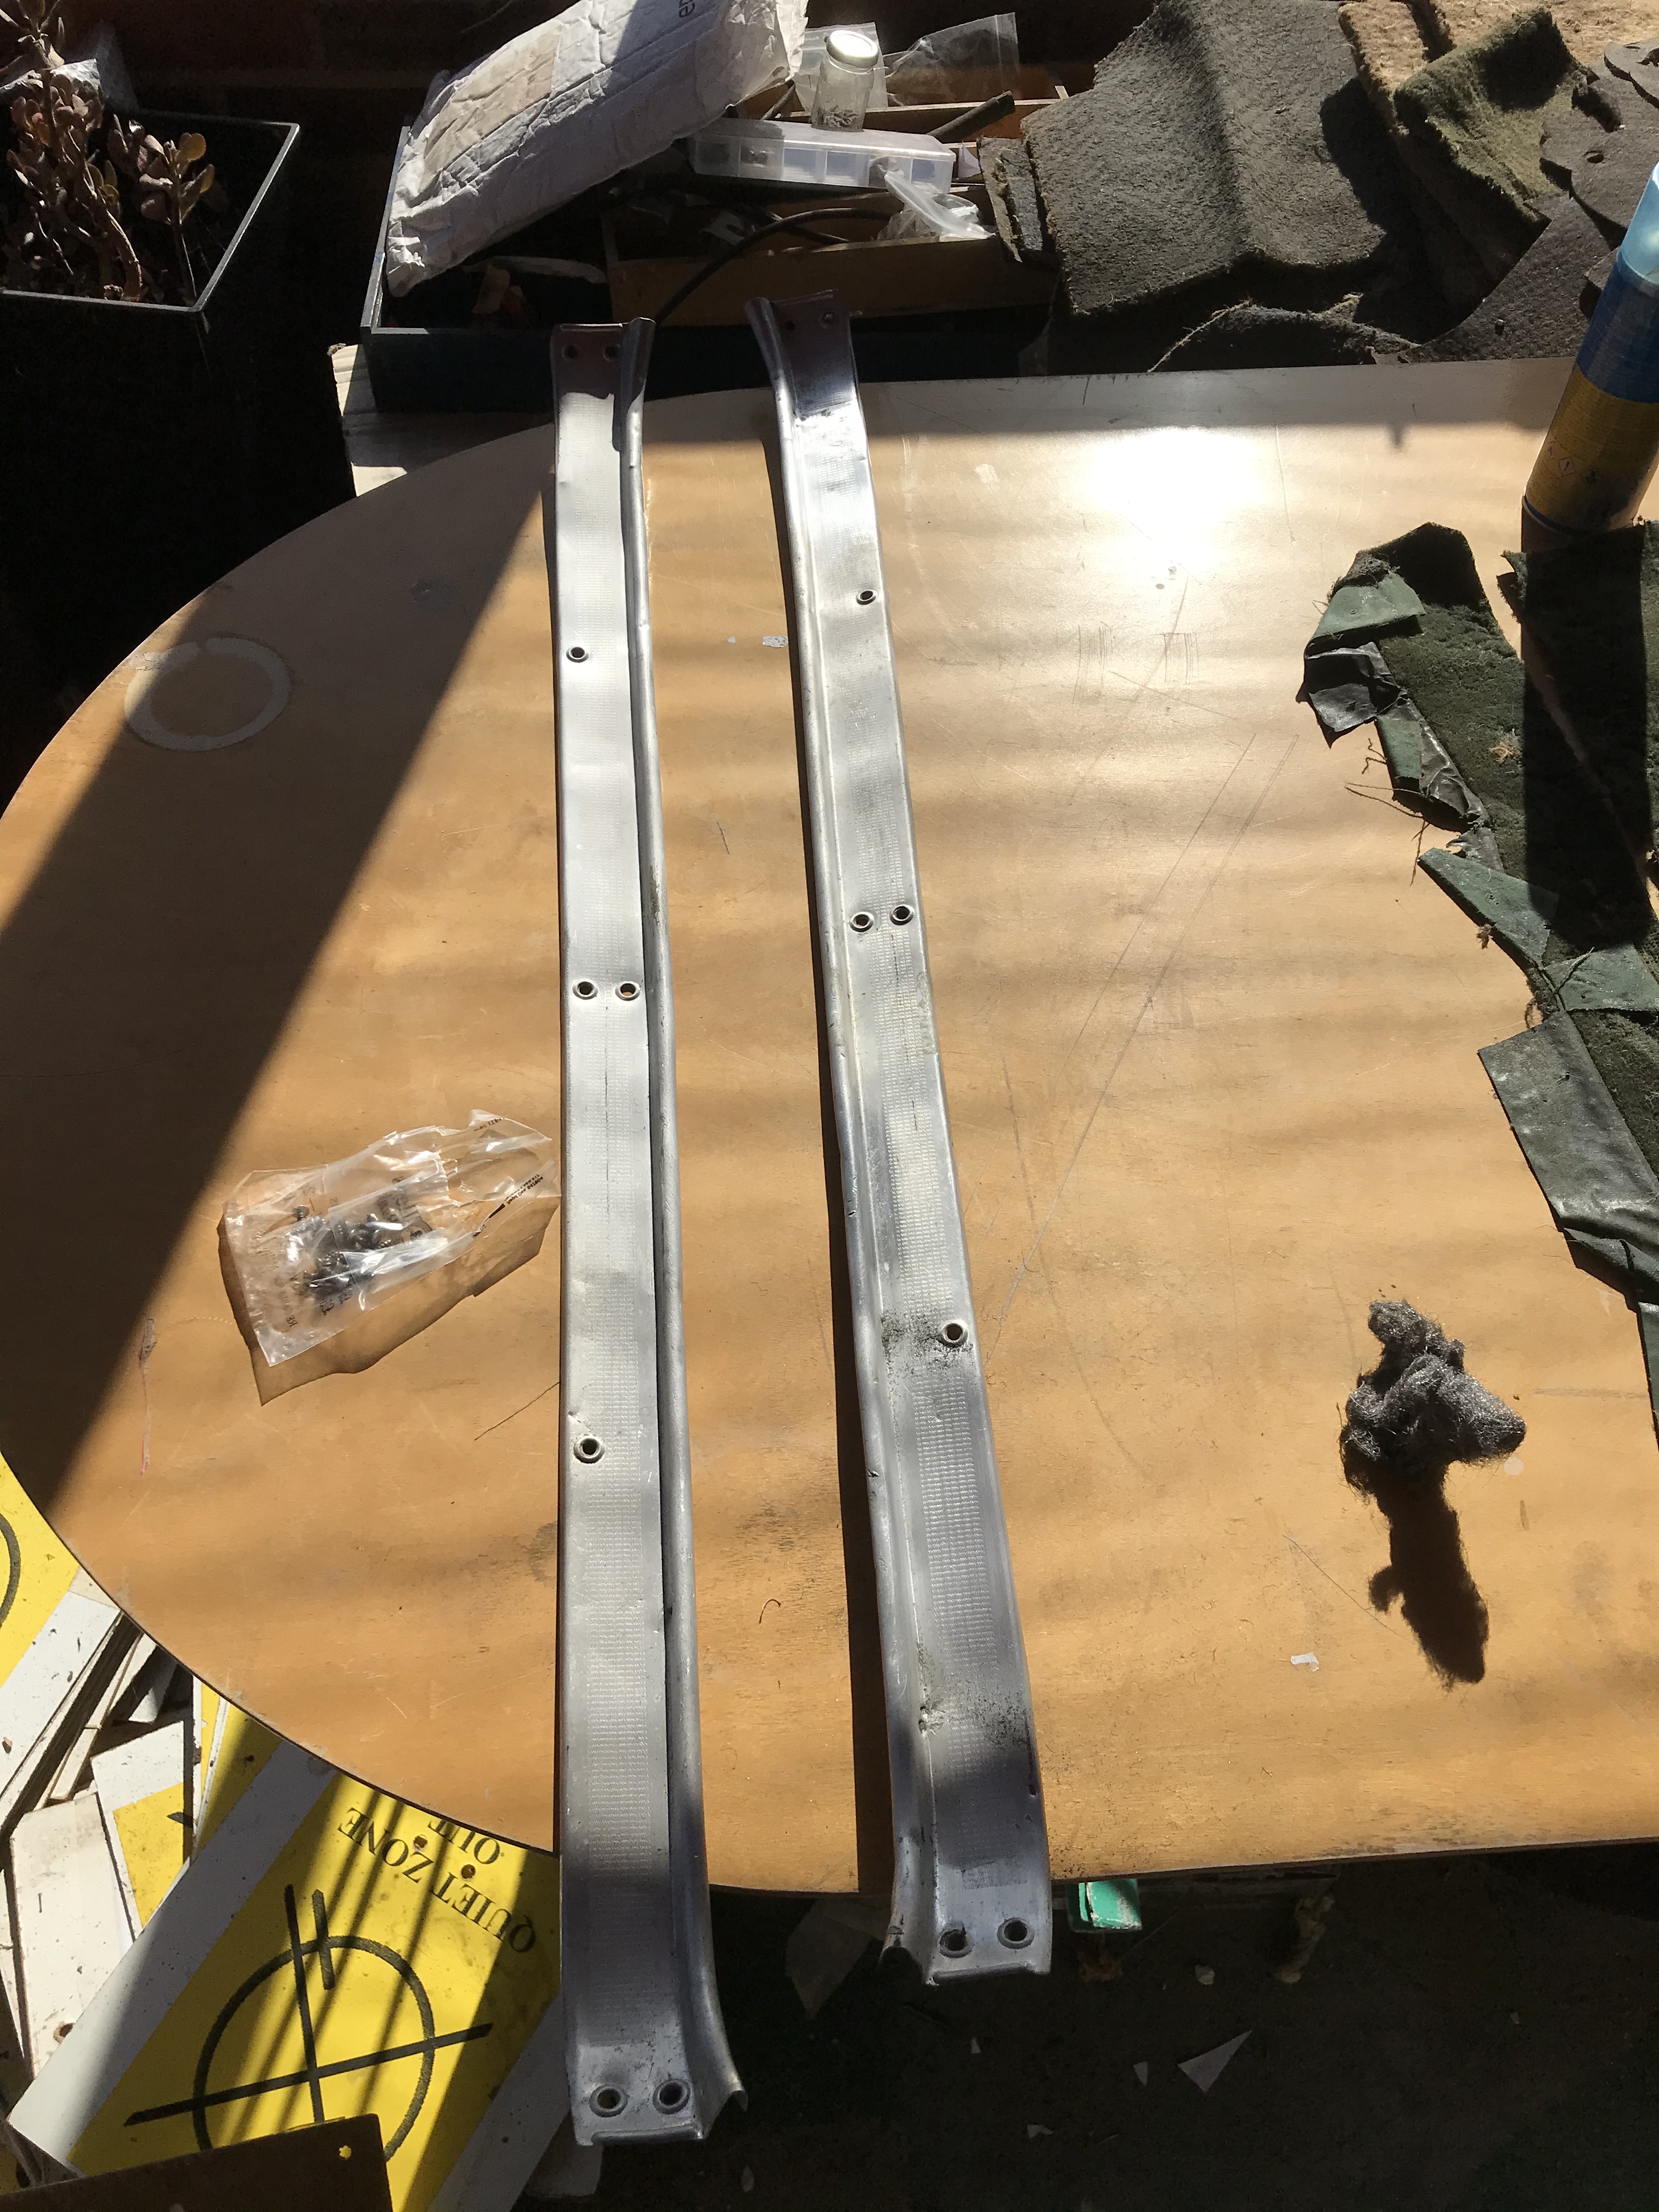
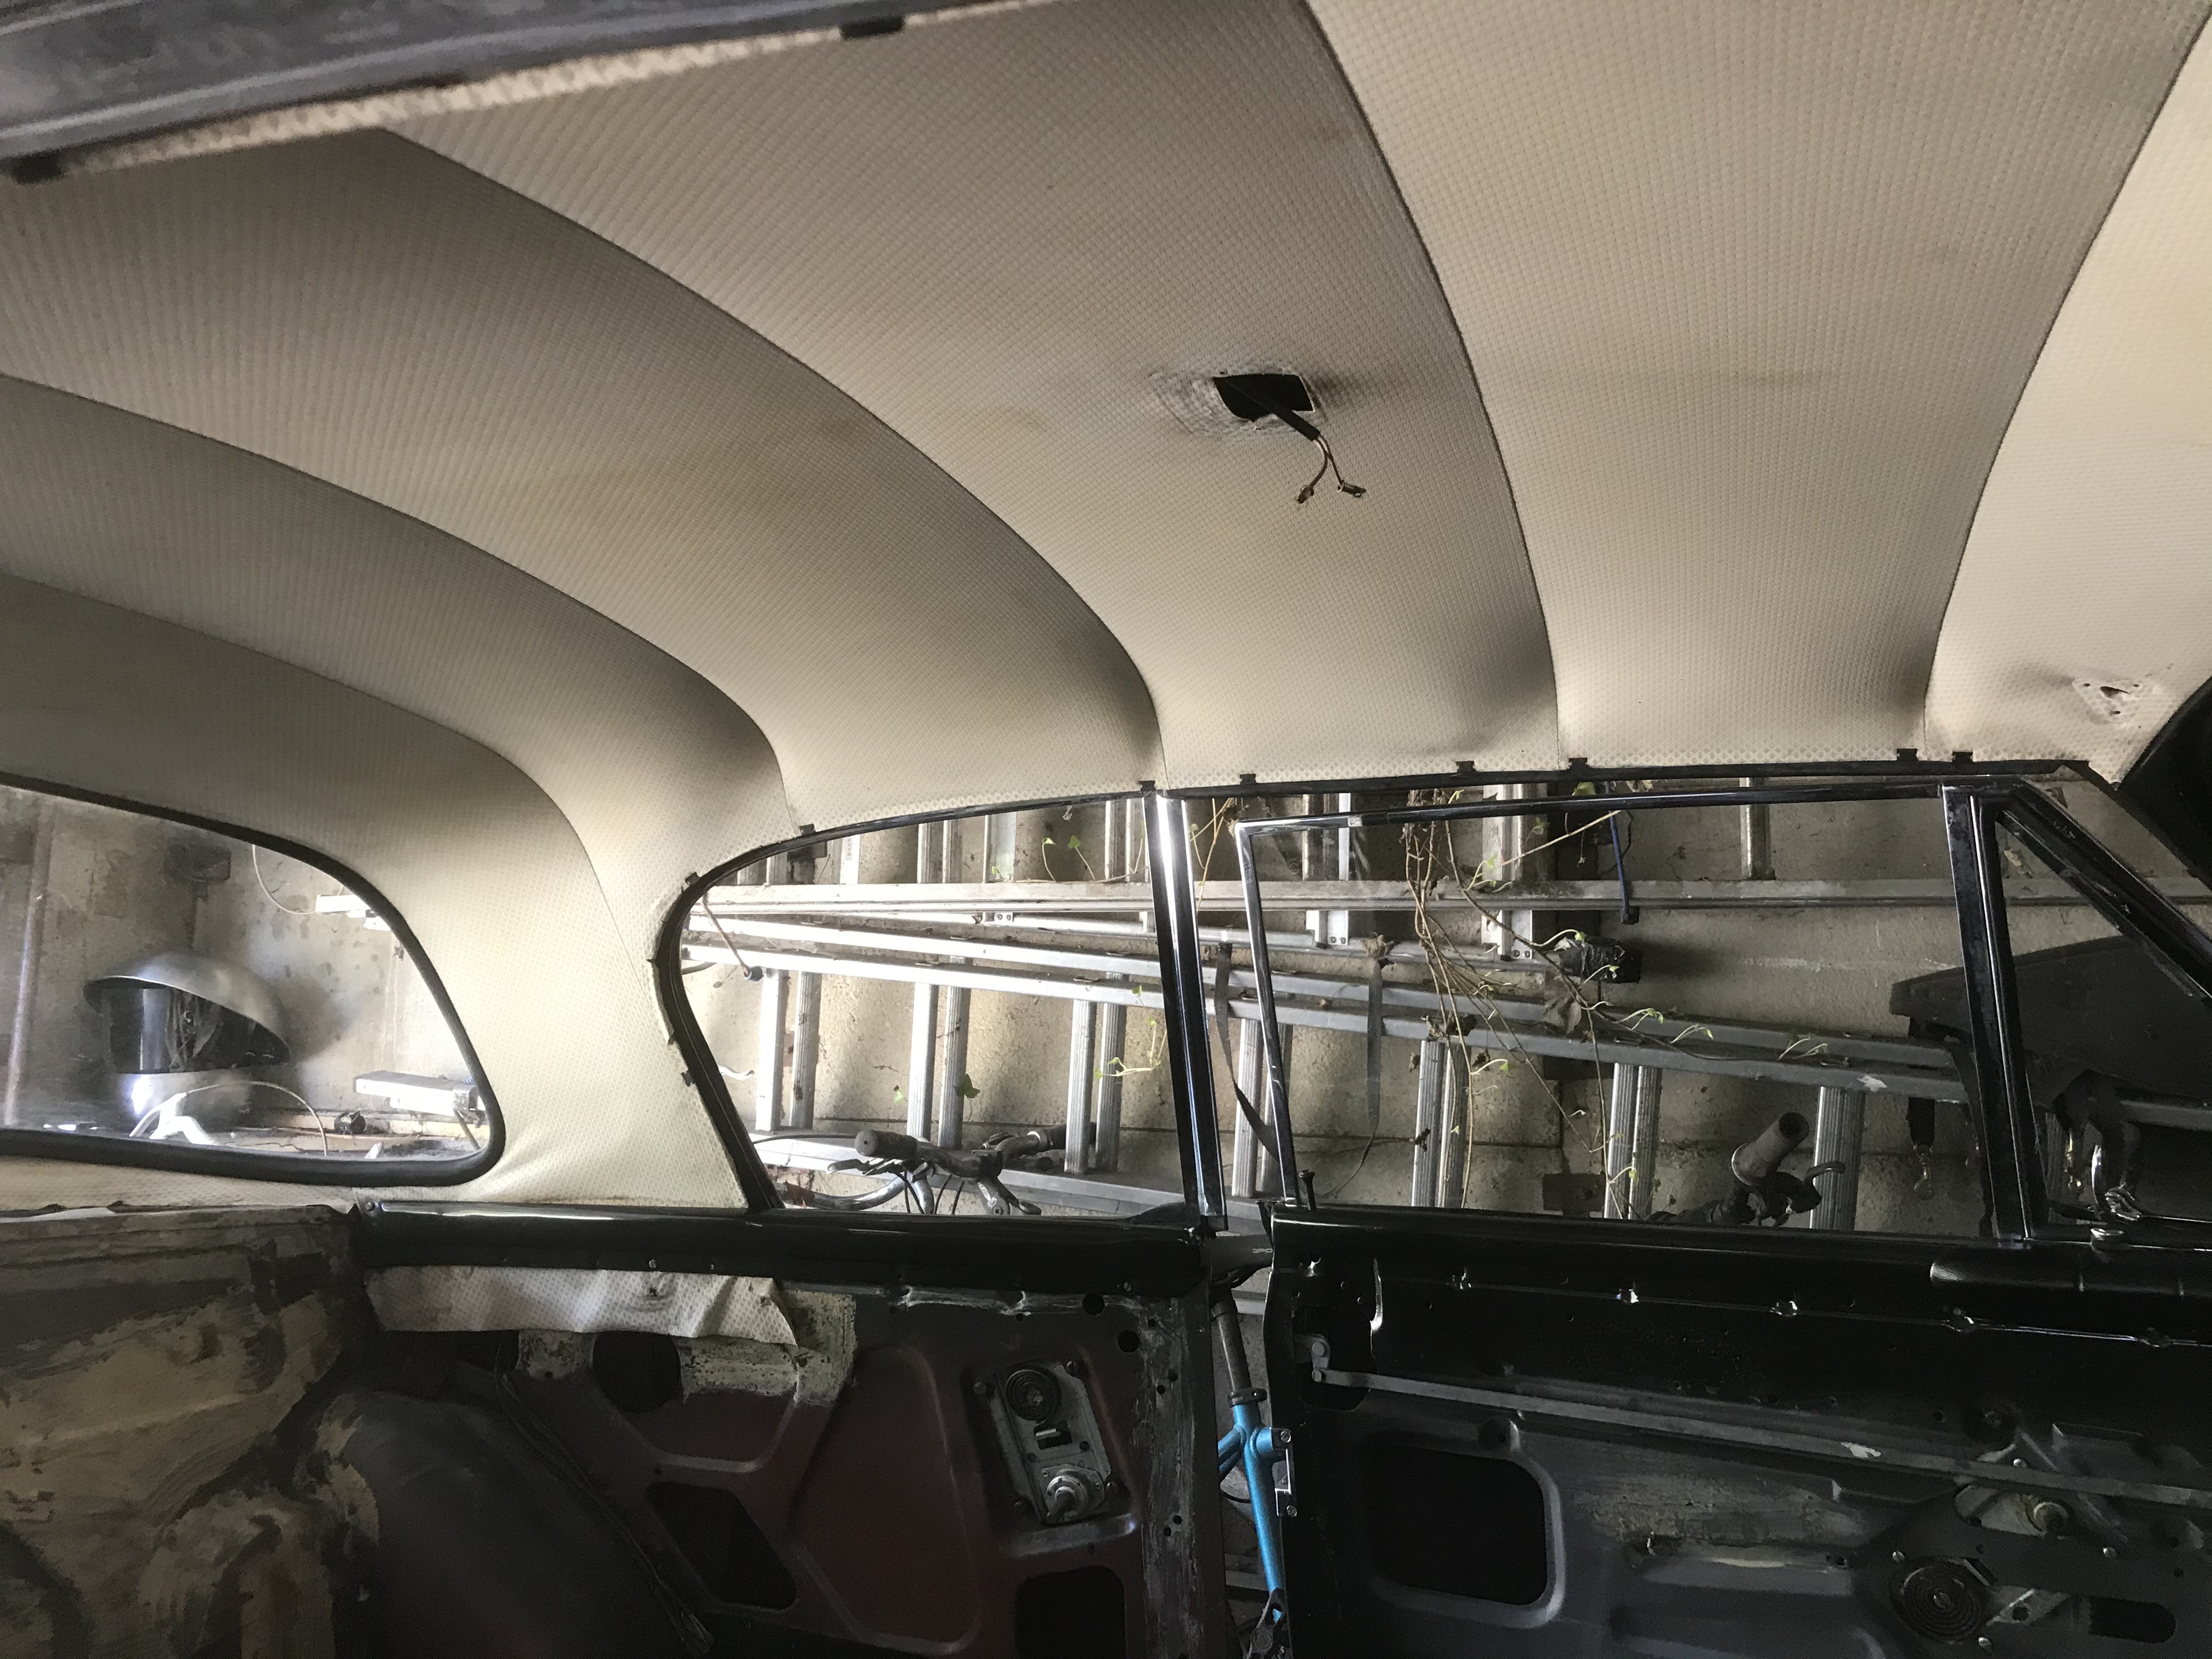
Day 801 to Day 805 (10 to 13 May 2019)
I had purchased the cantrail weather seal from the Owners Club at great expense. These weren’t the right ones but with the addition of a strip of foam, could be thickened up to work. A bit of trial and error here but they are on. I did manage to spill superglue on the roof. Doh.
Day 806 to 808 (13 to 15 May 2019)
Wipers. While contemplating fitting these, I had a think about the hand pump which it transpired, is knackered. After a bit of studying my collection of pictures cribbed of eBay over the years, I realised that like the mirrors, this item is aftermarket. So I decided to scrap that and install an electric pump in due course. Someone (not me!) had drilled the veneer dash to take the pump. Later cars have it on a bracket below the dash. That is what I shall do.
Fitting the wiper rack was fiddly as was getting the nuts on the stalks. But eventually I got them on and joy of joys, they work on both speeds! It needed a bit of snagging to prevent the bonnet hinge hitting the wiper tube – poor design really.
I wanted to get the car out to photograph this stage, only to find a bent throttle control rod was restricting revs. This was caused by a jammed accelerator piston. Moral – run it more regularly! Anyway. I finally got her out into the light….This is 19th May 2019.


I’m pretty happy with this!
Day 812 (22 May 2019) to Day 842 (19 June 2019)
The next job was the lights. I unpacked, dismantled and cleaned the rear light clusters and replaced the worn out foam gaskets which sit between the lense and the lamp body. I checked the wiring against the book, checked the bulbs and then fitted the rear lights using greenhouse self adhesive foam sealing tape for the unit to body seal. All the bulbs worked, which after 36 years off the road is remarkable.
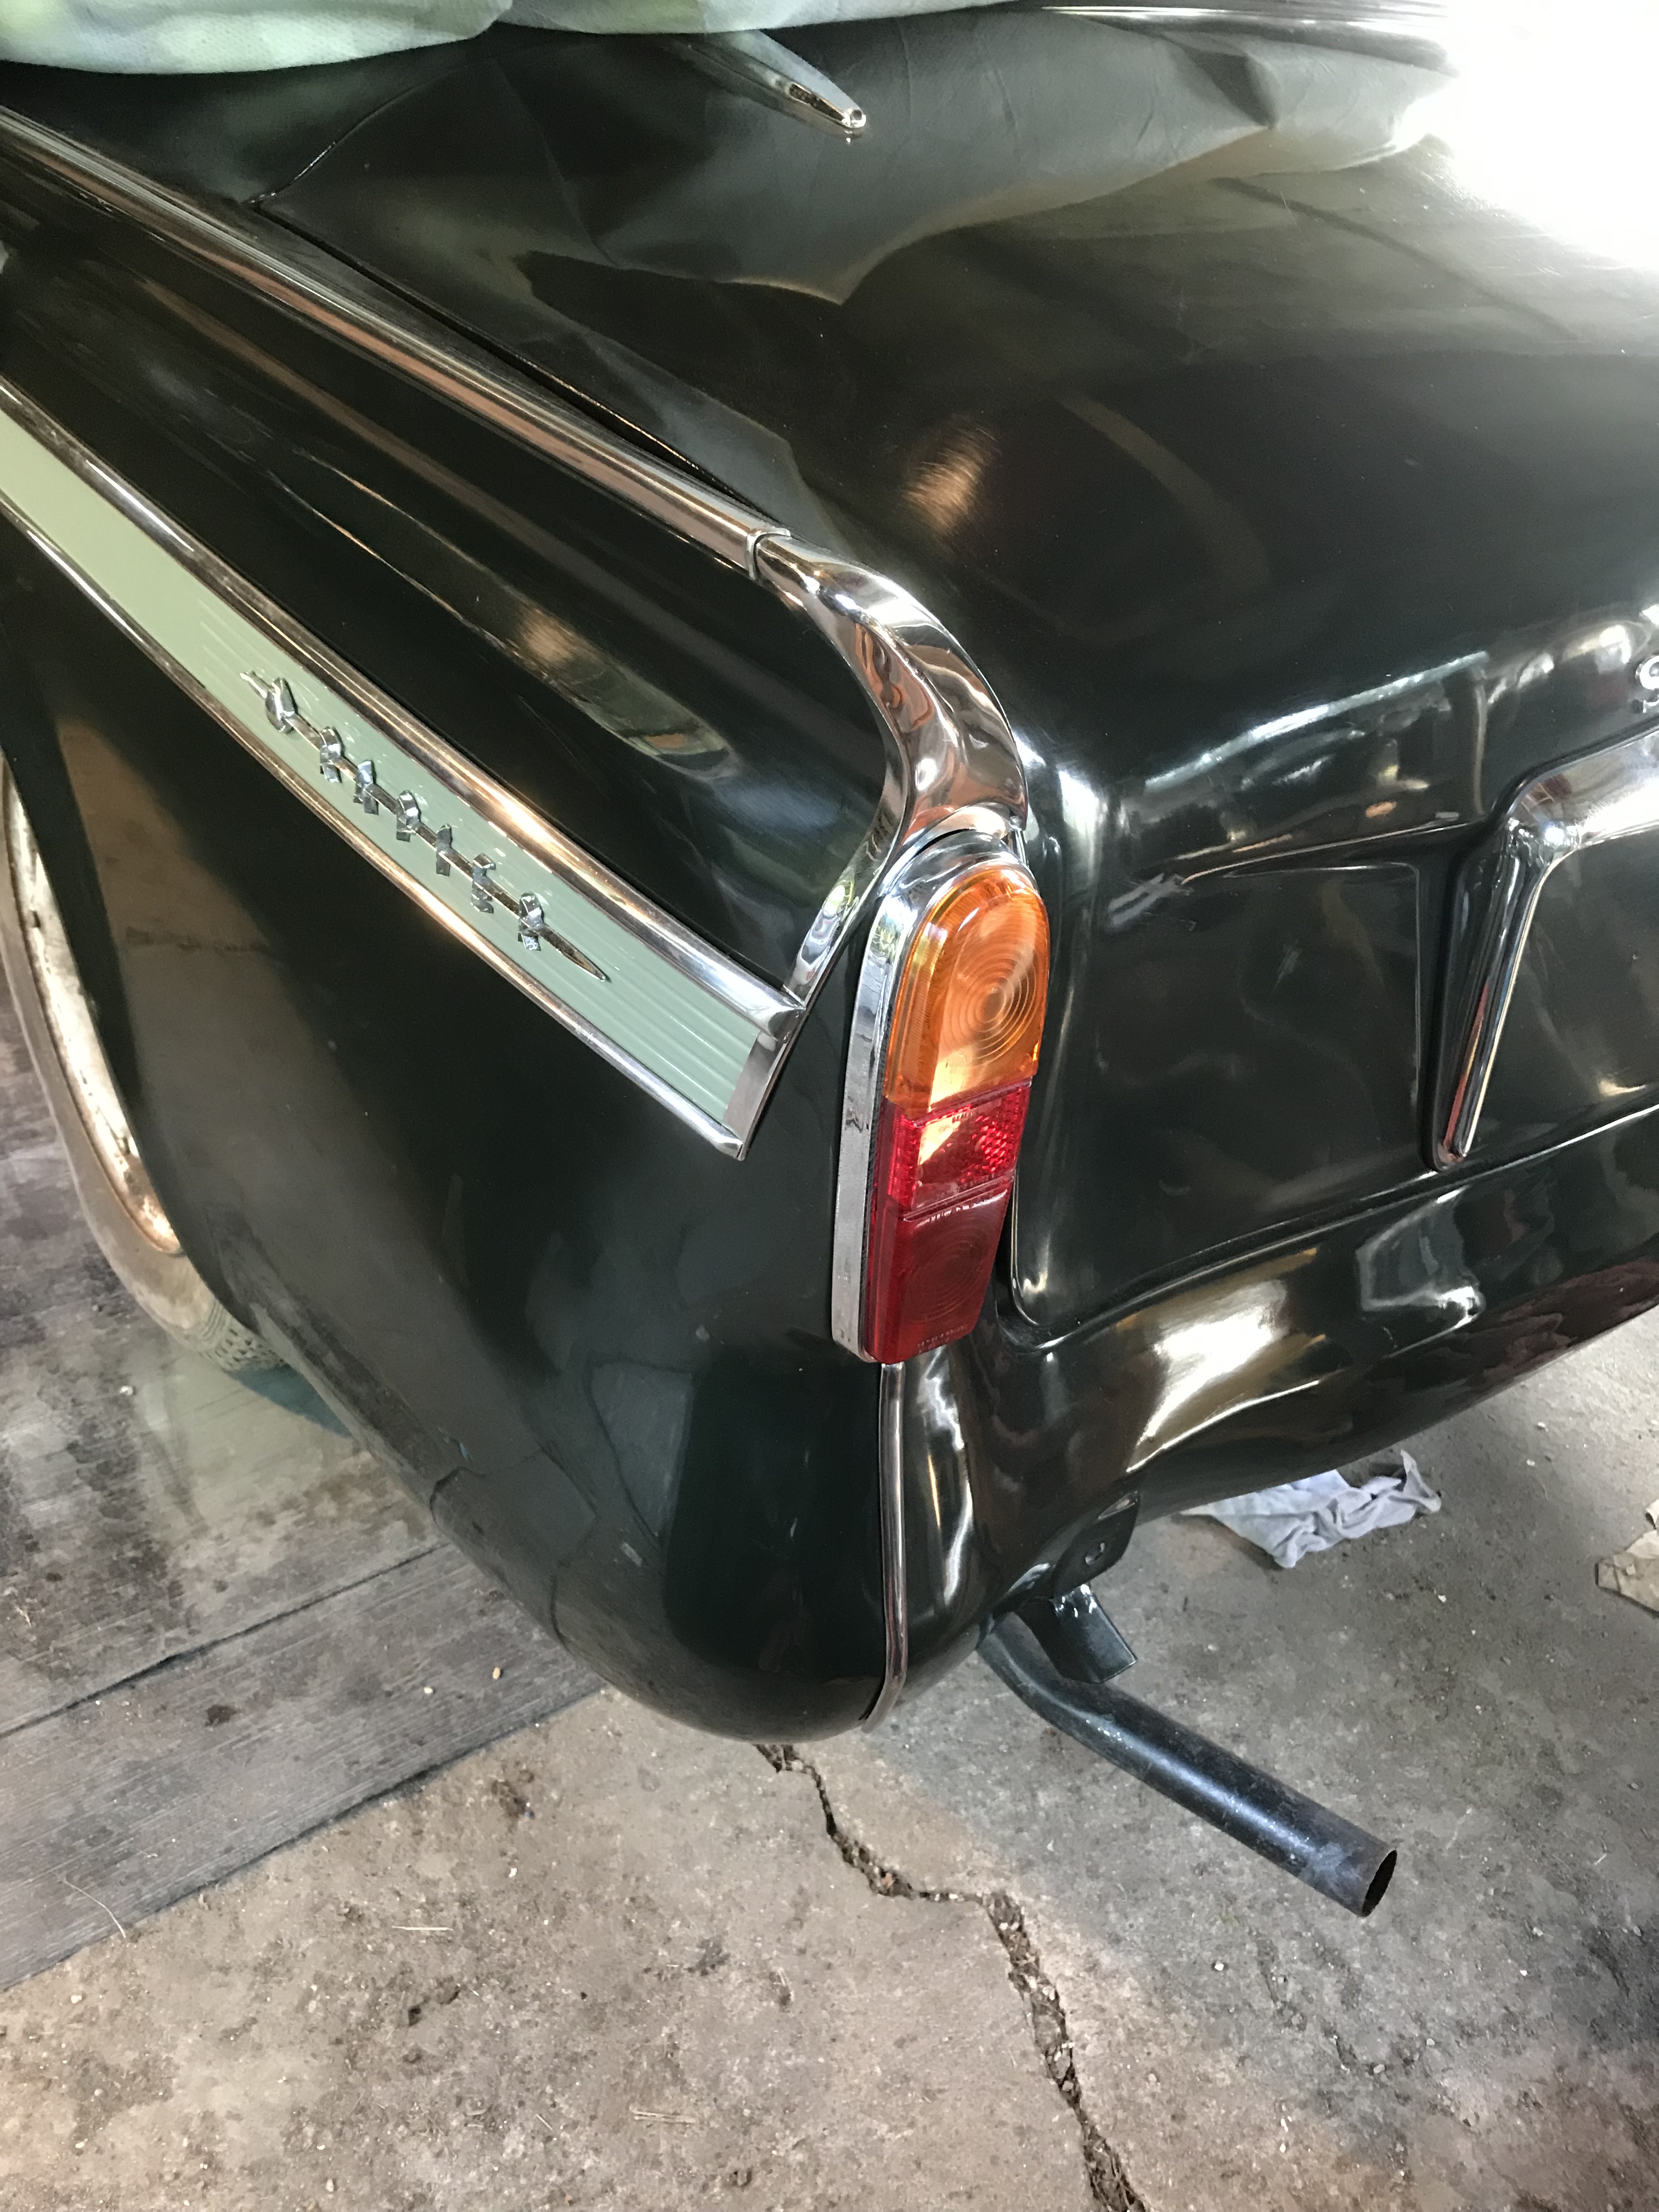
This looks great! I keep saying this now!
Next was the headlights. I had fully intended to uses the old ones but replace the French Style yellow bulbs the car had always had since I knew it (visible in the SROC Meeting picture above in 1982) with white ones. The O/S was OK but the N/S bowl had seized adjusters, so needed replacing. I bought some Lucas reproduction ones that had all the rubbers, new bulbs and the ‘Tripod’ lenses. These could be regarded as a bit ‘whitewall tyre’ but they are fitted to the car pictured in the handbook – so must be OK!
I fitted the lights to the car, and then spent some time re-doing the looms which some idiot had cut off (instead of disconnecting at the bullet connectors at the back top of each inner wing). Yes that idiot was the 19 or 20 year old me!
Although the sidelight/indicators where the final piece in the puzzle, they had to wait until I addressed the chrome work, as the sit on top of the side grills.
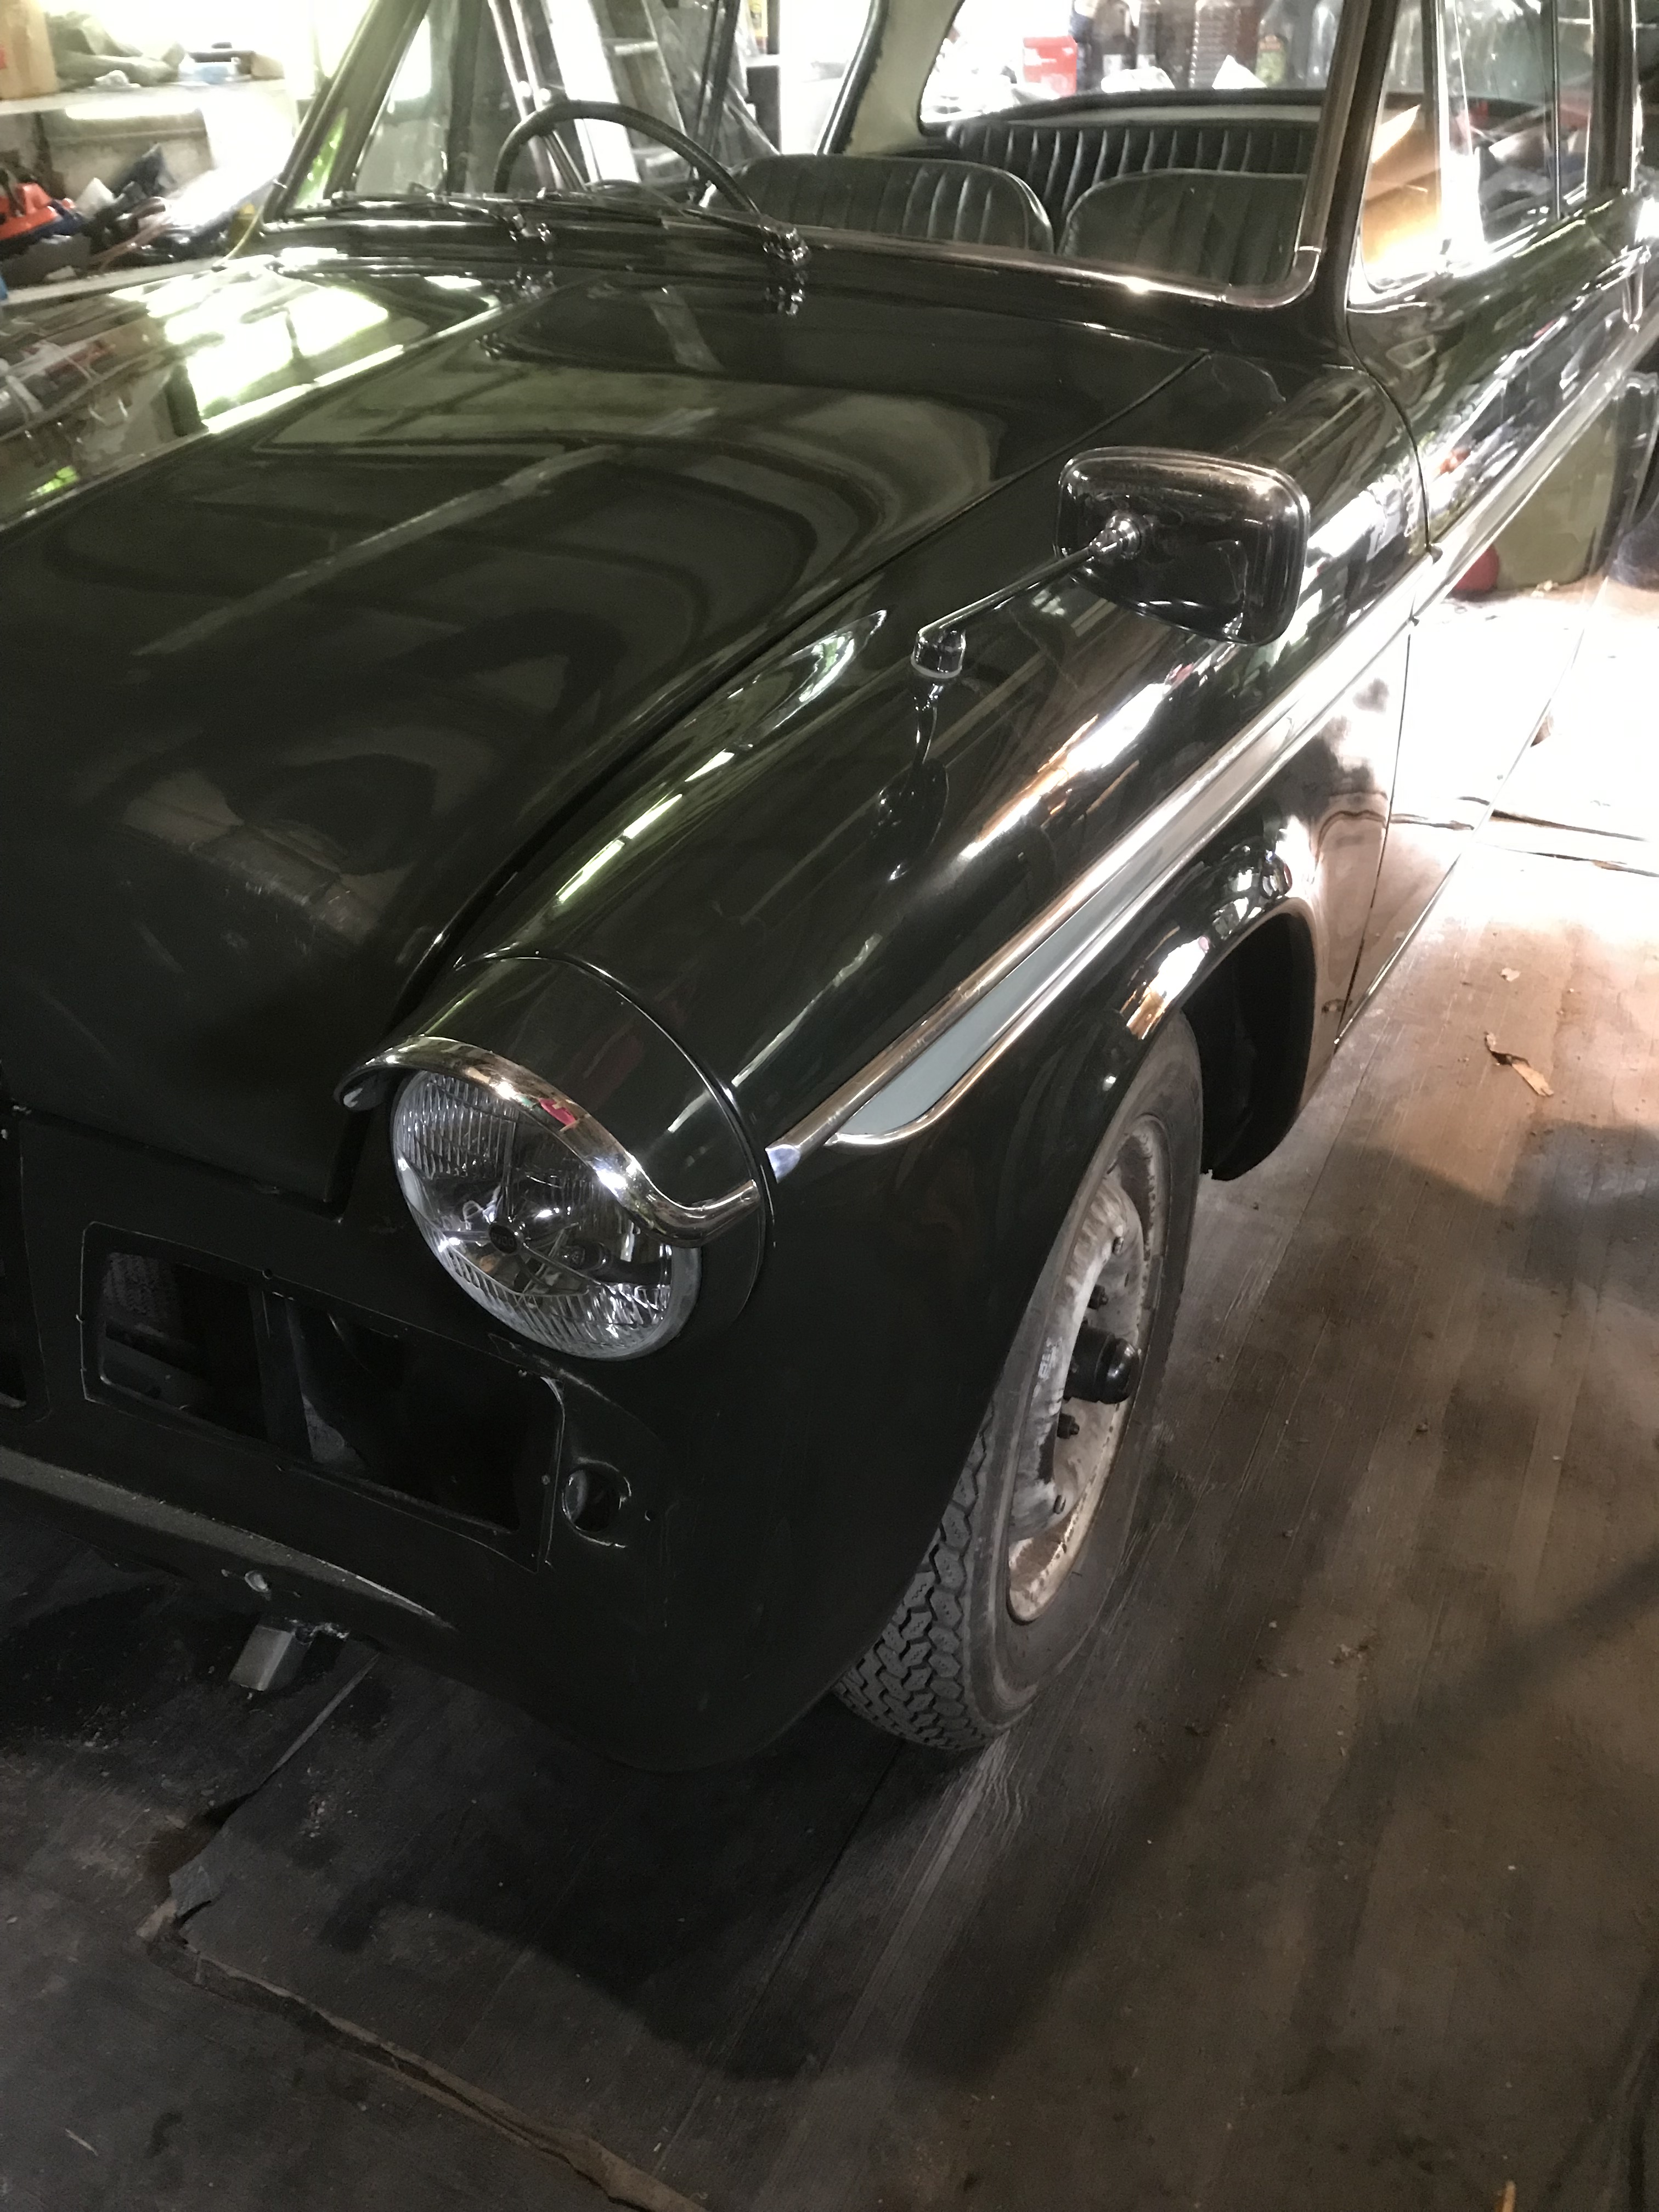
This is the first time this car had a working white headlight since at least 1978.
The lights took a while, as I had to deal with two car problems during this period. The first was my daughters Mini R50 needed a clutch (the second time during our ownership) and then the replacement (her brother’s/my 3 door Fiat Punto) got broken into via the (very rare) side window.
Day 843 (20 June 2019) to Day 853 (1 July 2019)
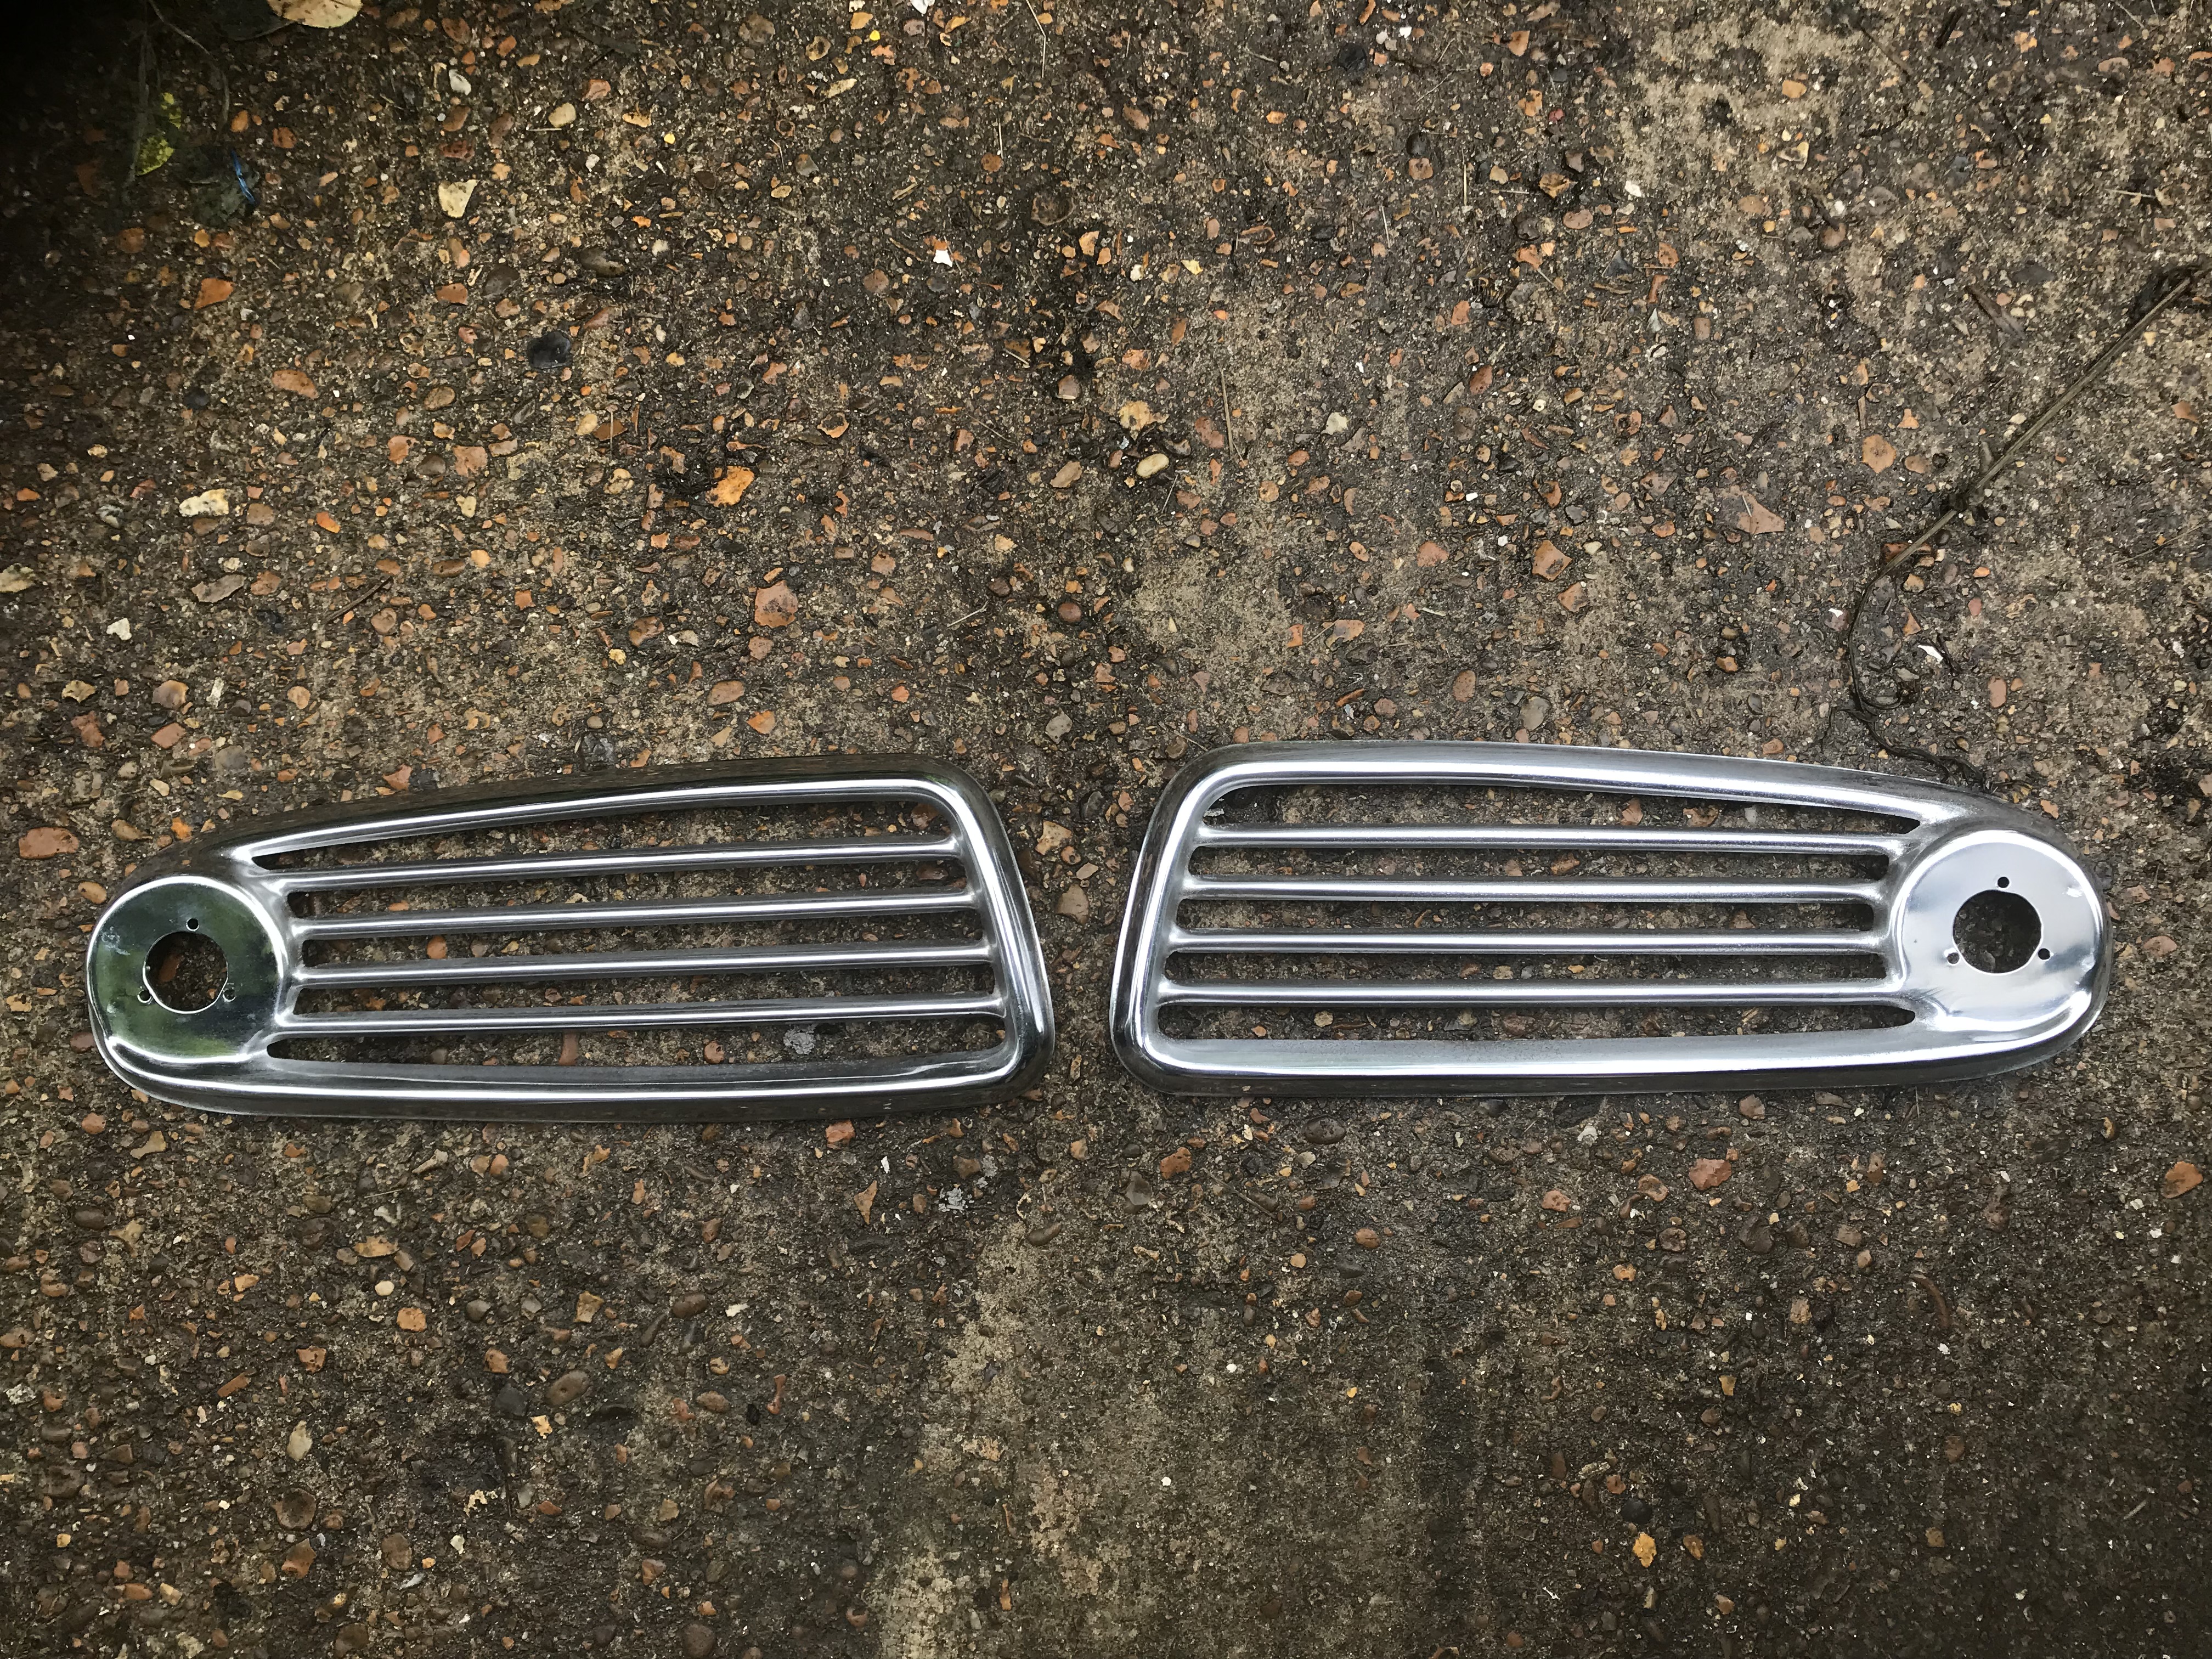
Once these problems were solved it was time to address the chrome grills. Neither side grill or either of the two centre grills or the three bonnet plinths were really good enough. I did enquire about re-chroming but it was prohibitively expensive. The side grills needed some replacement studs that I soldered on using the same method as the rear plinth and trim clips. I then cleaned them as best I could and in the case of the side grills, painted the backs in ‘chrome effect’ paint (silver to you and me!)
One of the sidelights was damaged, so the lens just fell off and it was missing the inner workings of the bulb holder because of this. I found a replacement that was a good quality reproduction. I tested the lamps (all good), prepared the looms for these and fitted them. Very fiddly, even with the heater and battery off the car. To my great pleasure, I discovered that the indicators all work. Very cool with the brake light style bulbs (21W flasher over 5W side light)
I opted for the original dented plinth over one that was very, very rusty and a third which was very faded. While this one is a good candidate for re-chroming one day, it looks awful (see below).
The central grill was a tough choice. The original had four damaged uprights, and some scaby patches. This one (below) was rustier but not in such extremes. I masked it and painted visible parts and the back satin black. This took hours to put on and take off.

Over all the front chrome (well all the chrome) is letting it down a bit. But I don’t have the funds or the inclination to spend hundreds of pounds on it at the moment. It won’t win any ‘best in shows’. I shall argue the lived in look is better!

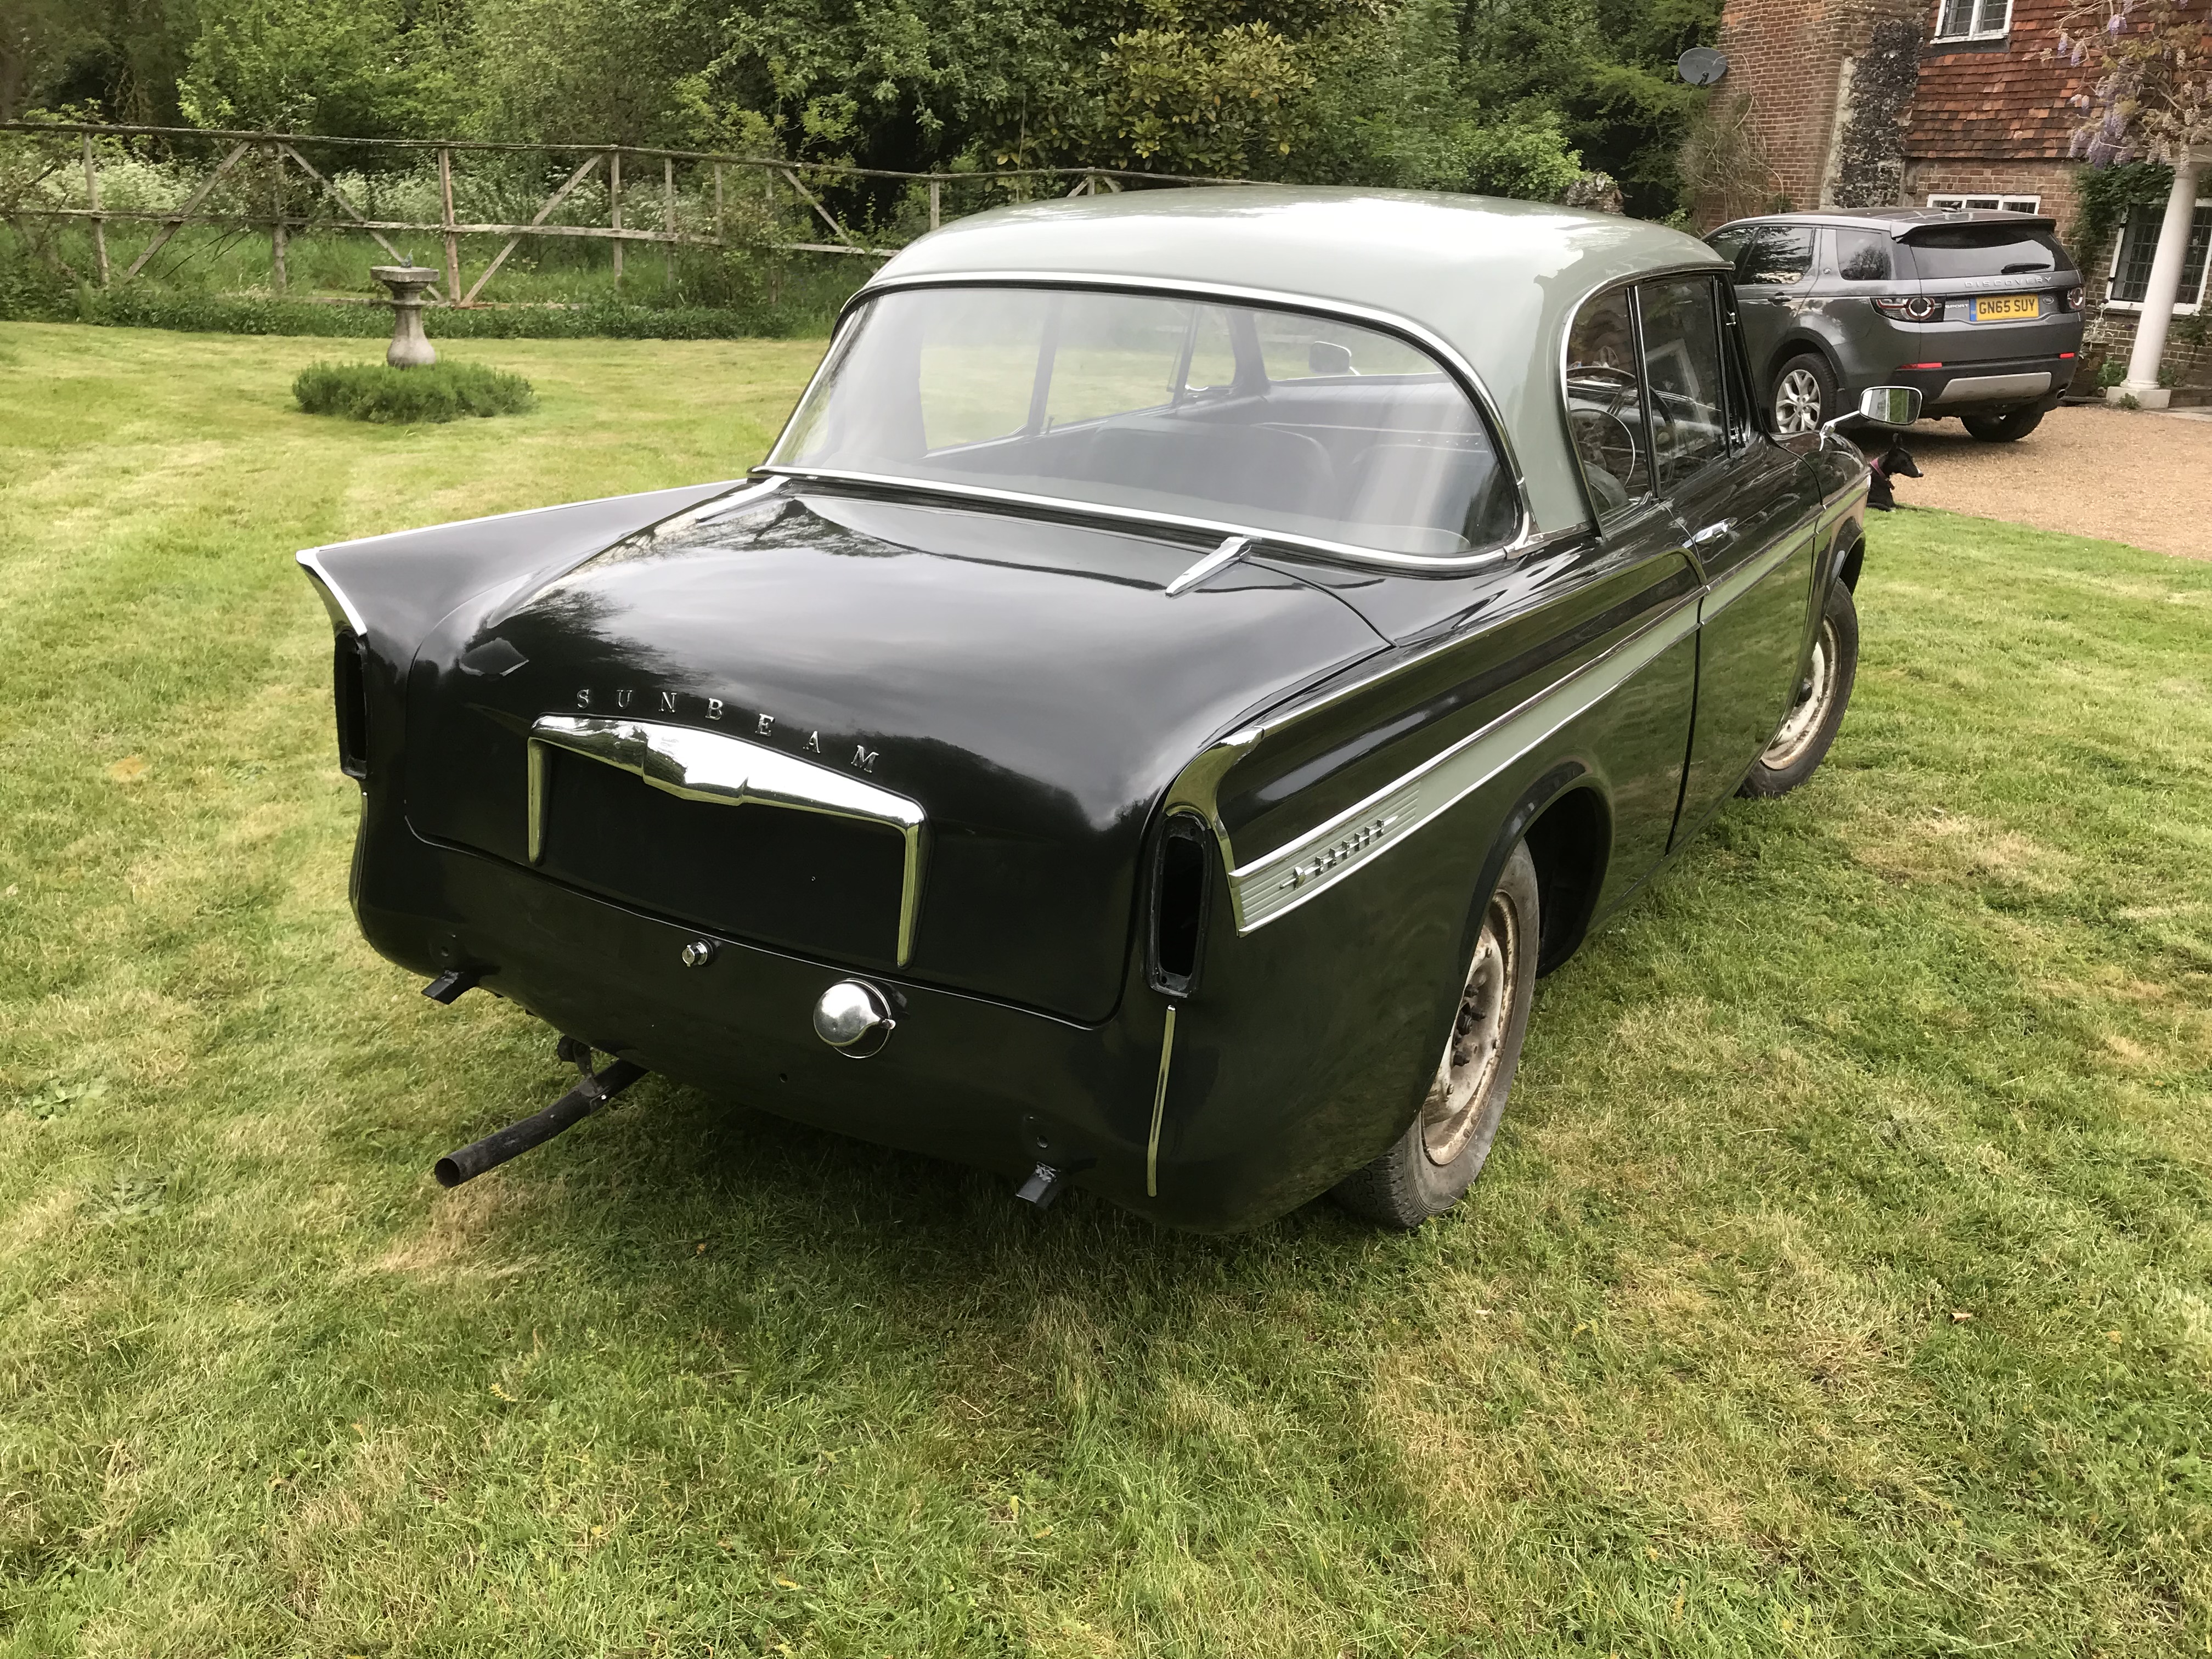
And here she is…

This car is looking a lot like a Sunbeam Rapier S111! it aint concourse, but it’s good and it has provenance.
Days 854 to 869 (2nd – 23rd July 2019)
Bumpers. Dug them out. Cleaned the brackets. Rust proofed. Painted. Chrome cleaned (they are a bit pitted, but re-chroming is SO expensive). I spent a bit of time looking at pictures to check which way the brackets fitted (although they are stamped RF RR LF LR).
I also dismantled the number plates. Straightened and painted. Fabricated a new bracket for the front. Then I put it all on.

These pictures give me so much pleasure!
Day 875 to 935 (24 July – 20th September 2019)
A long and tedious job doing the wheels and hub caps. Lots of cleaning polishing and tapping out dents (hub caps). Paint stripping, wire brushing and tapping for my patent hub cap retaining screws (wheels). Losing hubcaps is the bane of these cars lives.
Some rust just can’t be got out!

But they look nice for now..
I resolved the big wheel colour debate – this is the colour they always were. Not sure what it is but I got there mixing moonstone white and cavalry beige!
It annoys me that the hubcaps rip up the paint on the wheels – what a daft design. It would look nice on minilites wouldn’t it???
The car needs a lot of dinks and scratches touching up, but would rather do that in the spring/summer. Meanwhile she went outside for some pictures to send to the DVLA.
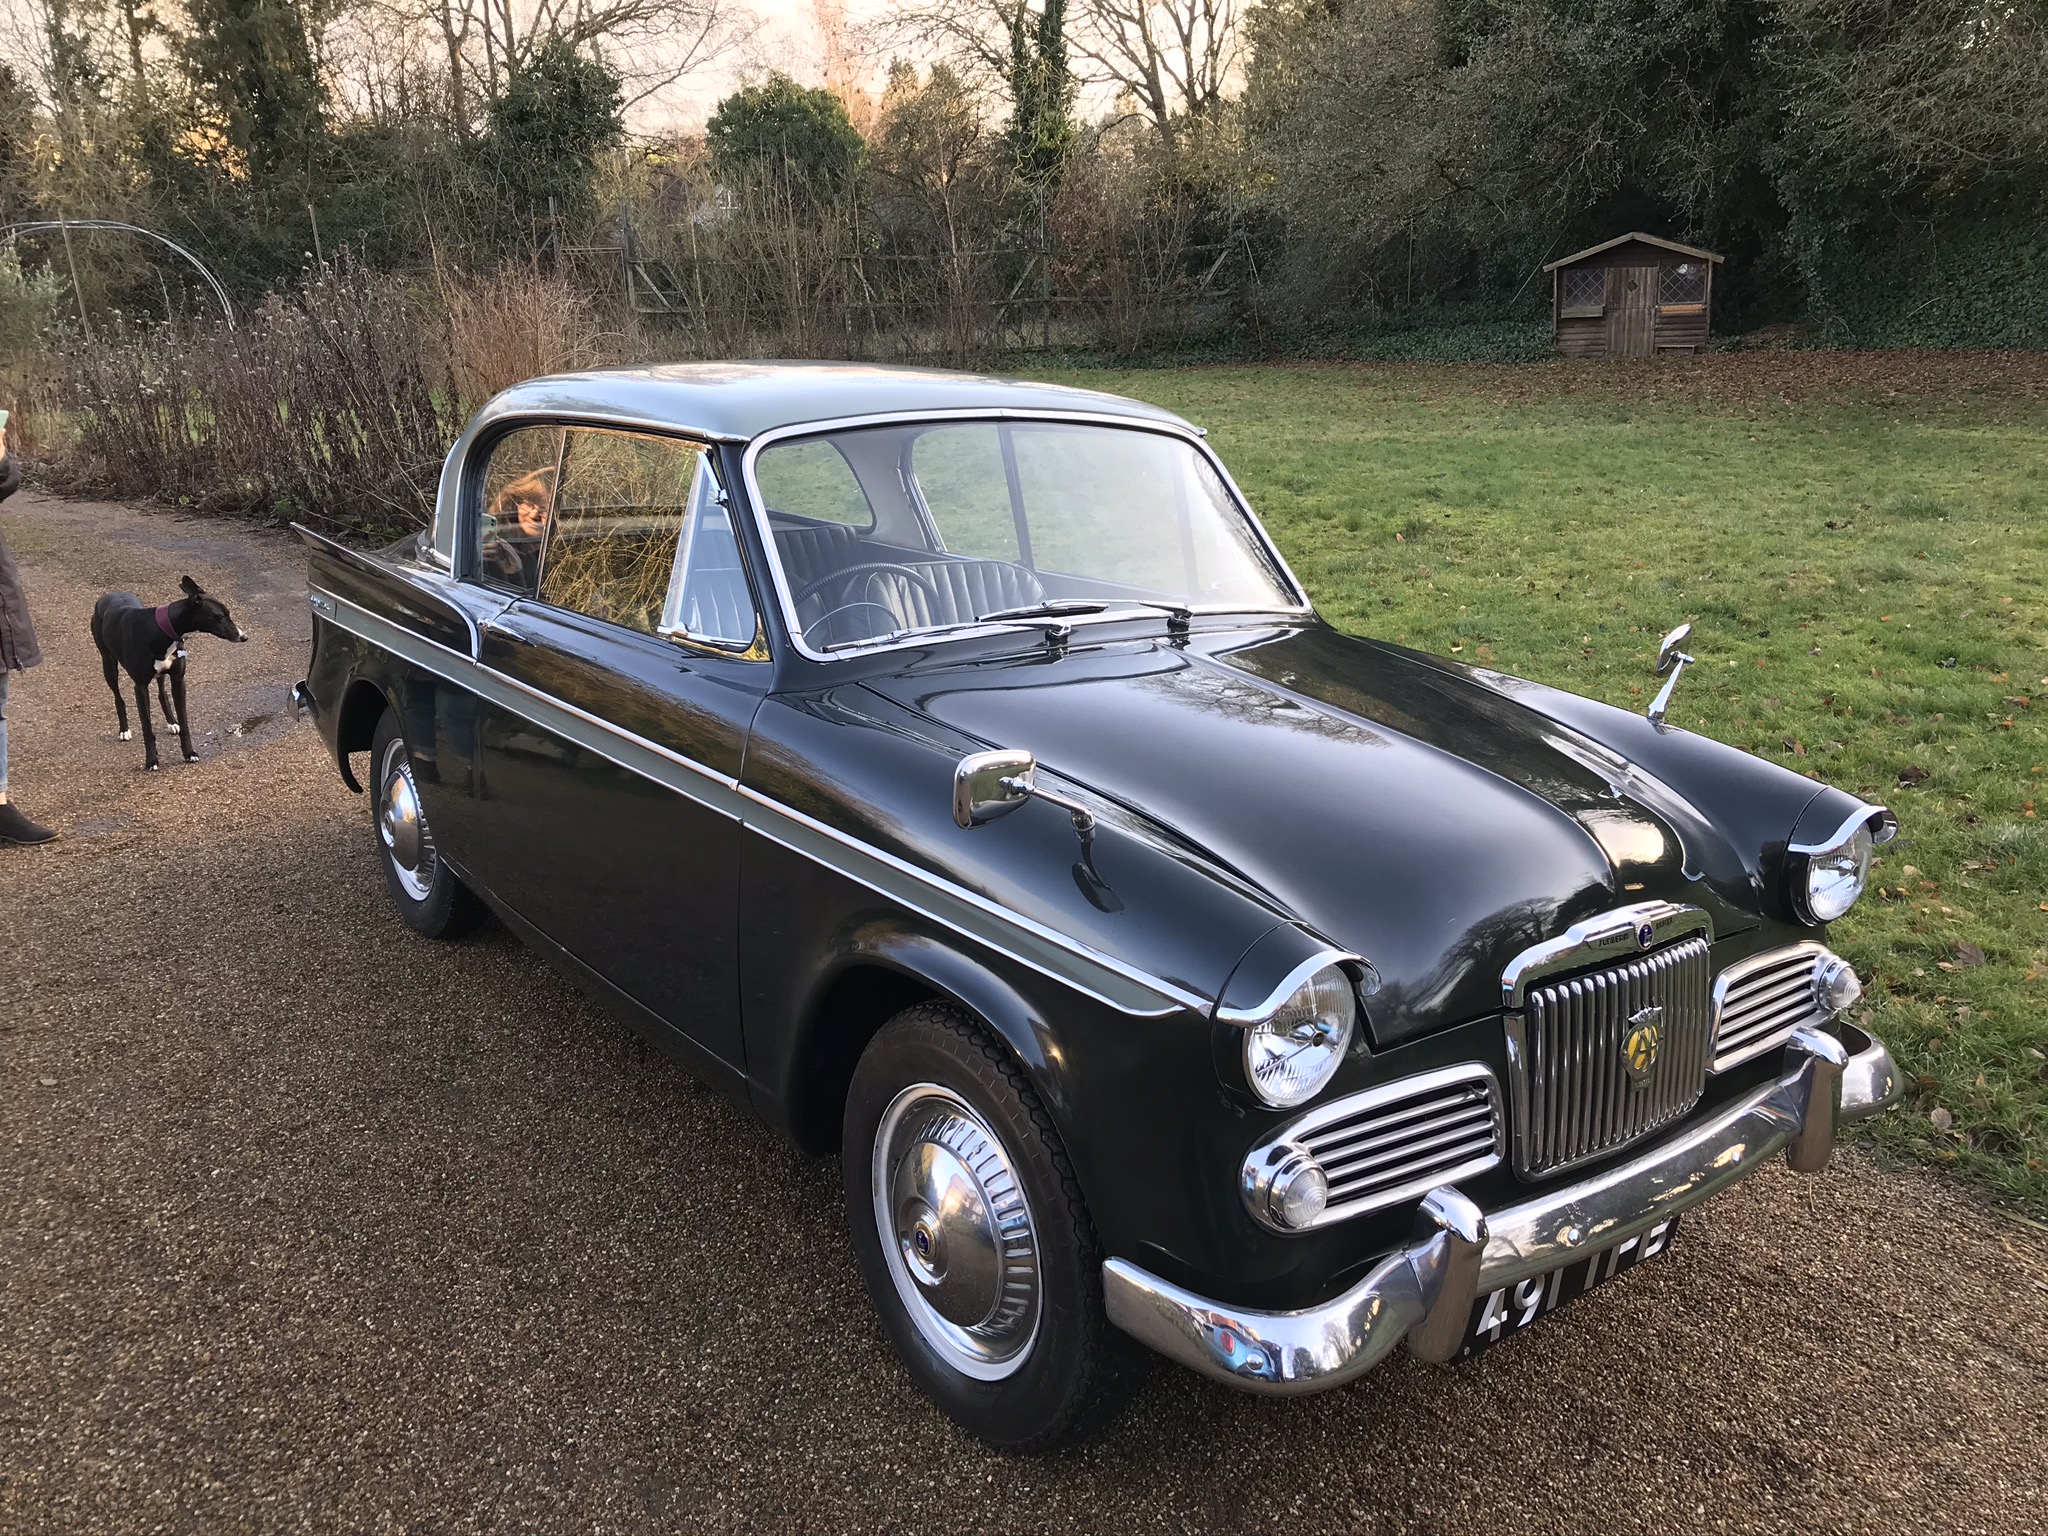
…but it looks good…
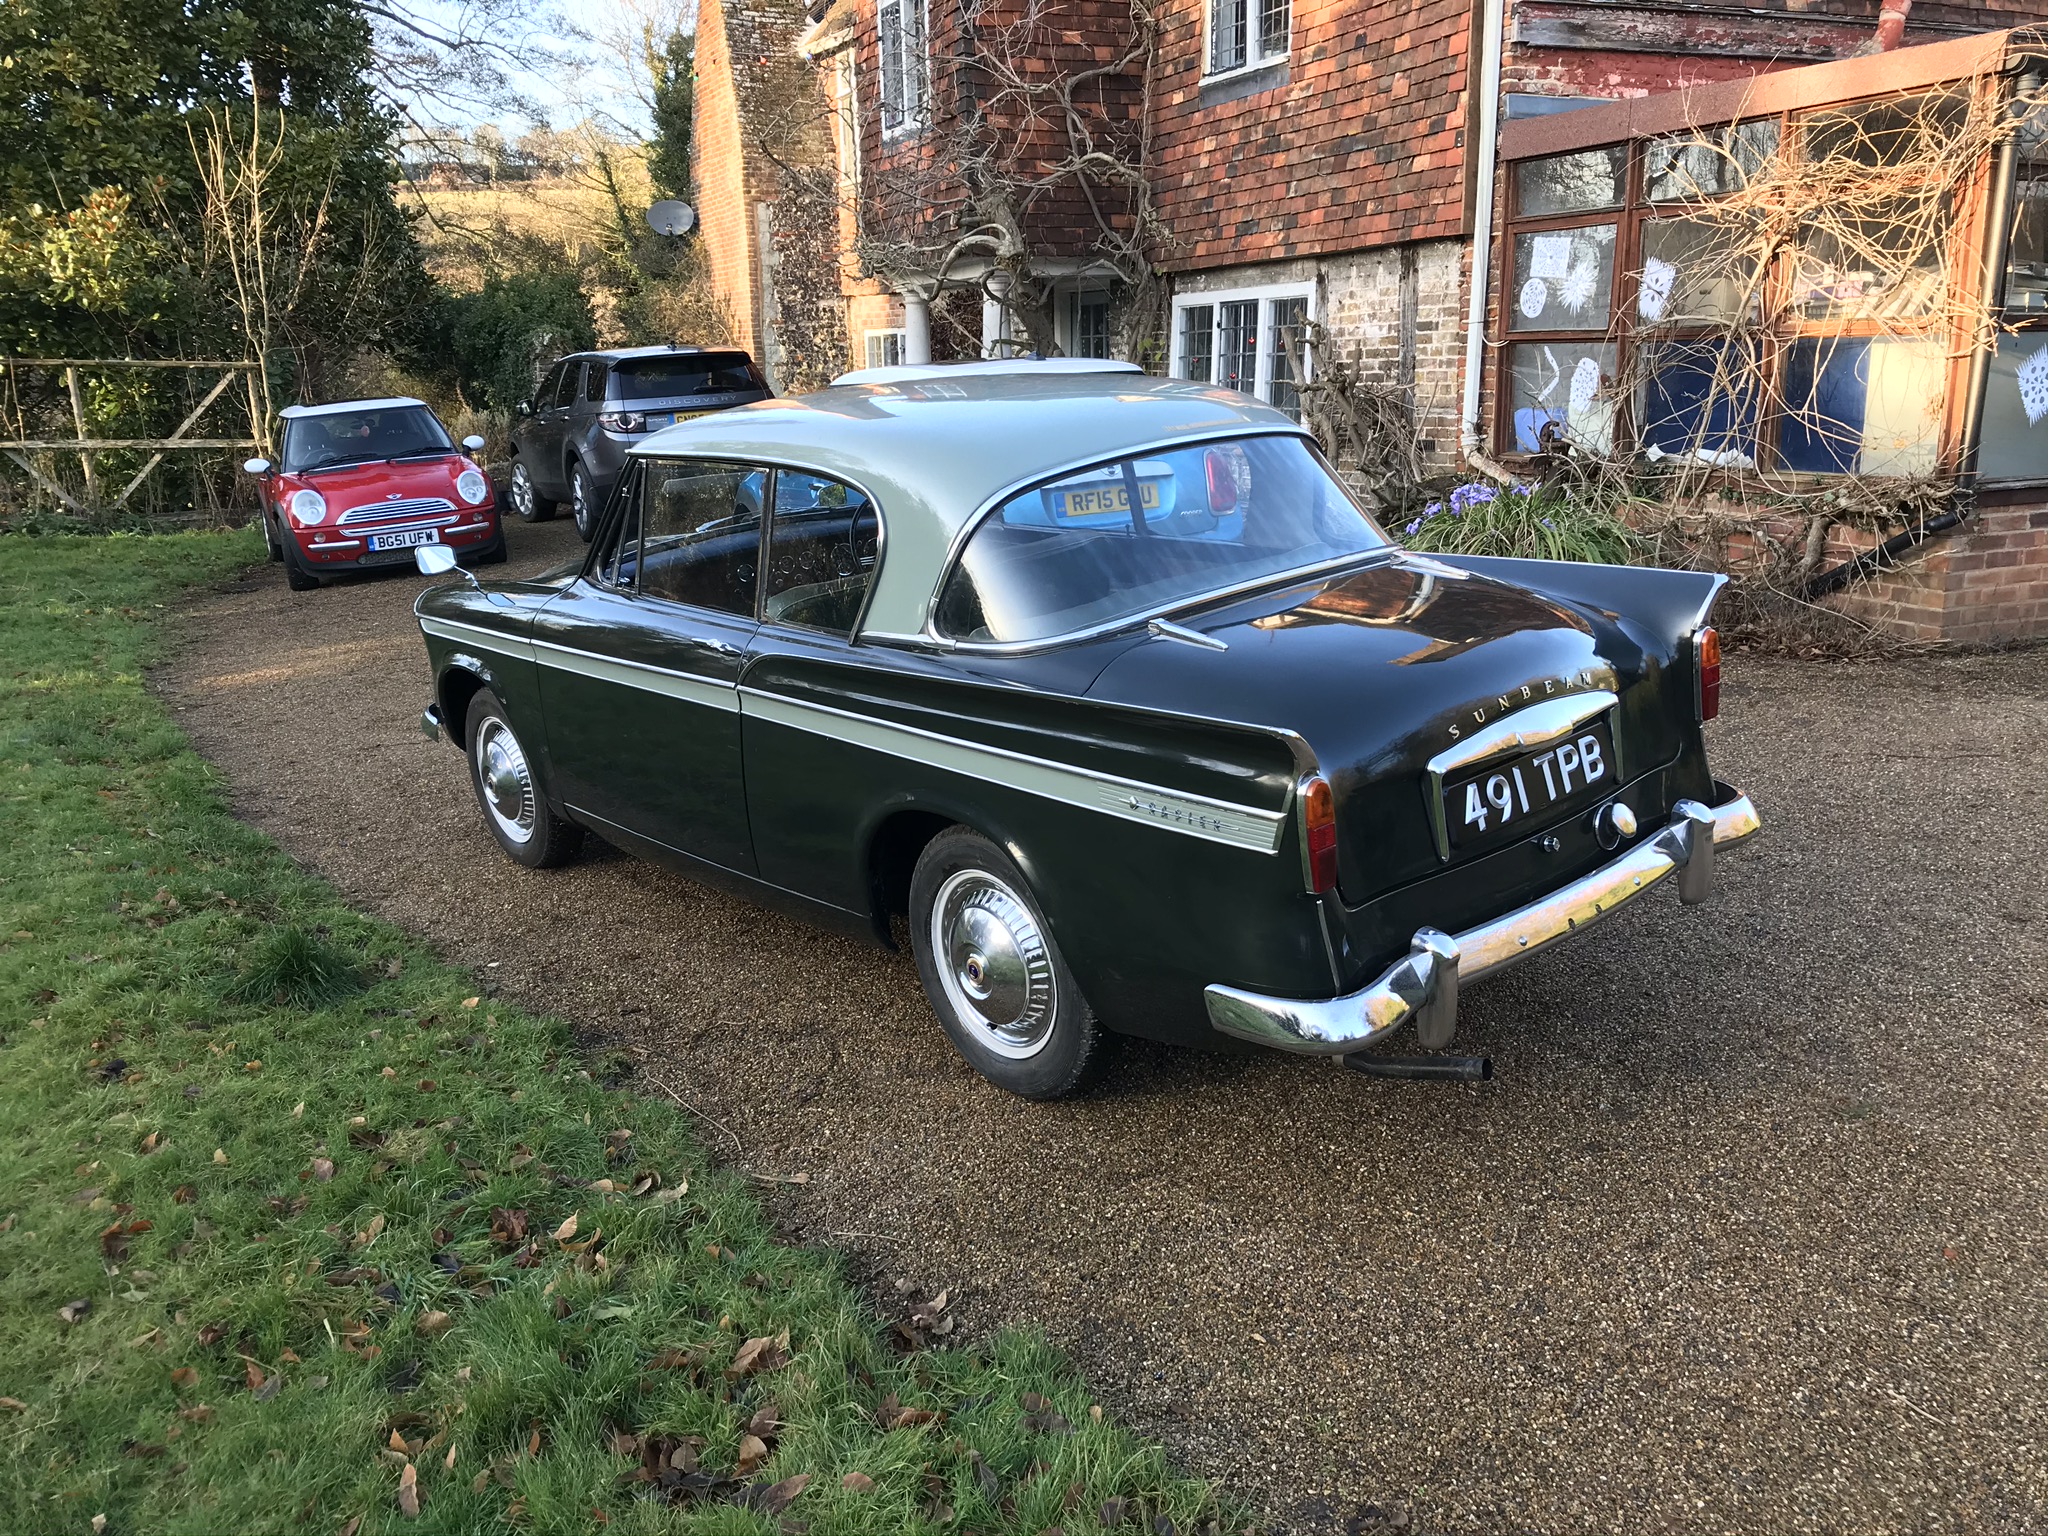
Does it not?? Future classics in the background???
Days 936 to 995 (21 September to 20 November 2019)
A few problems cropping up. I was unwell for a spell, the wheels have come off the economy, and that has left me seriously skint. And the breakdown twins (my Mini R50 and MK1 Punto) both started acting up. Many of the Sunbeam jobs require warm sunny weather and money. I don’t have either available!
Days 995 to 1023 (20 November 2019 – 17 December 2019)
So I tackled a few things I could do.
Fuel and Water gauge. To cut a long story short. I haven’t fixed these. I tried. Both have some life and are getting a signal. But until I can fill the car with fuel and running it up to temperature, I don’t know how wrong they are.
Days 1024 to 1038 (18th December 2019 – 2nd January 2020).
I tackled two jobs together. The construction of a bracket to accommodate the original screen washer and some additional wiring for an isolator.

The screen wash was an optional extra so there is no right or wrong way to do this. Try and ignore the peeling lacquer on the bottom of the dash, and the absence of sound proofing. The first can’t be seen and the second I will deal with. The rubber band are holding the the trim on while the glue sets.
Days 1045 to 1102 (11 January to 5 March 2020)
The first job was messy and largely remedial. Removing the exhaust which was blowing and patching it again. It needs replacing. But at £700.00 and having the car present at the fabricators, that isn’t an option just now. While back underneath I under-sealed every nook and cranny I could find and poured oil into the sills from above. I may regret doing that. I may not.
Next up was a lot of interior trim.
The bonnet sound proofing. I did a fair amount of research to work out how this fitted. Cleaned and painted the wire frame. I made a new pad from fireproof upholstery padding and a black sheet. A lot of restored cars don’t have this done right.

This is right!
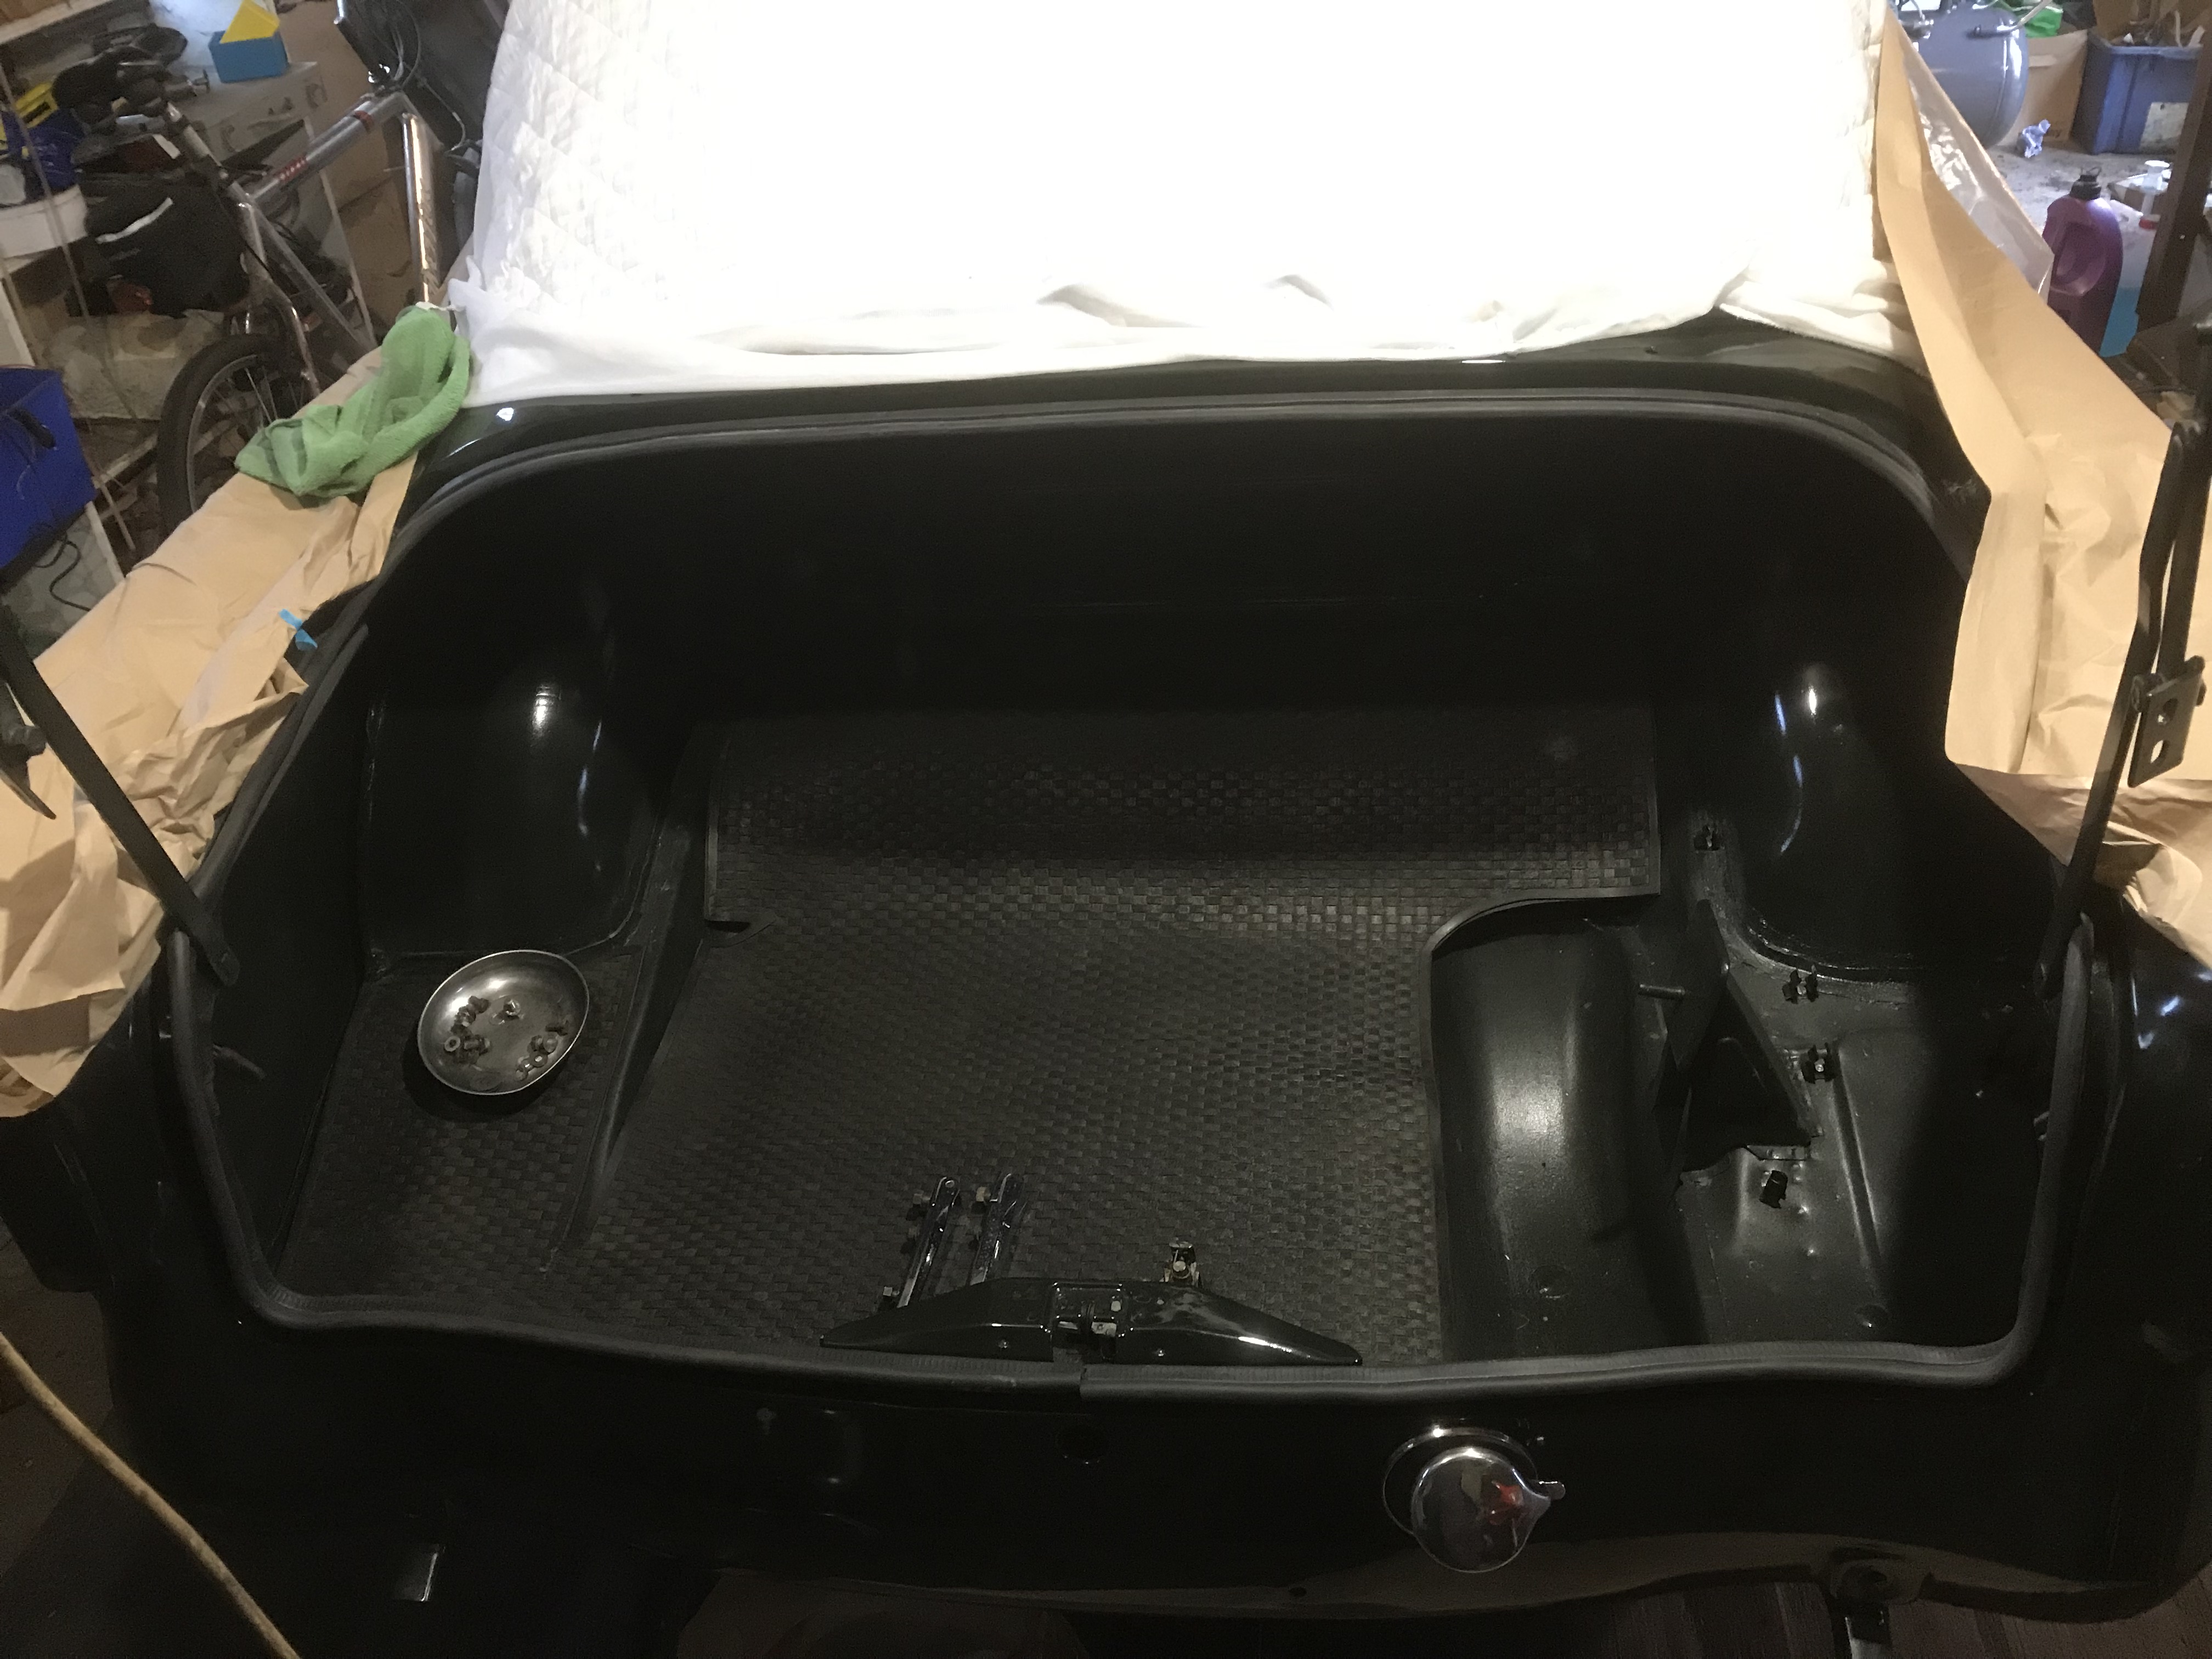
Next up was the boot sound proofing which is a grey/white. I gave this all a good wash and then attached with contact adhesive. It was an expensive car as this is on the boot lid, both wings and the rear panel. My 1972 Avenger had painted metal in the boot.
Classy!
Then I started removing bits! The glove box and shelf on the drivers side had never been removed and had twenty years of use and nearly forty years of storage dirt. I removed dismantled them. Cleaned and re glued and painted the black felt finish and the metalwork.

This is how it looked before..
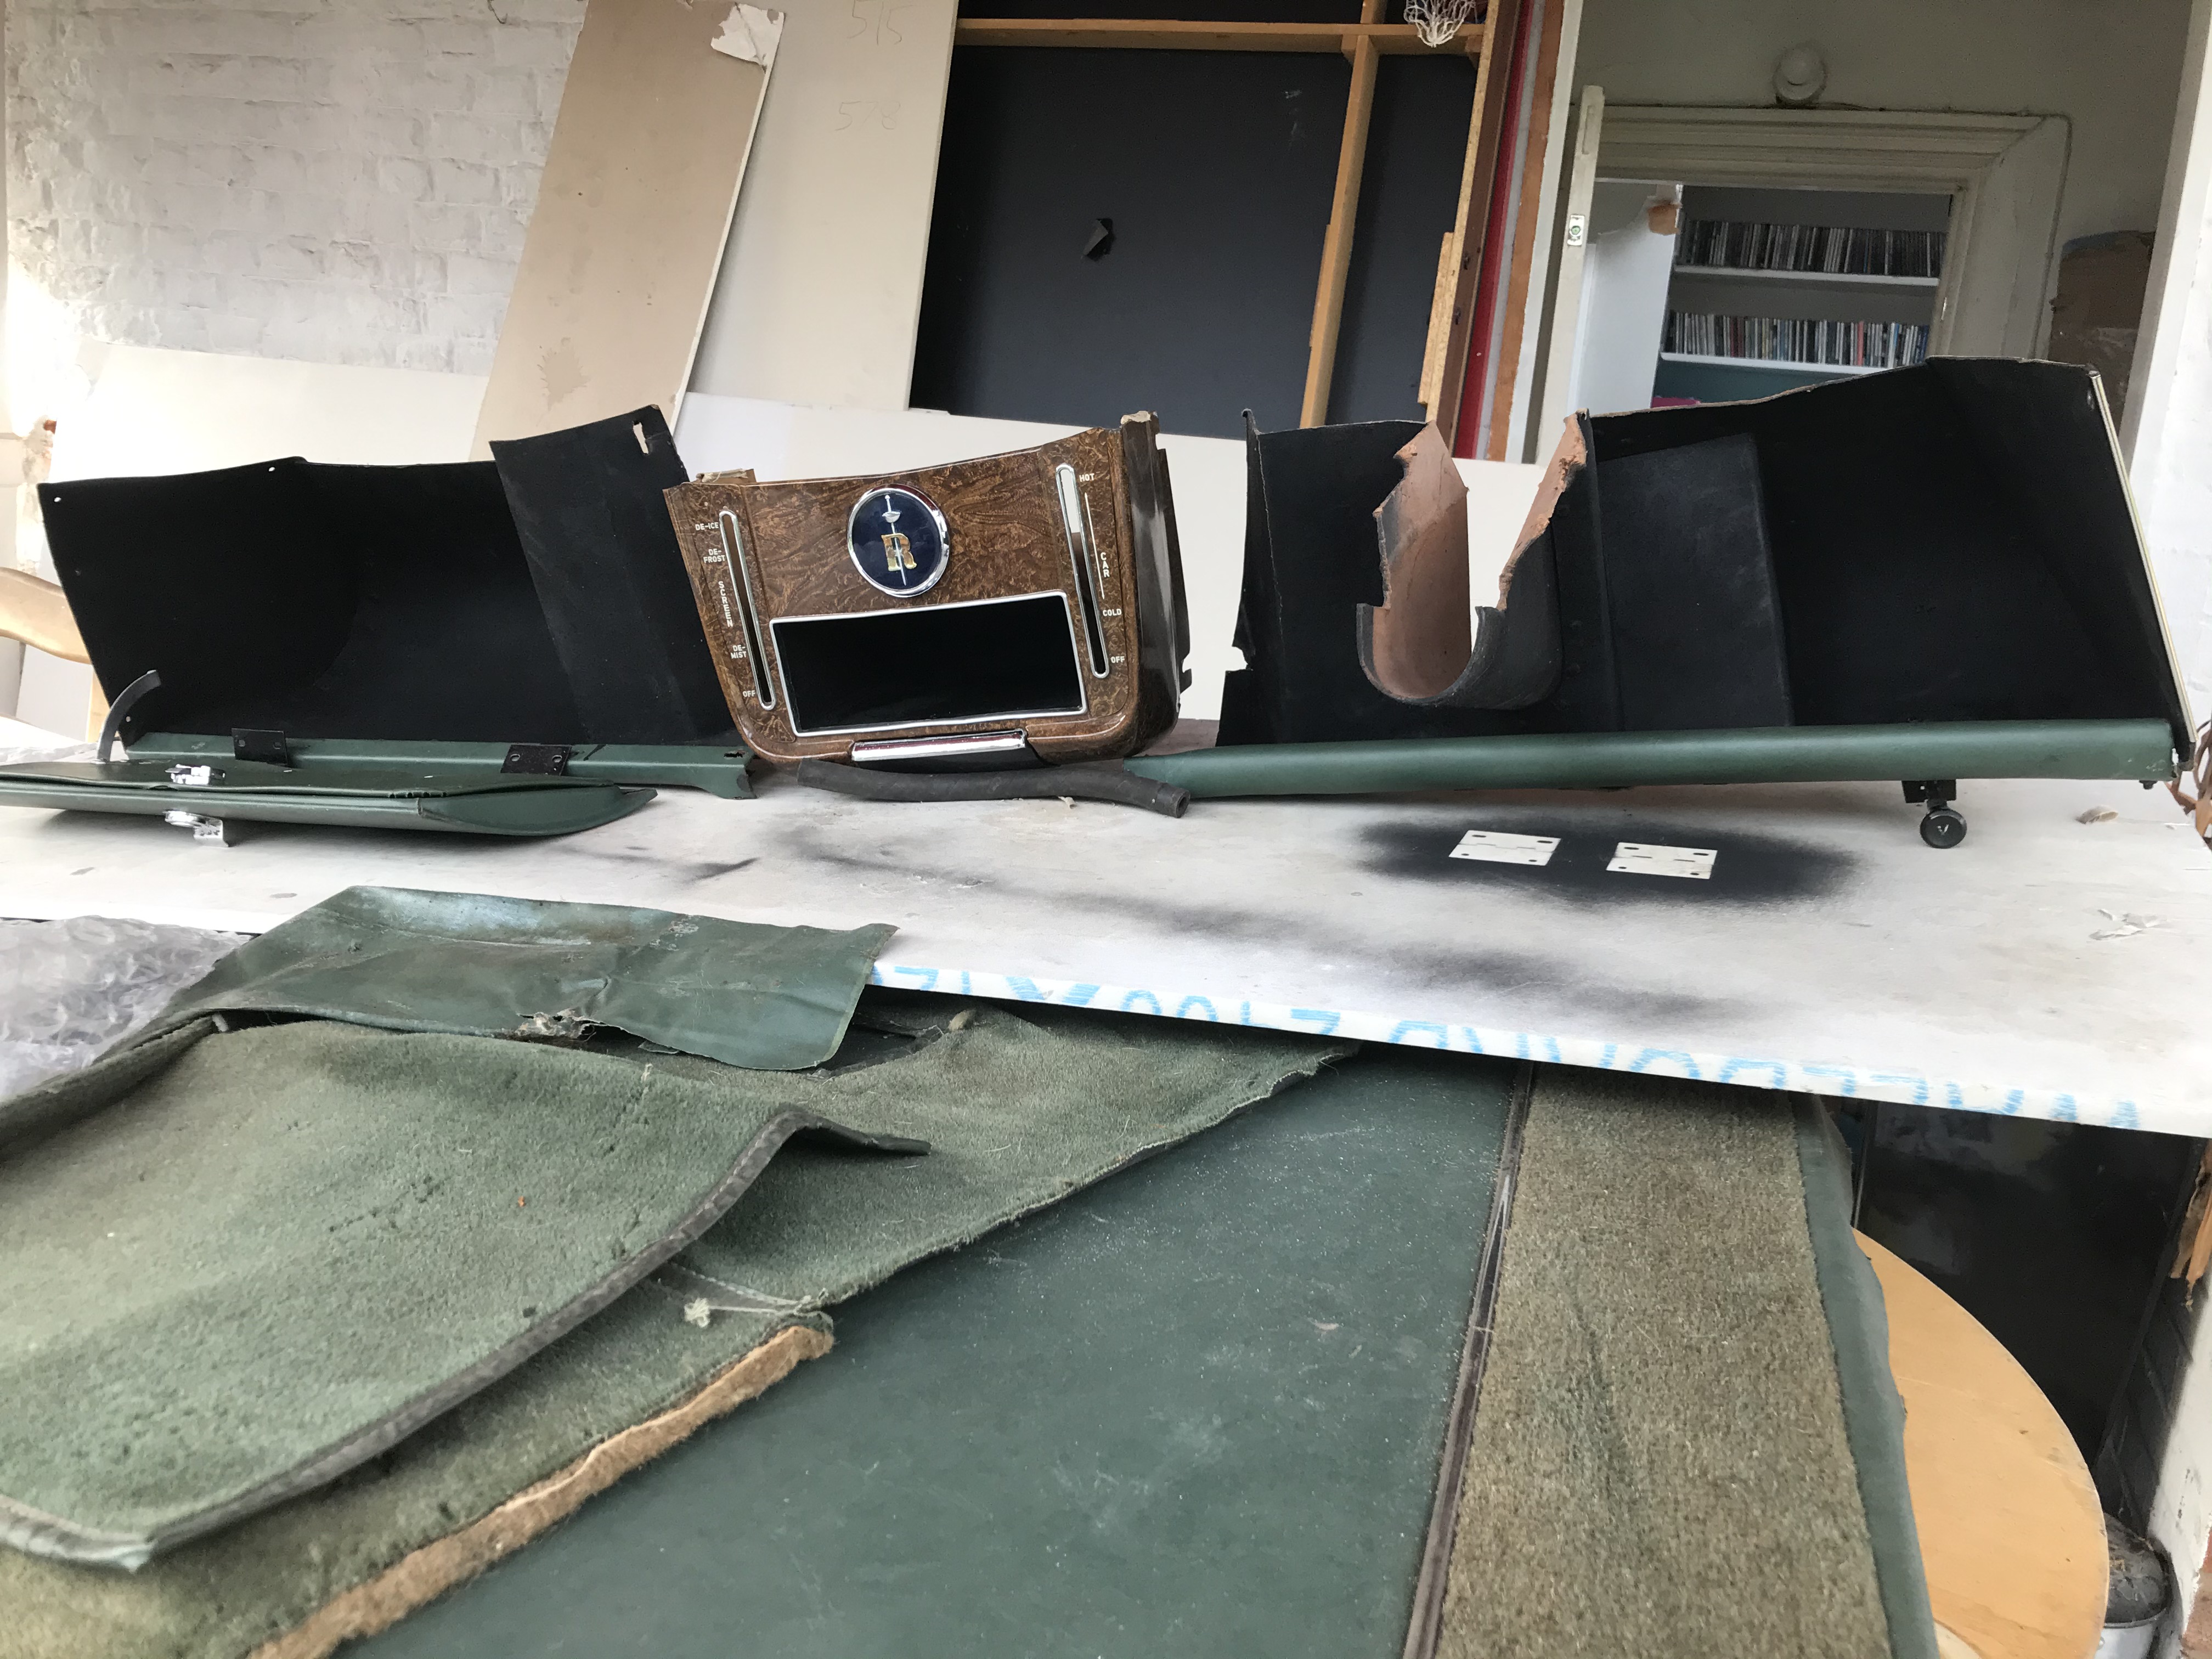
And after..(ignore the carpets – they are the old ones)
The rear parcel shelf had destroyed itself one summer evening in 1981 when some dumb kid was doing 70 mph with all the windows down (yeah, yeah, it was me). The whole thing lifted up and spewed cotton wool (the padding) everywhere, much of it out of the windows. While the mates in the back thought this was hilarious; it didn’t do the parcel shelf any good.
I rebuilt this using the original vinyl and a new bit of hardboard. the cotton wool was replaced with laminate floor underlay. It has the original clips removed from the old broken one.

I’m pleased with it.

Day 1103 to day 1165 (March 6th to May 6th 2020)
Some weird goings on during this time. The world went into corona-virus lock down and fearing the worse, I took a temporary job driving a Tesco van! At the time I didn’t know about furloughing or bounce back loans and we thought the army would be guarding the supermarkets from rioting mobs… so it made sense (sort of).
I continued when I could with the interior.
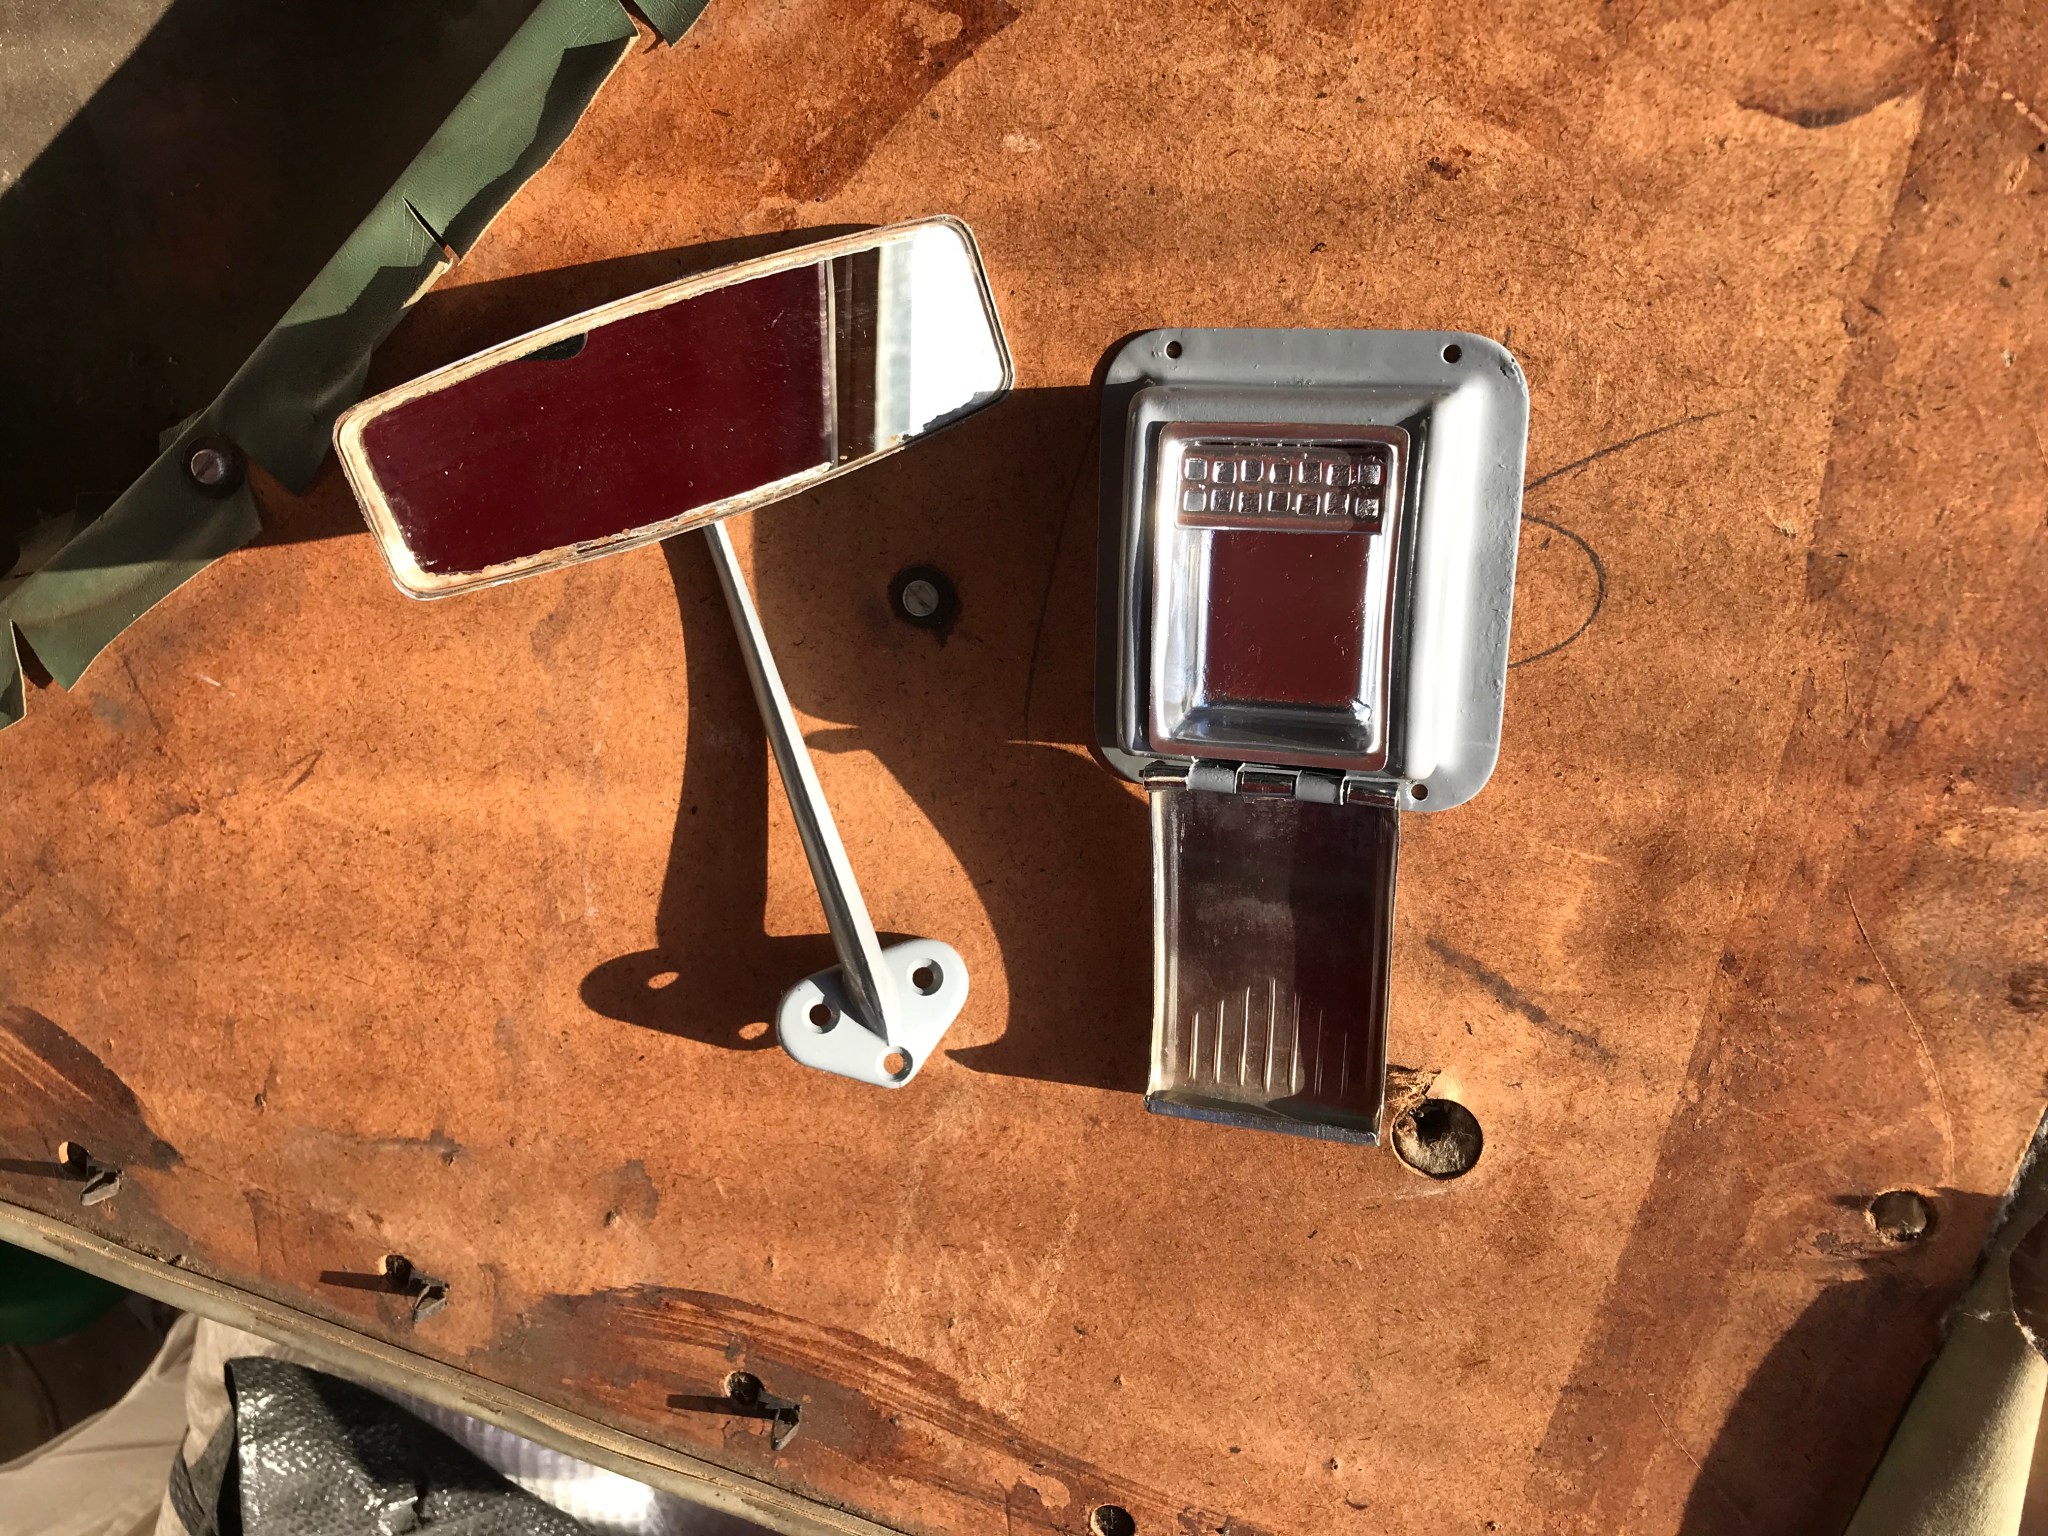
I repainted the mirror and rear seat ashtray…

Cleaned up the door cards (These will need the carpet inserts replacing)..

Cleaned and repaired the rear seat trims..
Cleaned up the sill plates..

Cleaned and painted the steering wheel, column switches and sun visors…

I’m pleased with the Overdrive indicator!

I repainted the pedals…..
Cleaned the roof lining…

Took advantage of a unseasonably hot day, to clean the seats..(poor colour match evident on the front passenger seat).
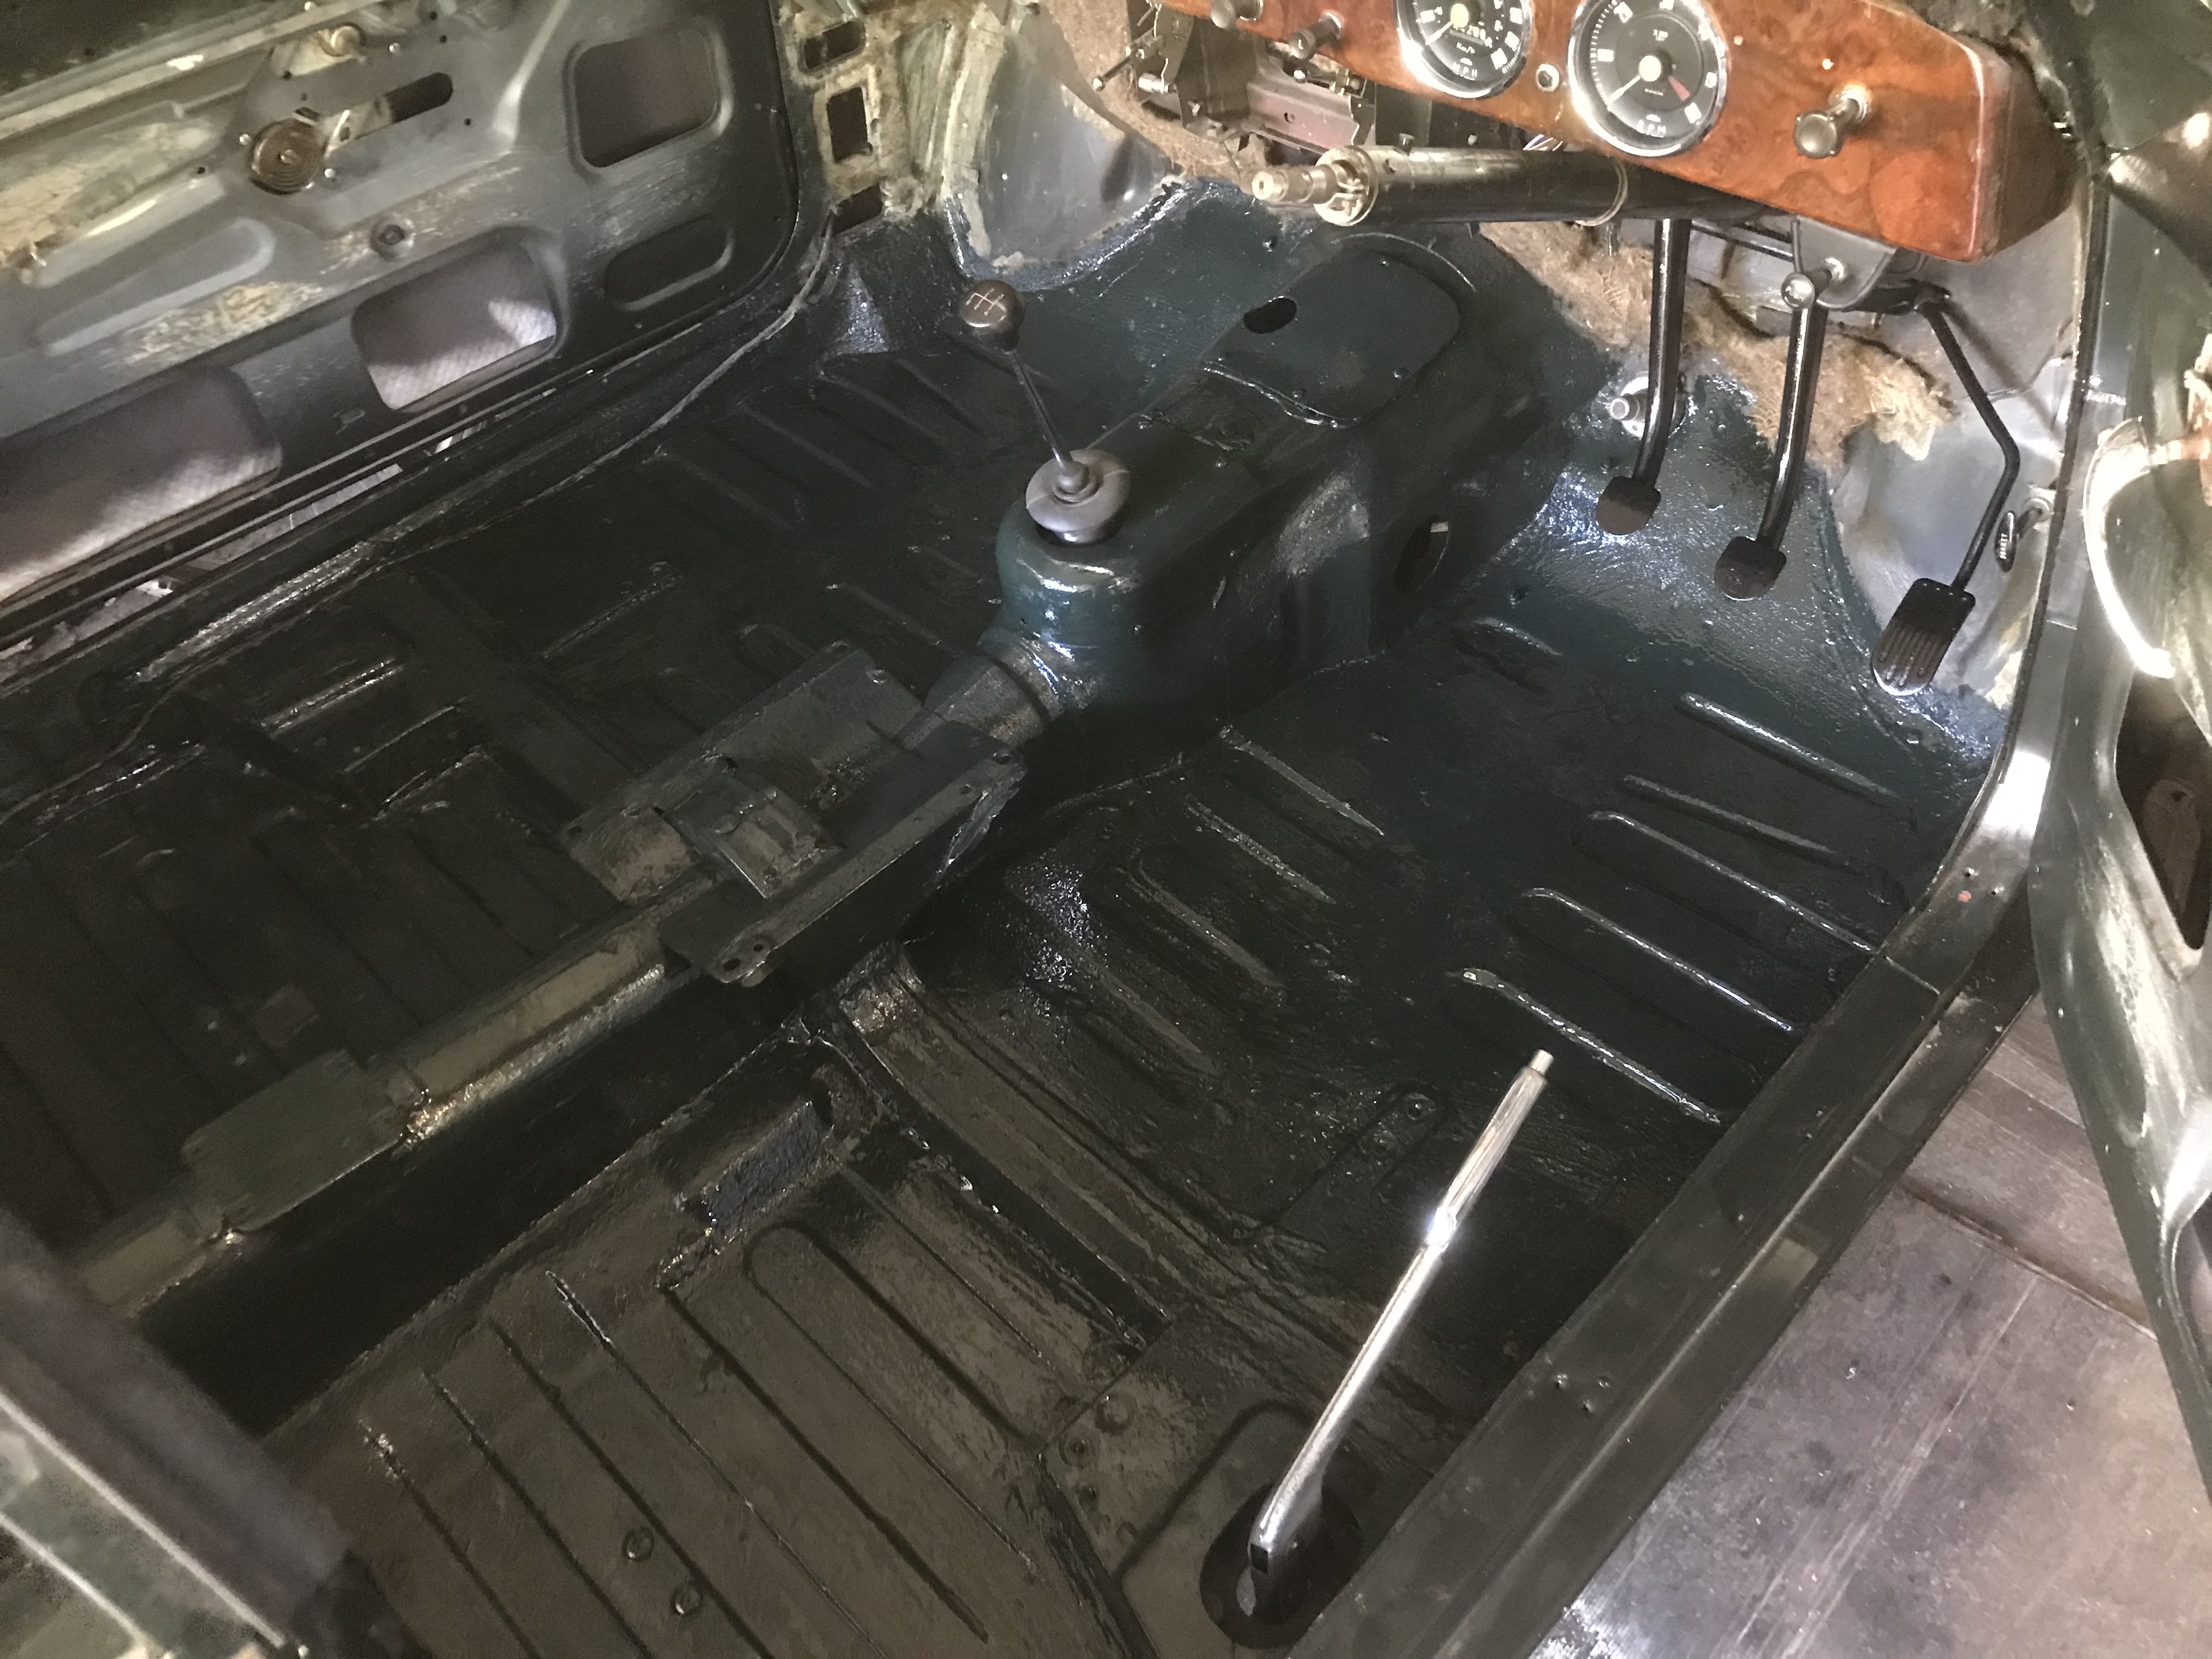
Then I cleaned and painted the floor. Even though this will be permanently covered with glued down coverings, I’m glad I did it. A whole one litre tin of smooth green Hammerite went on here. I bought grommets to fill the holes where the passenger seat belt/harness had been fitted and 25 ‘B’ clips to hold the door and rear seat cards in place. I need 70 of these but only had 48. I imagine the rest are buried in the garden at my parent’s old house where I dismantled the car in the early 1980’s, my old loft in Orpington, or piles of dust swept up from various garages, sheds and vans!
I blew some of the hard earned wages from Tesco on a new carpet. £248.00 including some spare for the door cards and enough felt to replace it all. My rational is; even if the whole world collapses in the next six months, I have to have the car finished, to enjoy, sell, get repossessed or whatever!!!
Days 1167 to 1200 (8th May to 11th June 2020)
While waiting for the carpet I; cleaned the floors mounted dip switch, fitted the handbrake lever rubber. I mentioned the angry eBayer who sold me this (day 580 in the autumn of 2018 above). I wish I had left him worse feedback, as it didn’t fit at all and ripped instantly. I ended up cleaning up and fitting the old one. I then cleaned and fitted the water seals on the rear parcel shelf and rear seat side panels, followed by all the sound deadening.
This looked good when fitted and was all more or less re-usable. At this point I refitted the steering wheel and stalks.
While still waiting for the carpet, I identified all the little dinks and scratches that needed attention and got busy with my touch up paint. The colour match is good and they sand back to be almost invisible when done (famous lat words).

On 22nd May 2020 the carpet arrived. Over the next few days I checked it all against the originals and cleaned and hoovered the car. The first job was all the annoying little pieces that live high up under the dash. I glued the sound deadening and the felt using new pieces when needed. I cut new sound deadening felt and fitted it to the rear seat back and base and both front and rear foot wells.
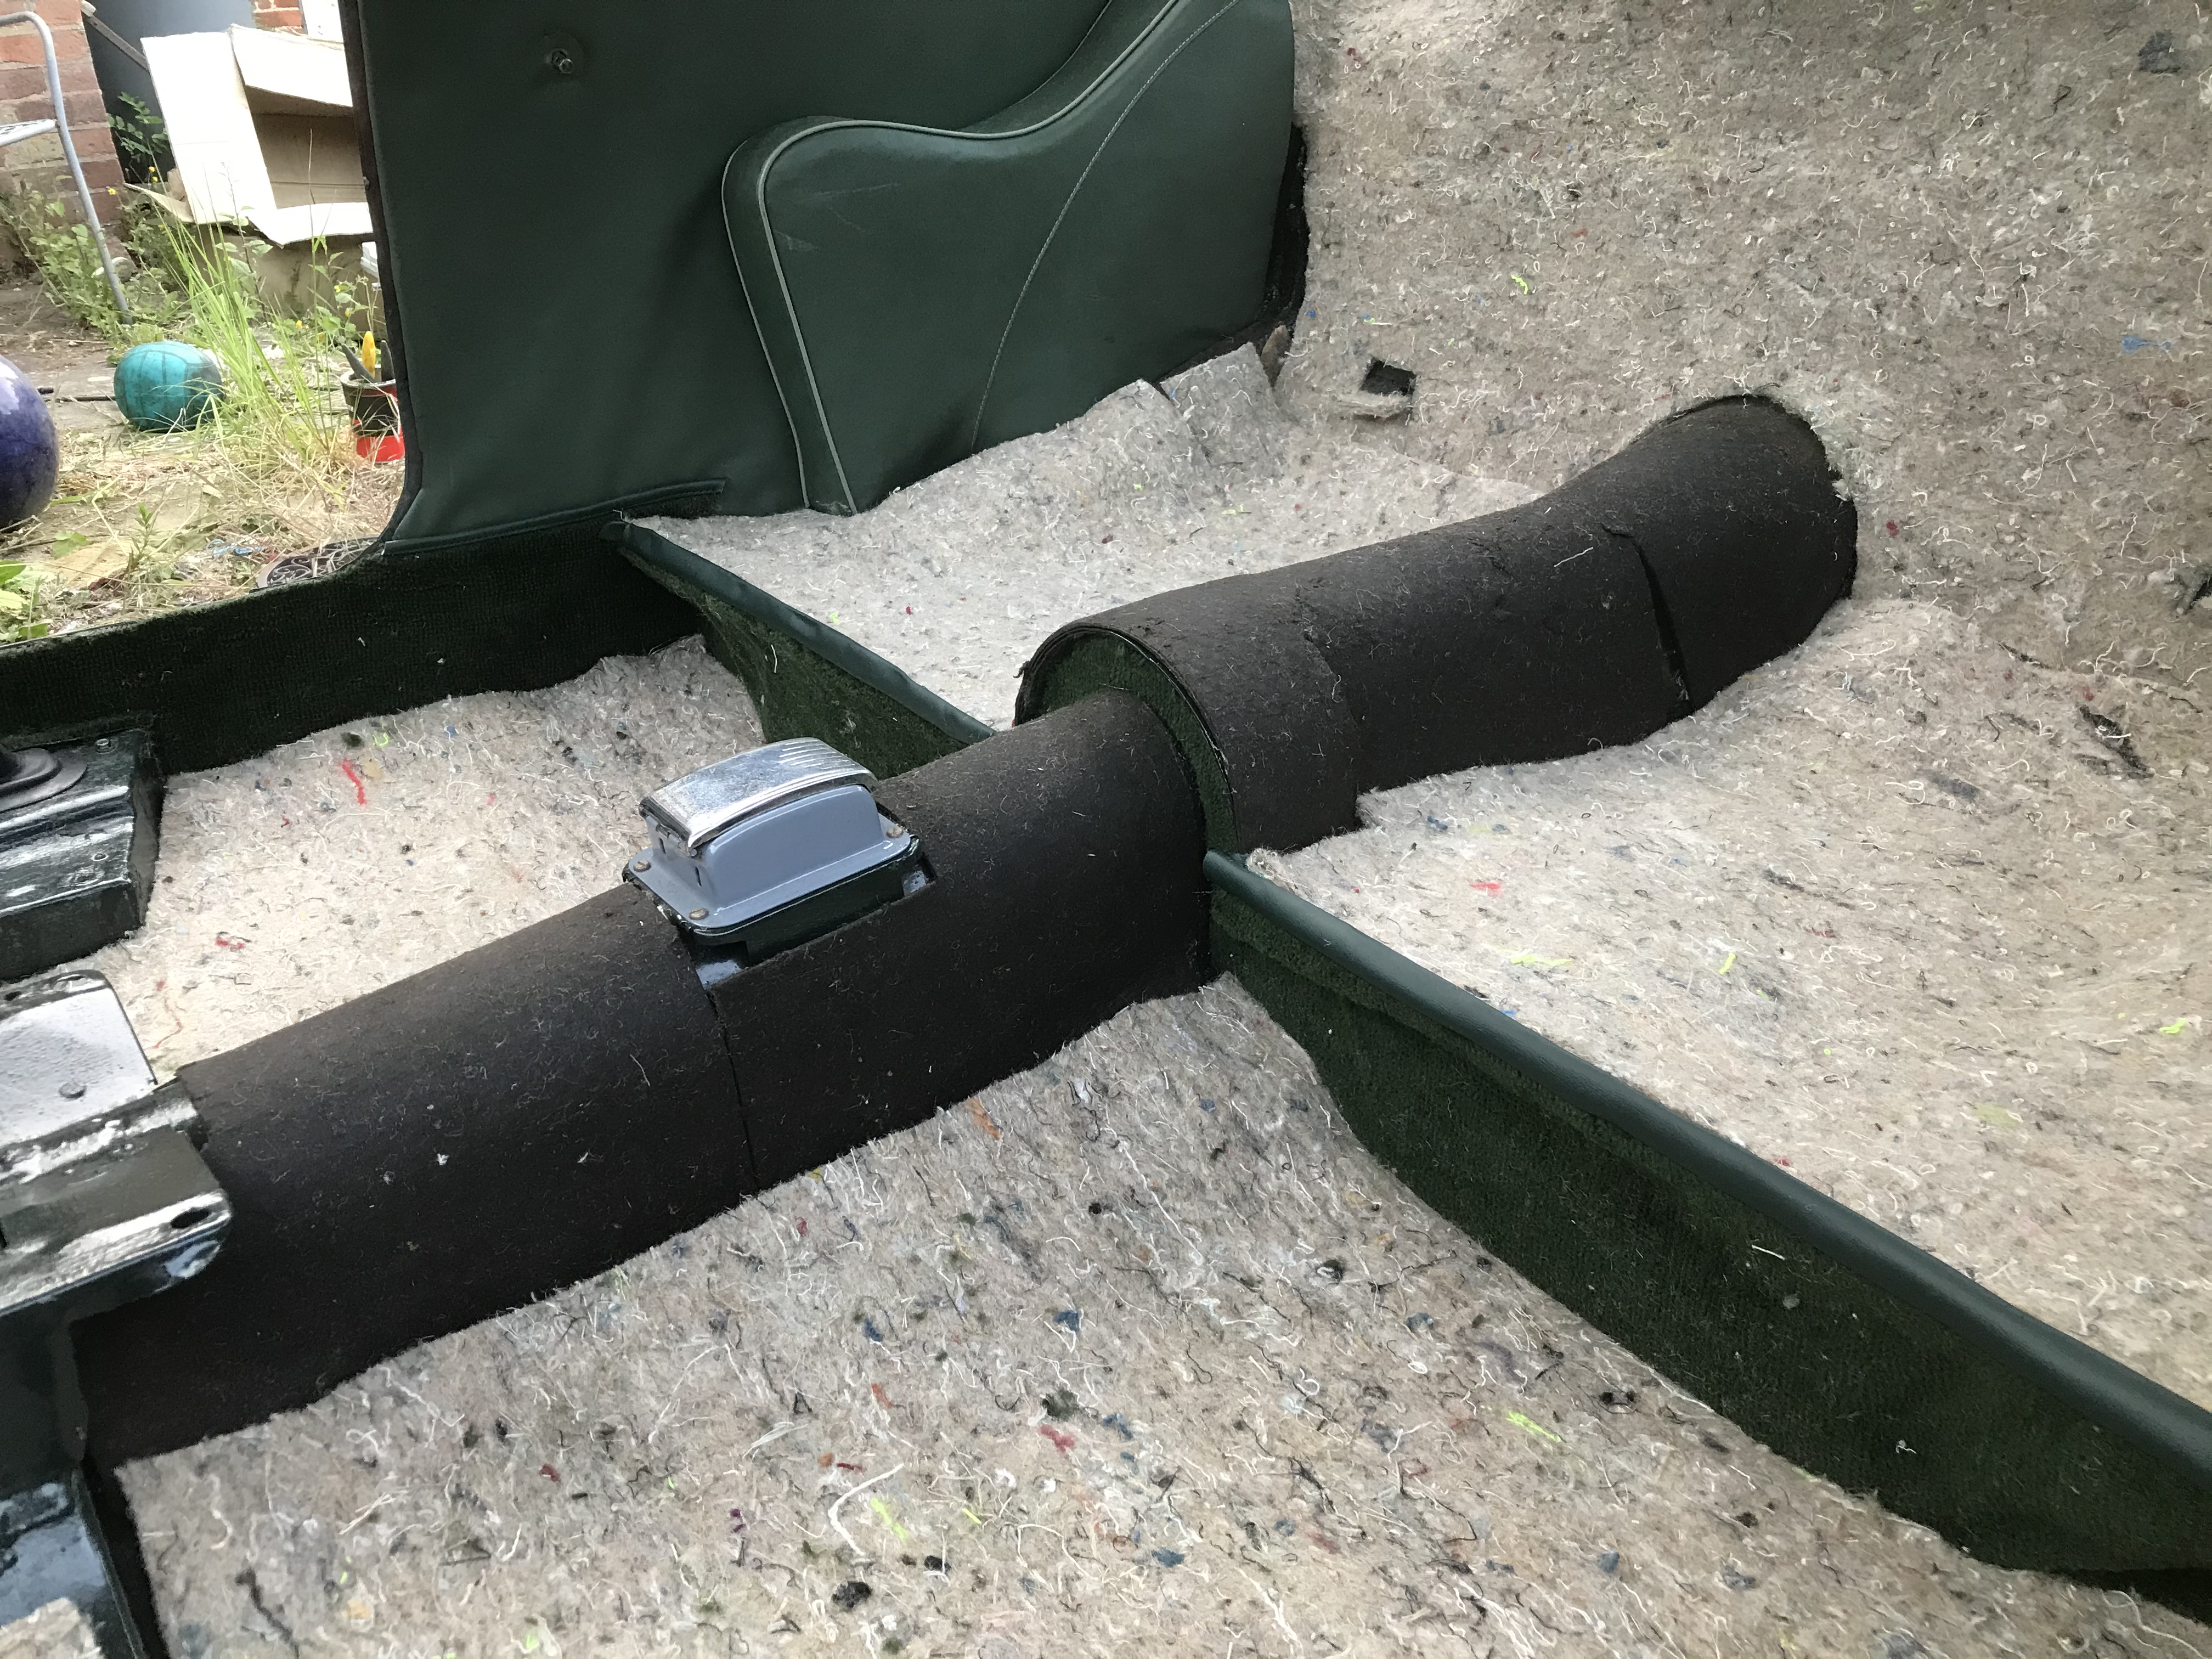

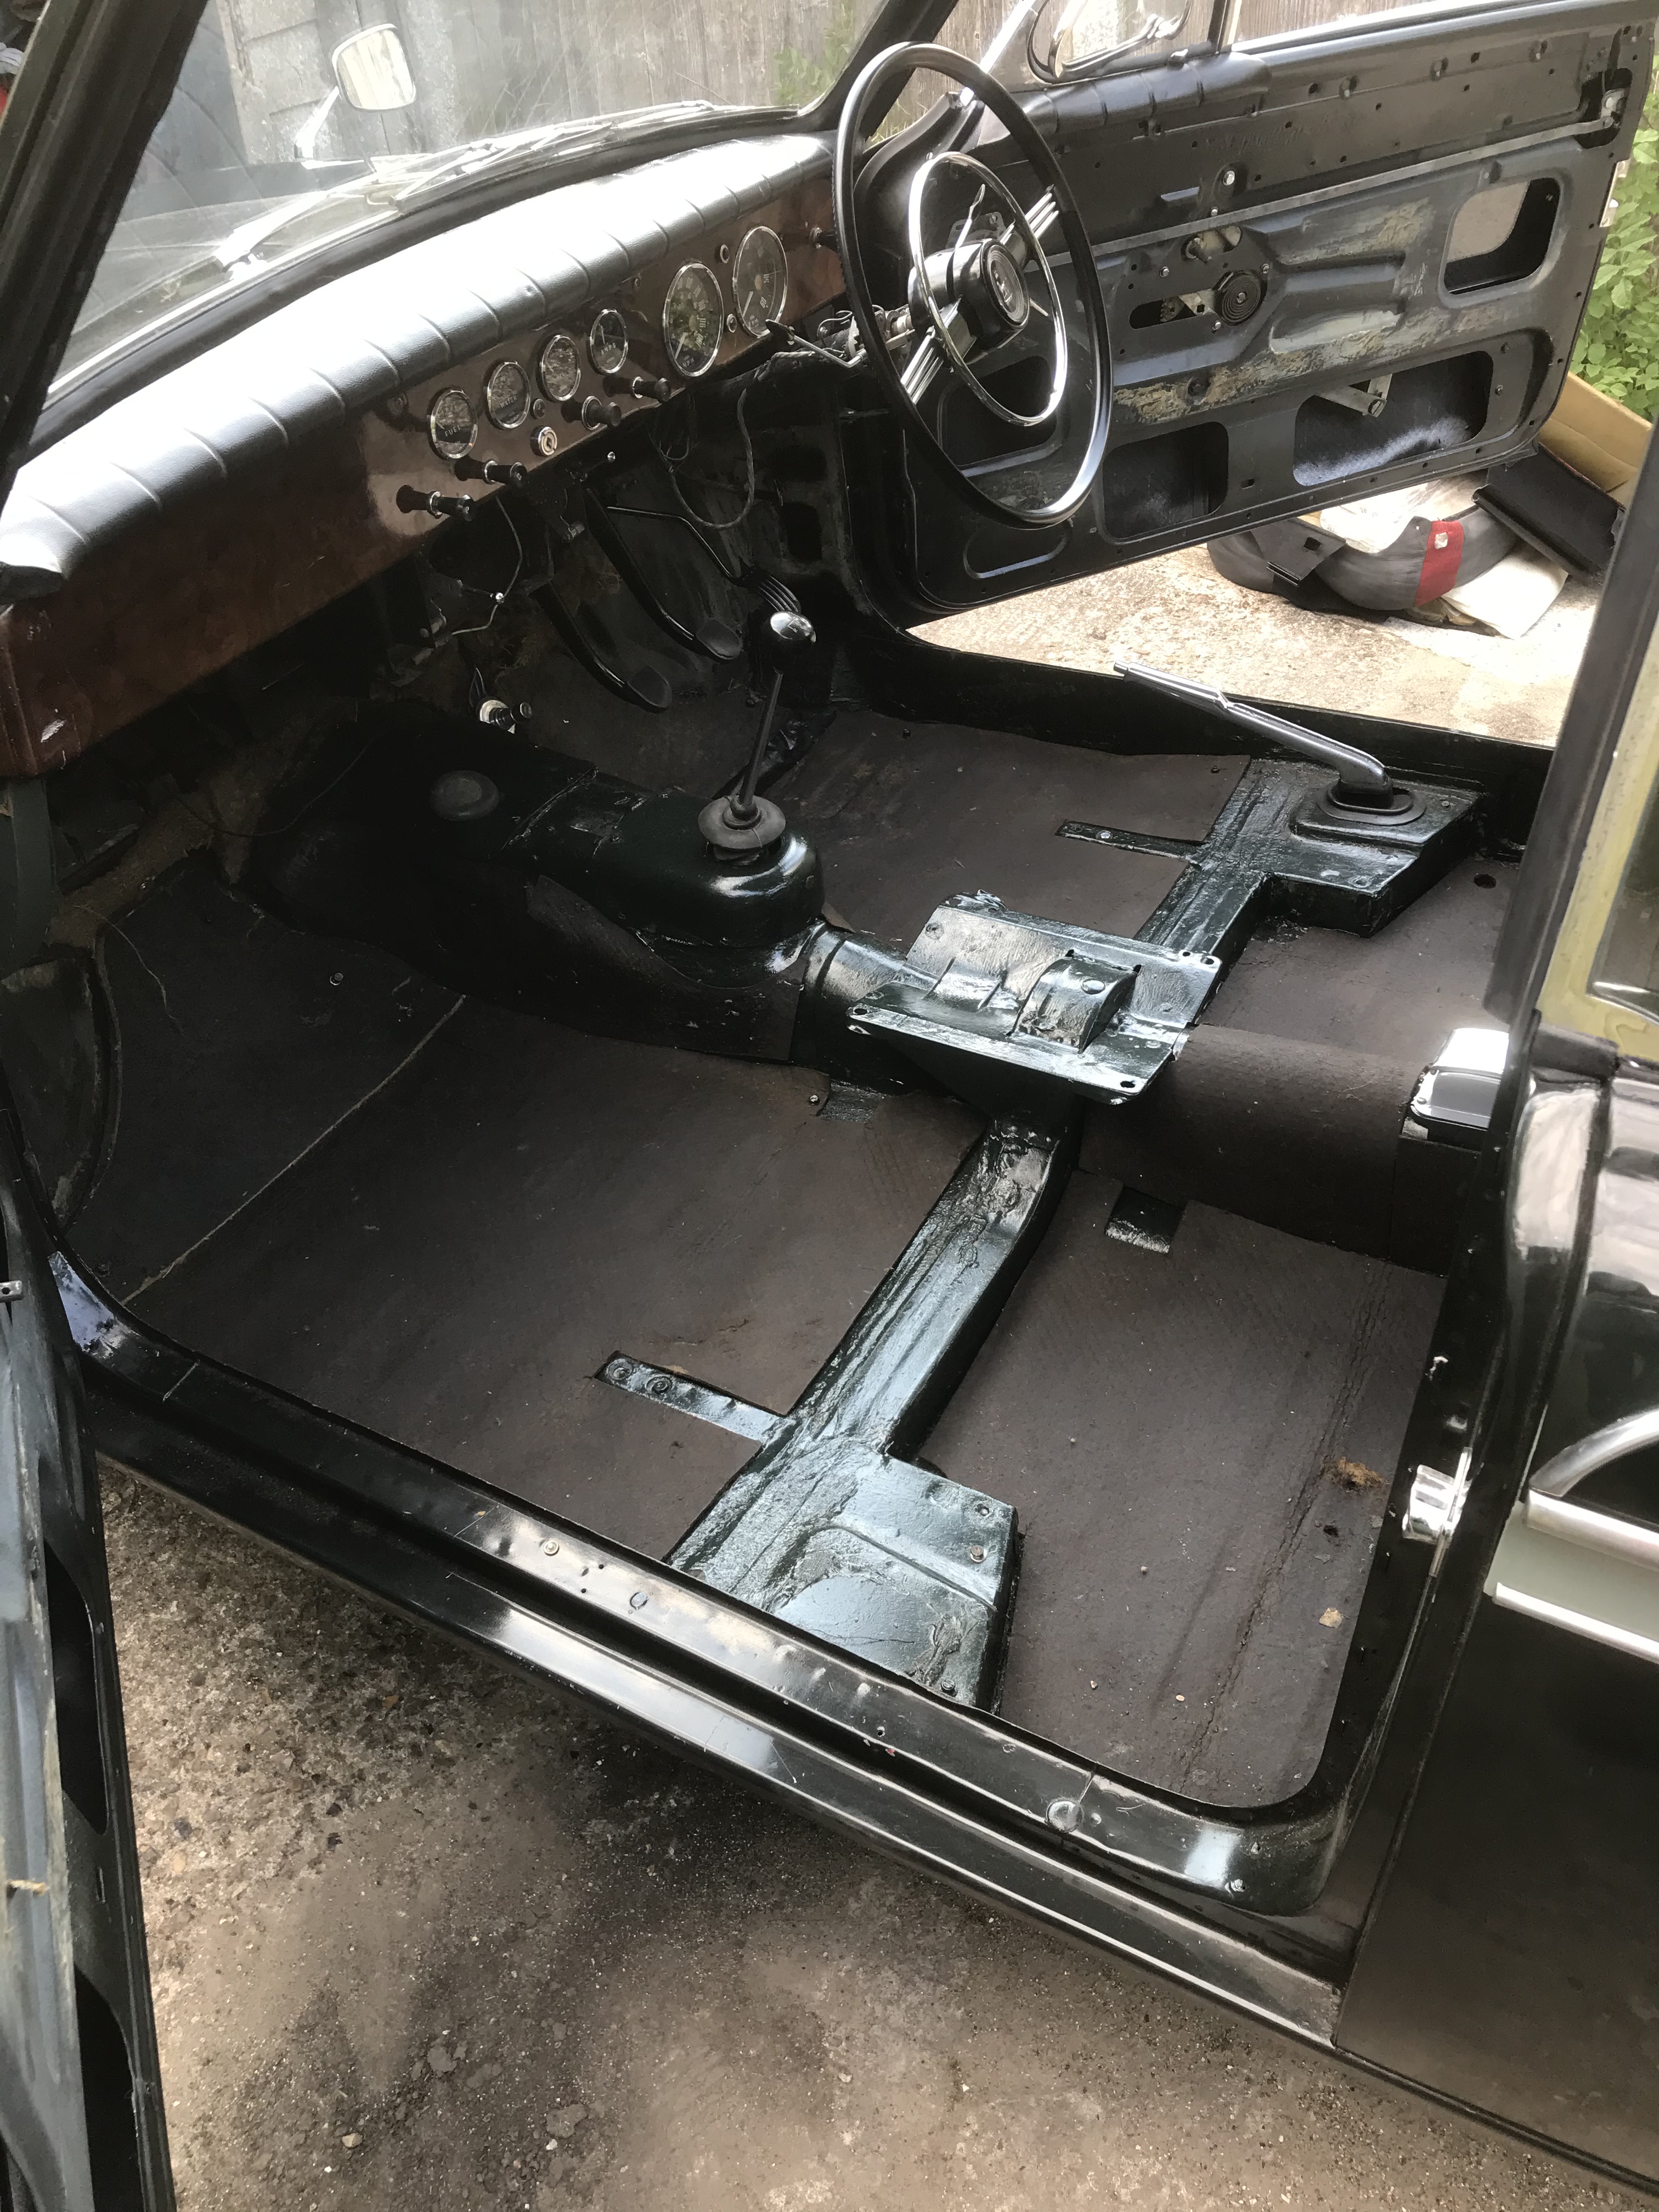
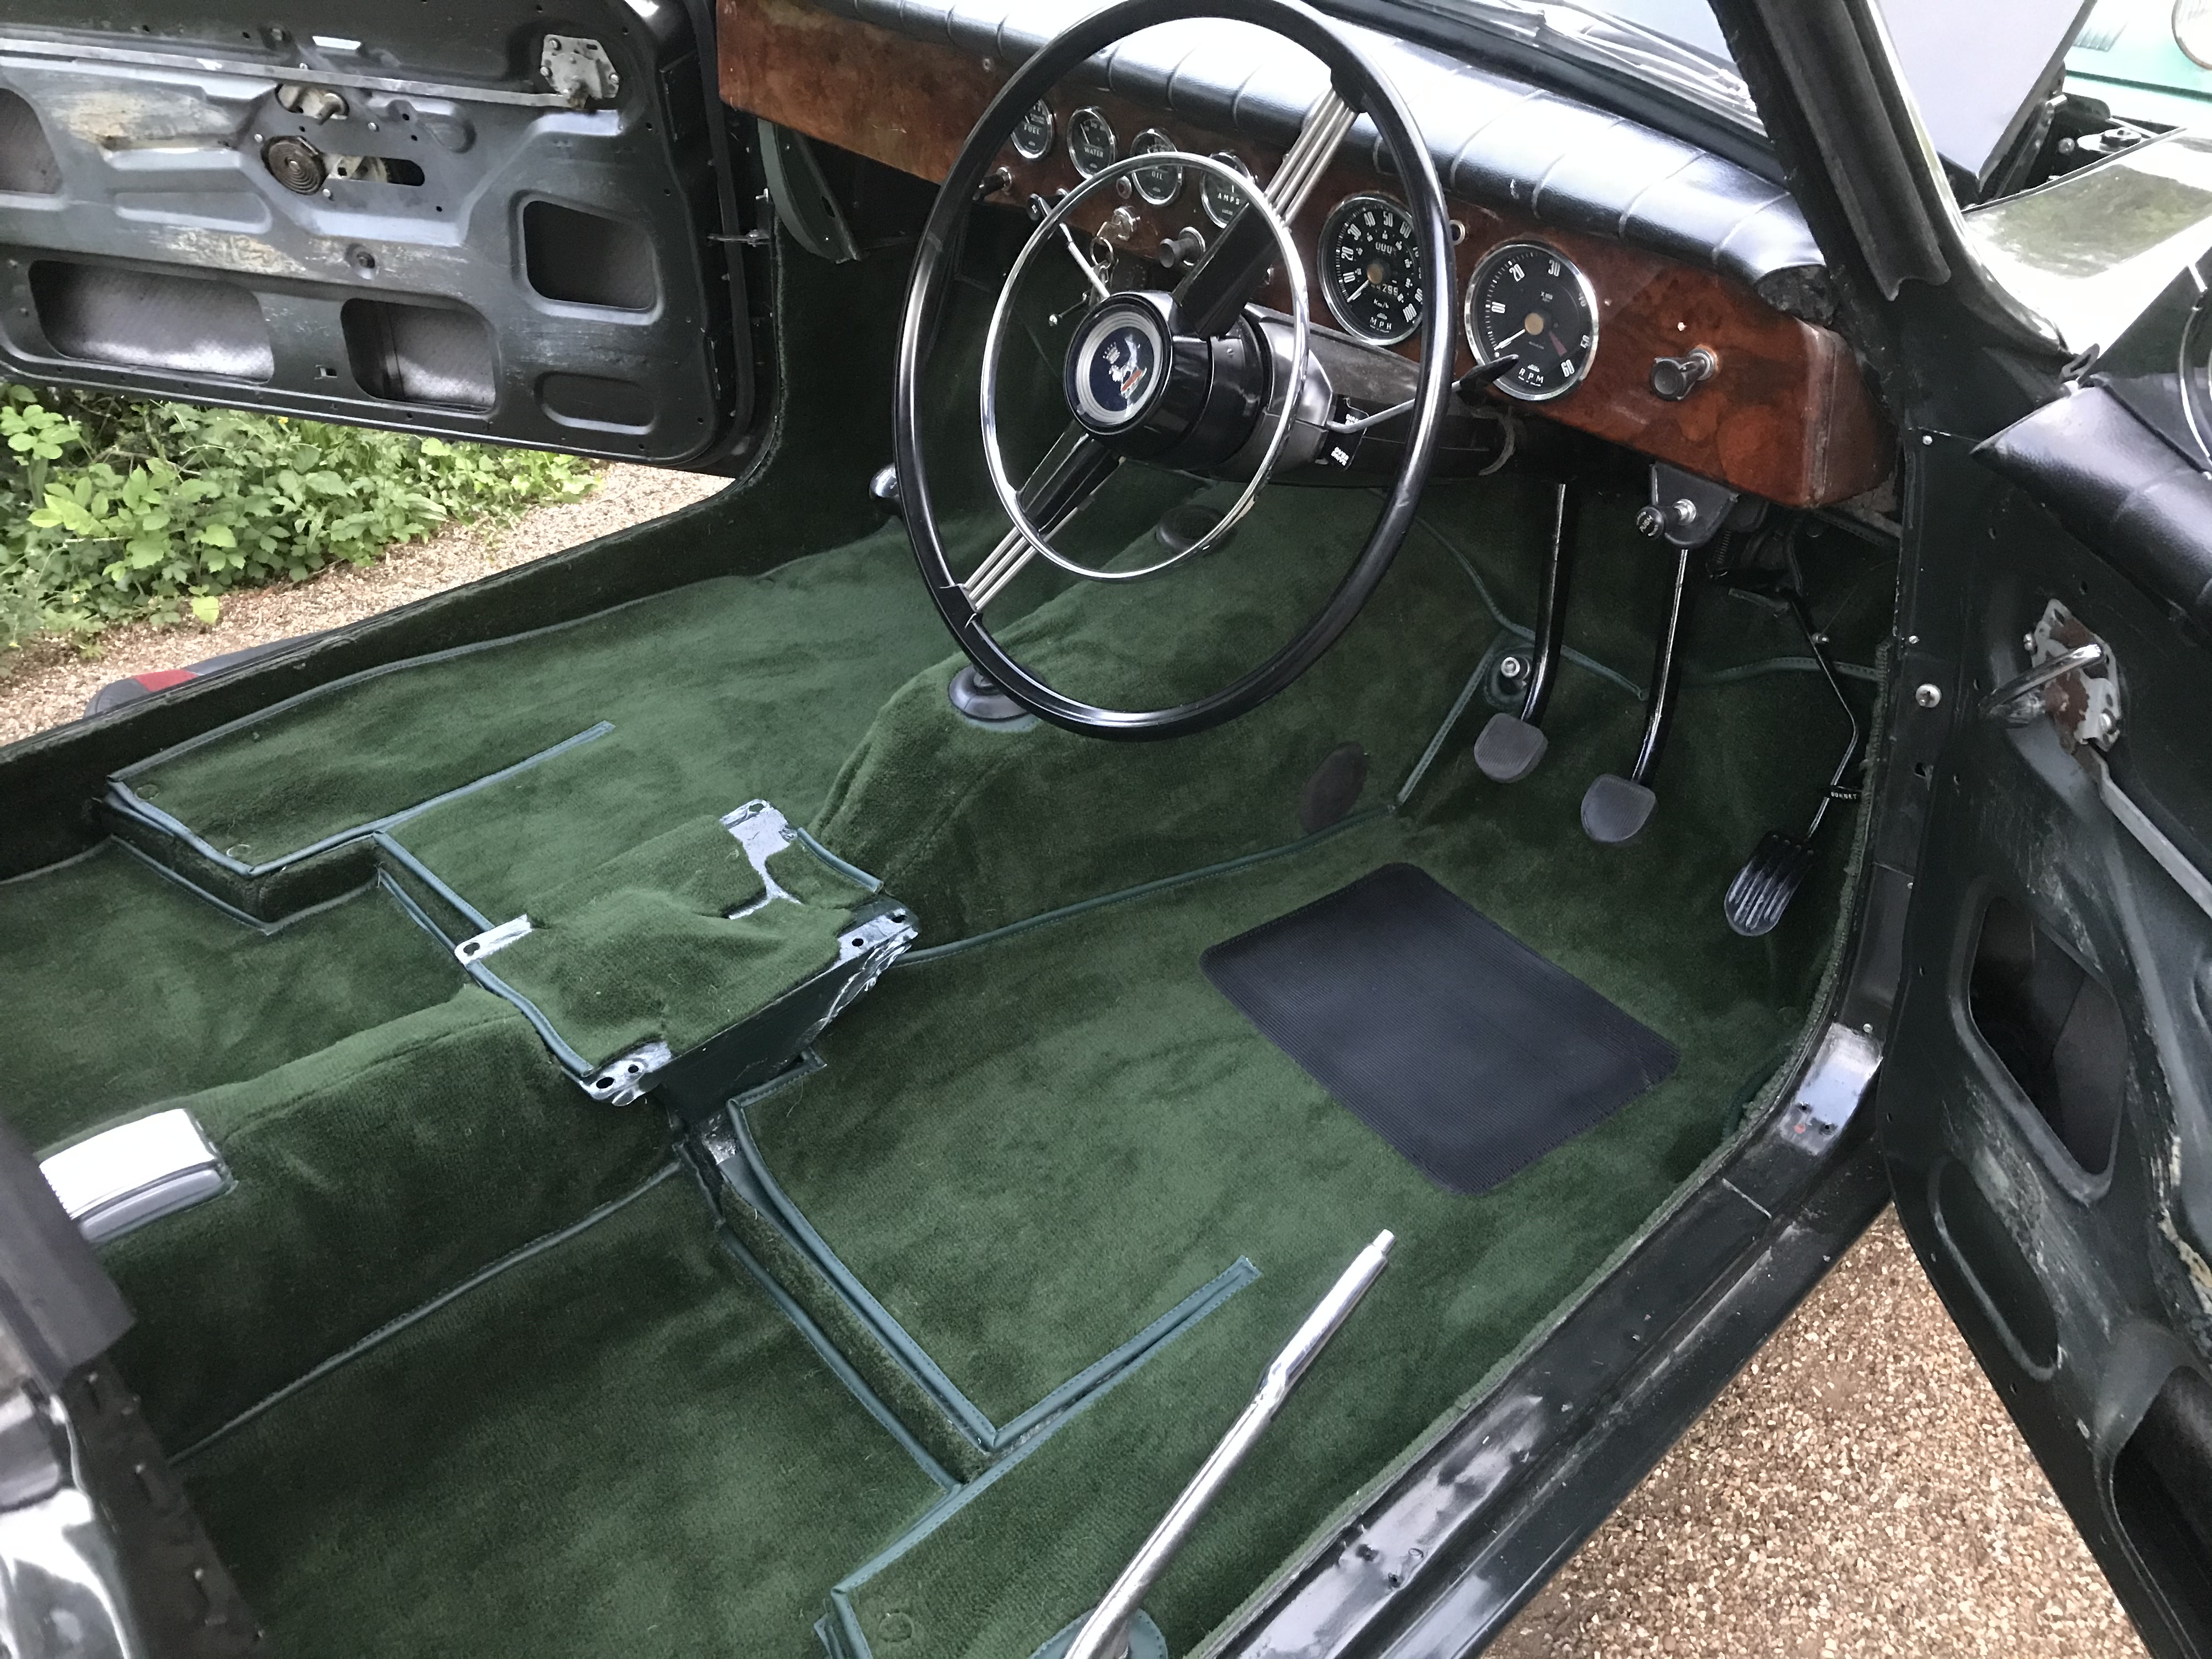
Then I cut and glued the various carpet sections to the ‘vertical’ places; Then I did the gearbox and the three main mats and then finally the bulkhead piece. The front sections all needed copious numbers of press studs moving from old to new to engage with their screwed on counterparts. These have somehow stayed put for nearly 40 years.

It was a lot of work, but very satisfying. I’m happy with the results. The colour is good too I think.

The next task was the furflex, which was of two types (with and without a attached rubber seal). These went on, but not without a fight. I have noticed that the doors don’t line up quite so well as all the new seals are pushing back a little harder than they did.

The sill plates went on next and then I made and fitted new weather seals for the doors and fitted those (more laminate flooring underlay). The old ones were falling apart and appeared to made from goats hair and tar!


I had two nearside door armrests and decided to repair them both. Neither is brilliant, but they are a pretty ugly item to start with.
Then I cleaned all the door handles and winders, made a new retaining pin from and old nail as I was missing one, fitted the rear winders and then turned my attention to the door cards.
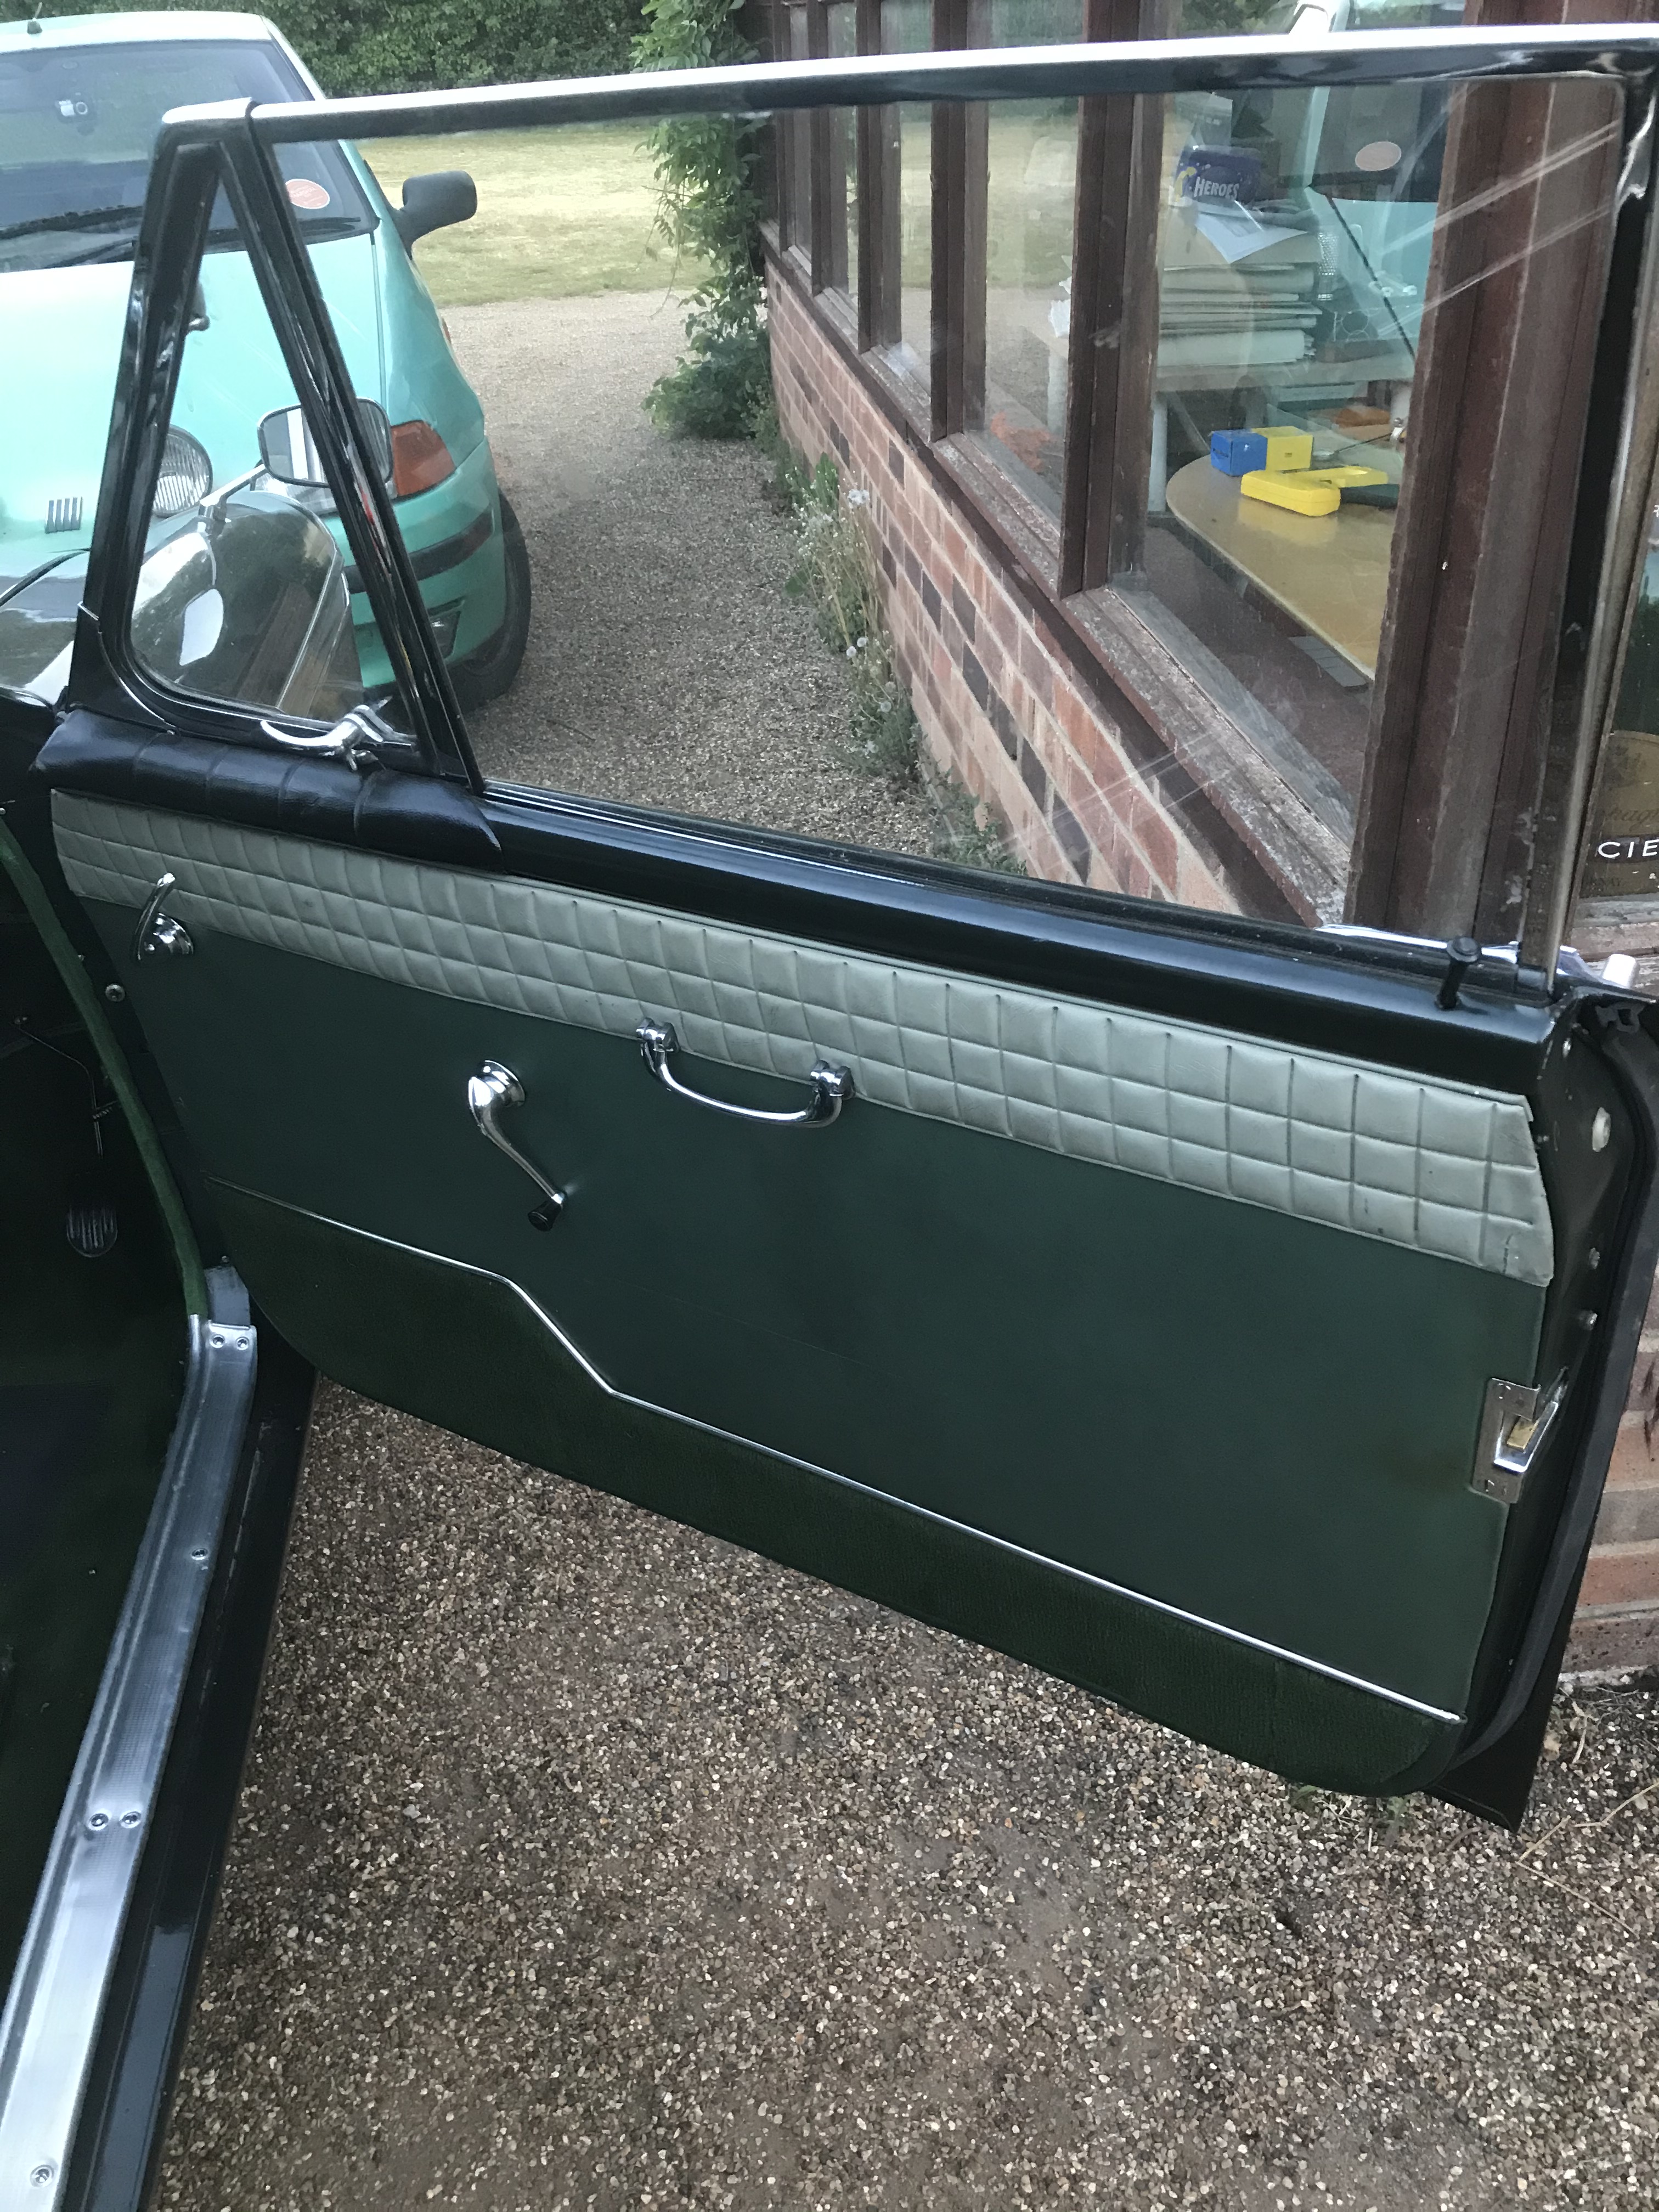
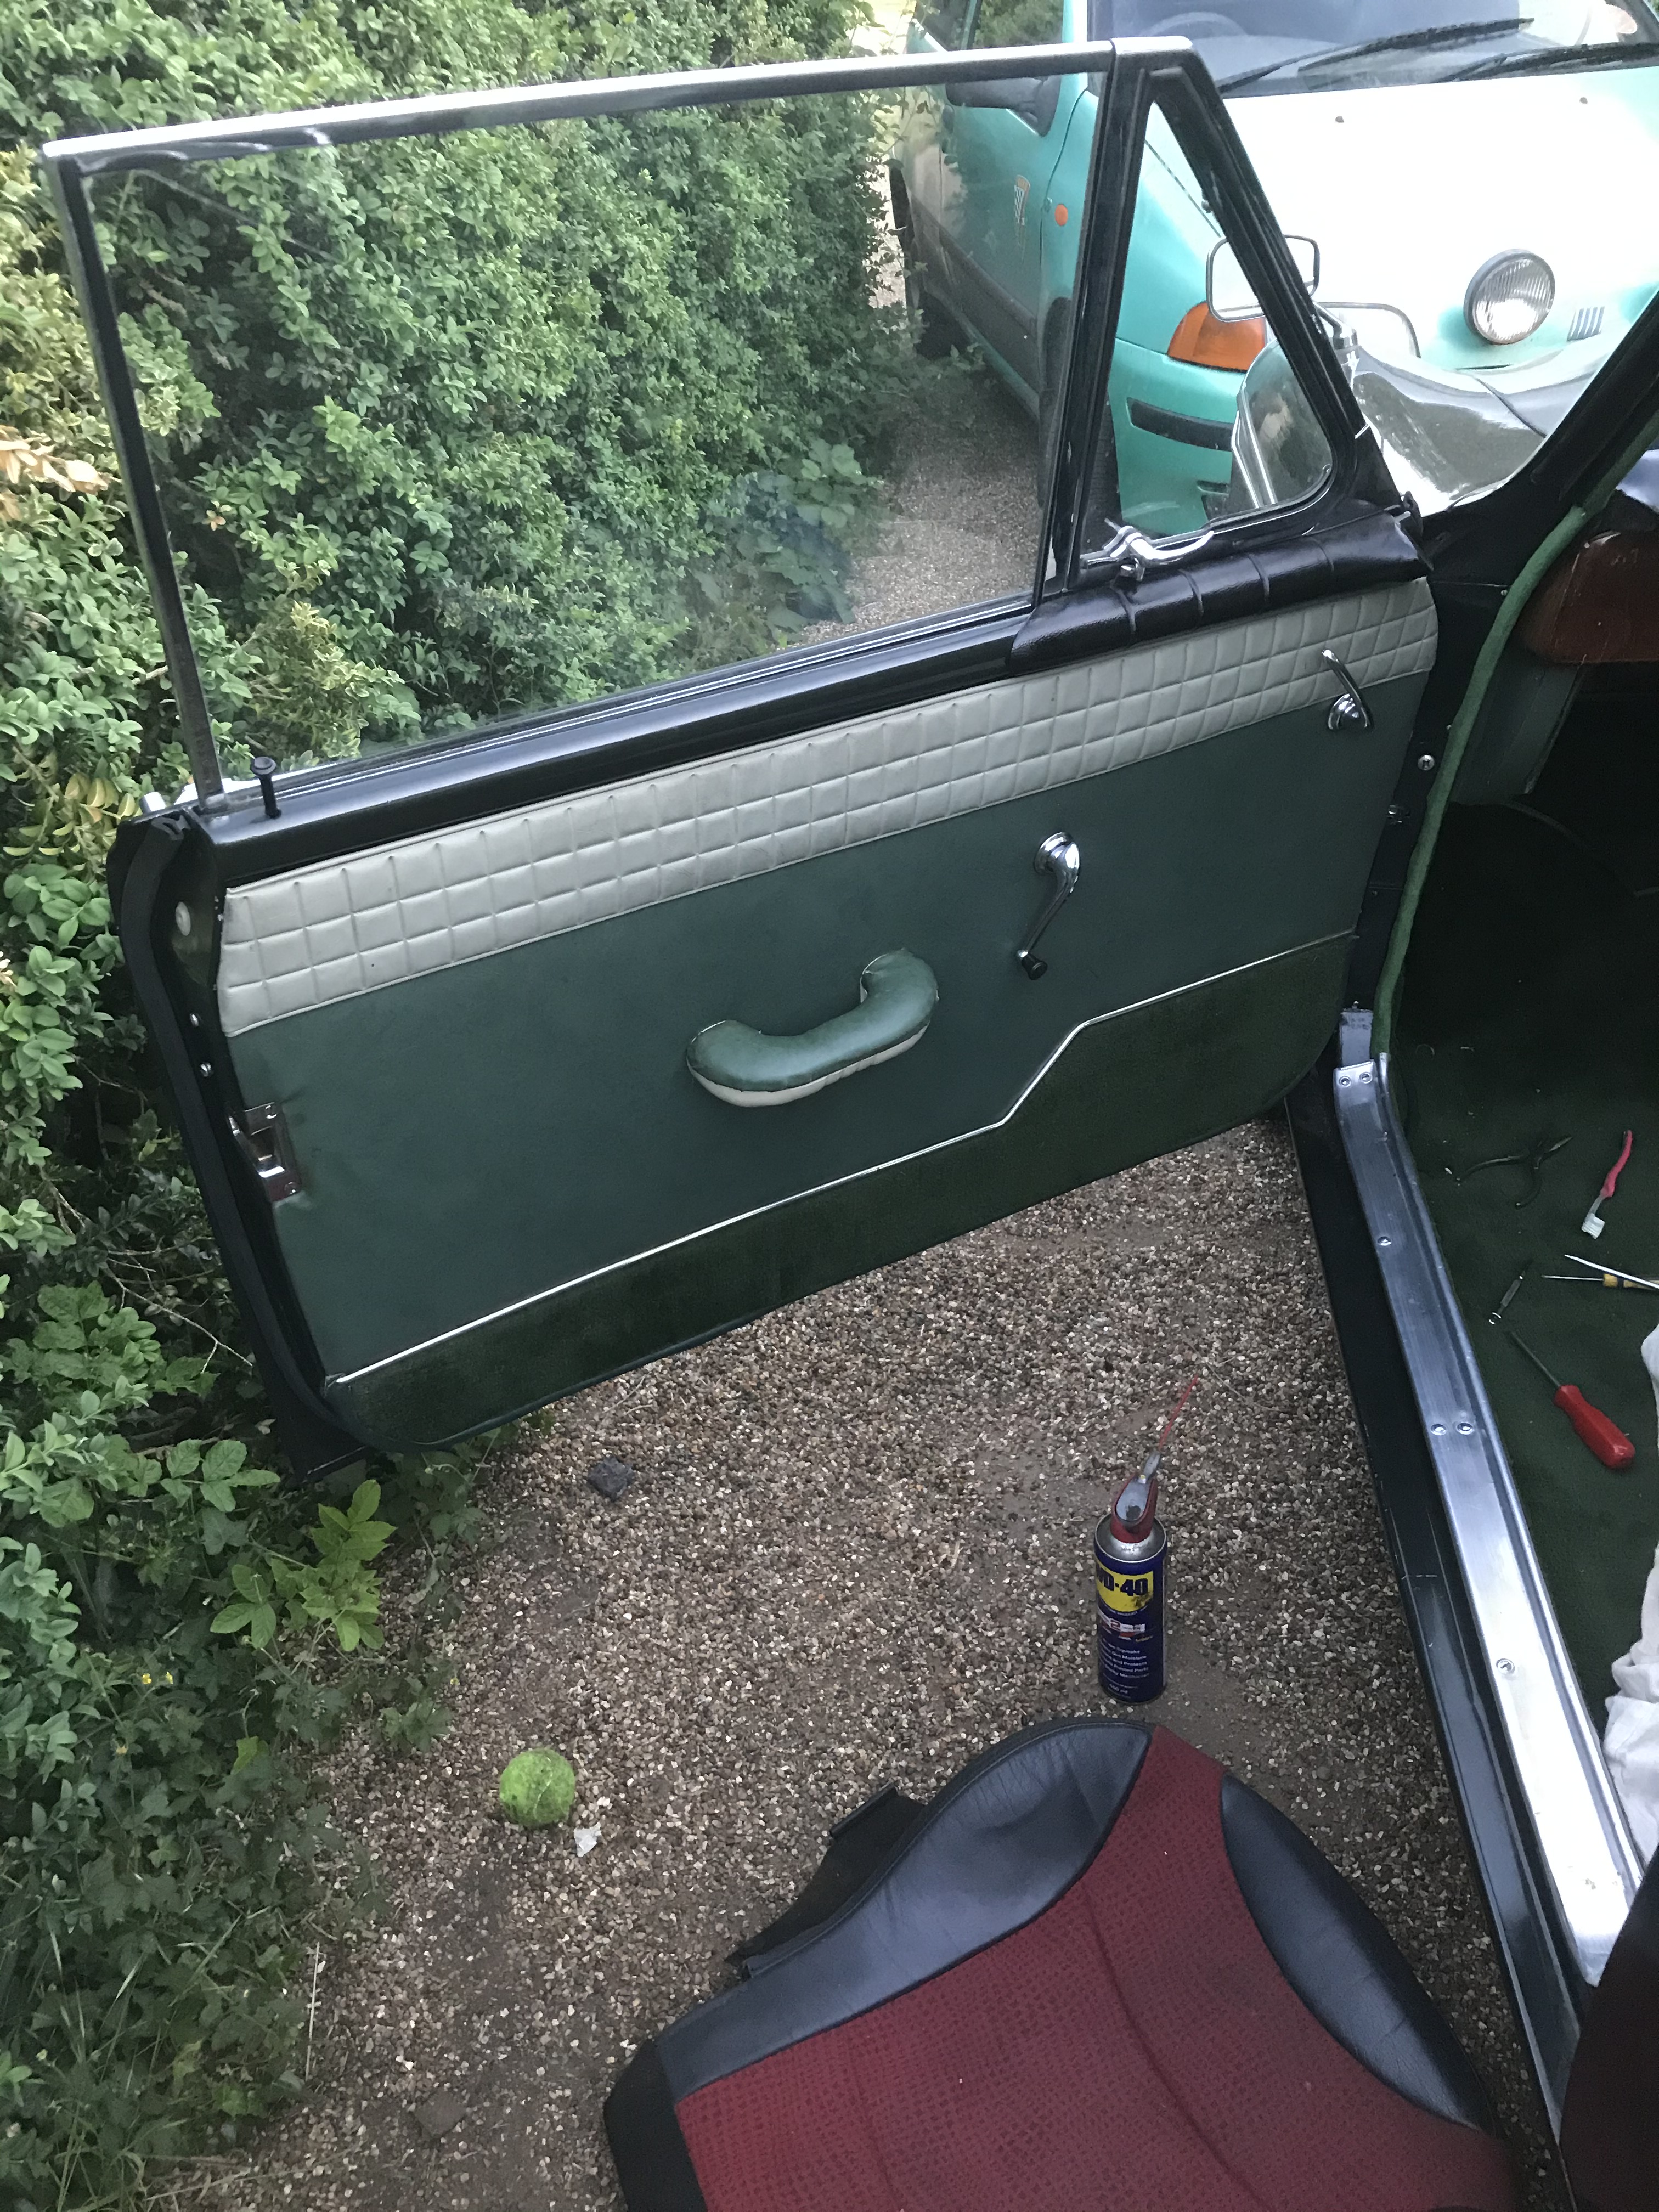
The carpet set came with replacement panels for these. The originals weren’t in bad shape, but the colour and texture of the two carpet sets, old and new, was not a match, at least not side by side. I dismantled each side and fitted the new pieces.
Then fitted the clips and finally put them on the car. This didn’t go that smoothly given the metal clips mounted in 60 year old hardboard, although to be fair, it’s not much different from the plastic clips they use now. I needed to buy a new (very long) screw for the armrest, but eventually it all came together.
The final job was to fit the glove box, drivers side shelf and the heater console.

I big moment. Not that it felt like it really. Its finished. But not really. From now on I’m just doing the same jobs again.
I did a whole series of checks and finally solved the ongoing engine issues I had been having (coking up) by putting the old plugs in. It looks like the ‘new’ ones that were in there, having never seen proper action, have just got too dirty to function. With everything working, I insured it for the road and drove 14 miles to the next village and back.
…And so this is really the end of the story. It still needs work. An exhaust. Tyres. A good tune. Maybe the brakes and the suspension will need attention. Neither the fuel and temp gauges work. I need to finish the touched up dinks, sort out the oil leak, fit a tracker, buy a decent disklok and get it an MOT. But all of these things will be for a roadworthy car, so does that stop it being a project? Who can say.
The cost. I ‘paid’ c£700 for it back in 1987 (the value of the Capri I swapped it for with my Mum). Since 2017 I have spent about £3500. Add tyres (£500) and an exhaust (£750), the gauges (£150), MOT and insurance (£170) and another £200 for things that I’m bound to need. That gives a grand total of just over £5K. I have no idea what its worth.
I wanted to take it to the Sunbeam Rapier Owners Club event at Gatwick on July 26th 2020 (some what fittingly my late Mum’s birthday) but sadly that has been cancelled due to the Covid situation. I may do some Regularity rallies in it and I will definitely take my wife and her friend to Hastings, so they can wear head scarfs and Jackie Onasis sunglasses!
Whatever the future holds, it has to be better with another Sunbeam Rapier in it. My Mum got quite angry with me when I suggested selling it ‘as was’ during the recession in the early 90’s. She would have been happy its done, as would Cecil Spring.
It is a shame neither is around to see it completed.